"15mm Gaming Examples Of "Finger & Toe" Pharaoh, The Temple?" Topic
16 Posts
All members in good standing are free to post here. Opinions expressed here are solely those of the posters, and have not been cleared with nor are they endorsed by The Miniatures Page.
Please remember that some of our members are children, and act appropriately.
For more information, see the TMP FAQ.
Back to the Terrain and Scenics Message Board Back to the Dungeoncrawls Message Board Back to the Horror Message Board Back to the Paper Modeling Message Board Back to the Scale Message Board Back to the Victorian SF Message Board Back to the Pulp Gaming Message Board Back to the 15mm Fantasy Message Board Back to the 15mm Sci-Fi Message Board Back to the Ancients Discussion Message Board
Areas of InterestGeneral
Fantasy
Ancients
19th Century
World War One
World War Two on the Land
Science Fiction
Featured Link
Featured Ruleset
Rating: 
Featured Showcase Article A walk down memory lane - do you remember the Tank Trap?
Featured Workbench Article Minidragon  been building and painting his own army for Flames of War for a while now. been building and painting his own army for Flames of War for a while now.
Featured Profile Article
|
Please sign in to your membership account, or, if you are not yet a member, please sign up for your free membership account.
| Cacique Caribe | 15 Jan 2014 9:36 a.m. PST |
This is the product I'm asking about: TMP link Does anyone know of pics showing it in actual use? I'm particularly interested in how it compares with 15mm figures? Thanks, Dan
TMP link
TMP link
TMP link
TMP link |
 FingerandToeGlenn FingerandToeGlenn  | 15 Jan 2014 10:00 a.m. PST |
It was designed for 28, BUT I actually had to reduce the size of the models, as a real temple would completely cover the board. At the size of the 28mm, it would really be a temple in a small town down south somewhere. I used reference photos from my trip to Egypt, and when I walked through the temples of Luxor and Karnak, I was an ant compared to the pylons and columns, so I think it would work exceptionally well with 15mm. |
| Cacique Caribe | 15 Jan 2014 10:32 a.m. PST |
Hi Glenn, Could portions of the set be used as subterranean corridor walls? And do the walls look aged/weathered, or freshly painted? TMP link Thanks again, Dan |
| Coyotepunc and Hatshepsuut | 15 Jan 2014 12:02 p.m. PST |
I have some pics somewhere, my dog broke my computer last night so I will check photobucket. They are very weathered. |
| Cacique Caribe | 15 Jan 2014 1:20 p.m. PST |
"They are very weathered" Excellent. Dan |
| Cacique Caribe | 15 Jan 2014 6:22 p.m. PST |
If anyone has photos, please share. I'm still on the fence, undecided if I should make foam and mdf terrain tiles, the heavy Hirstarts blocks, or if I should finally try paper and cardstock. If the printable ones have good detail on them, I may have to give them a shot.
link link
link
link link link Thanks, Dan
TMP link
TMP link
TMP link
TMP link |
| mister droid | 16 Jan 2014 12:11 p.m. PST |
If you build carefully, they build I to beautiful scenery. I too was on the fence, but now I am a believer. I print mine on cardstock, and print at least 3 copies. I cut out every window, and put acetate windows in (glued to backside, and cut out individual window frames and glue them to the outside. I do more or less the same thing with doors, trim… Basically whatever would protrude a bit. This layering takes a bit more time and patience, but it makes the models look great. They rival resin etc in my opinion. At 15mm, I feel printed brick works better visually than a lot of sculpted stuff…if you take the time to build, and the expense to print them nicely. Really if you like to fiddle about and be crafty, the building of F&T models is quite fun. Plus they are cheap as heck! |
| Cacique Caribe | 16 Jan 2014 12:14 p.m. PST |
MisterDroid, Now I'm intrigued. Do you have close up pics of your "layering" technique? Thanks, Dan |
| mister droid | 16 Jan 2014 12:40 p.m. PST |
Not on hand, but I would be happy to take some when I get home from work tonight. I will post some then… Around 10 est this evening |
 chicklewis chicklewis  | 16 Jan 2014 2:27 p.m. PST |
I, too, would love to see those photos. |
| Cacique Caribe | 16 Jan 2014 3:34 p.m. PST |
Excellent! Thanks so much. Dan |
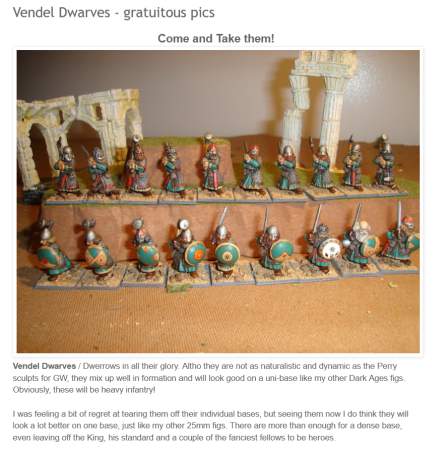
| mister droid | 16 Jan 2014 10:25 p.m. PST |
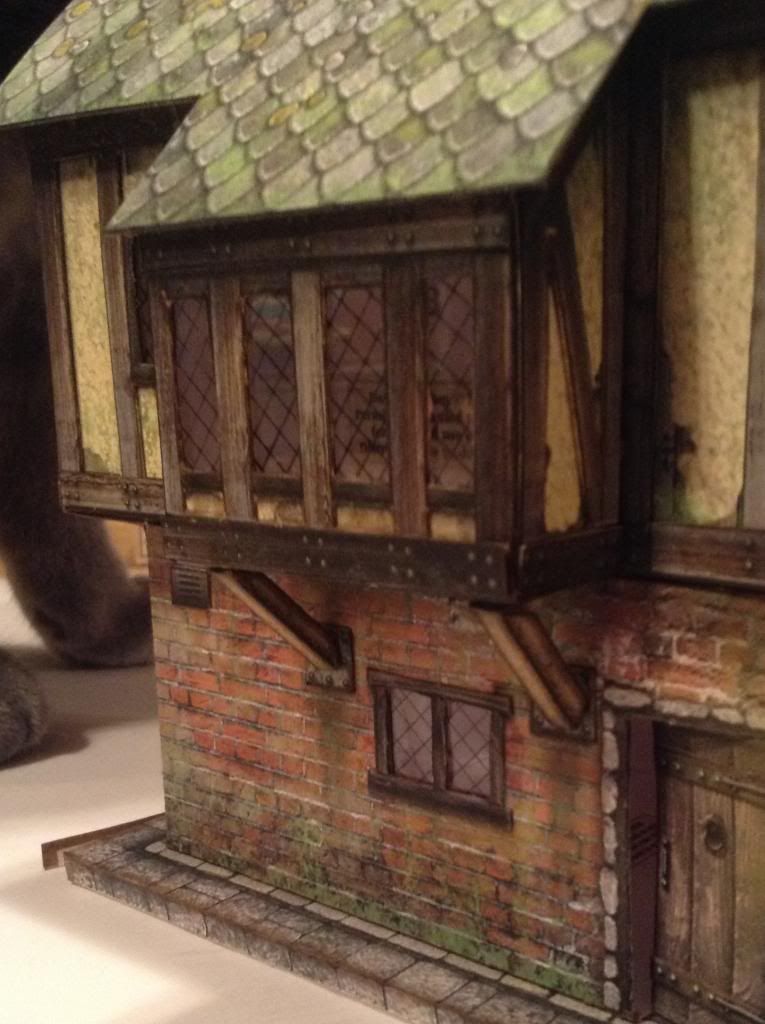
Okay, this is not the temple being discussed… It is fact not even Finger and Toe… This is (I believe) a Dave Graffam model. This just happens to be the building that was easiest to get out a photograph tonight…and it is 28mm, not 15mm. But it is an example of the layering effect I use.
So, with the many disclaimers out of the way, here are the pics!
[URL=http://s194.photobucket.com/user/misterdroid/media/image-44.jpg.html]
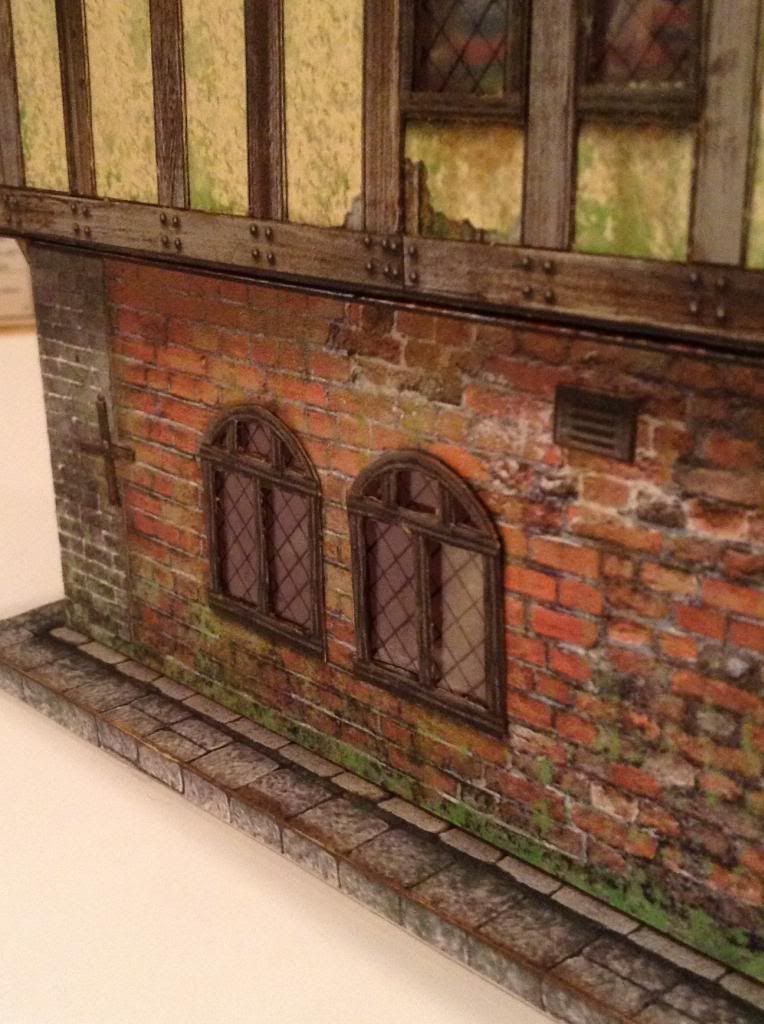
[/URL] This is a goodish pic of what I am talking about. Plastic on the back, trimmed sill on the top. With the card stock the layers build up a nice three dimensional quality pretty easily. I scored the window with and exacto, and ran a black sharpie over the lines. A quick light wipe with windex to remove the extra… And pow! Cheap and dirty panes. The little grating and the cross shaped thing are also trimmed and glued on the main layer. [URL=http://s194.photobucket.com/user/misterdroid/media/image-43.jpg.html]
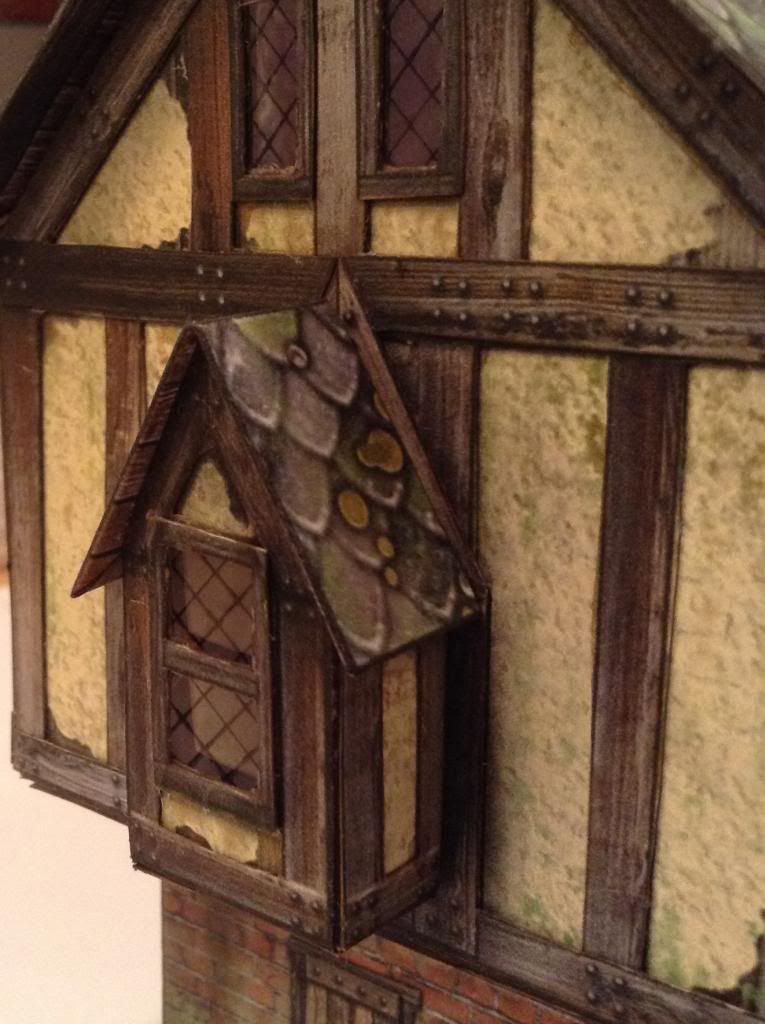
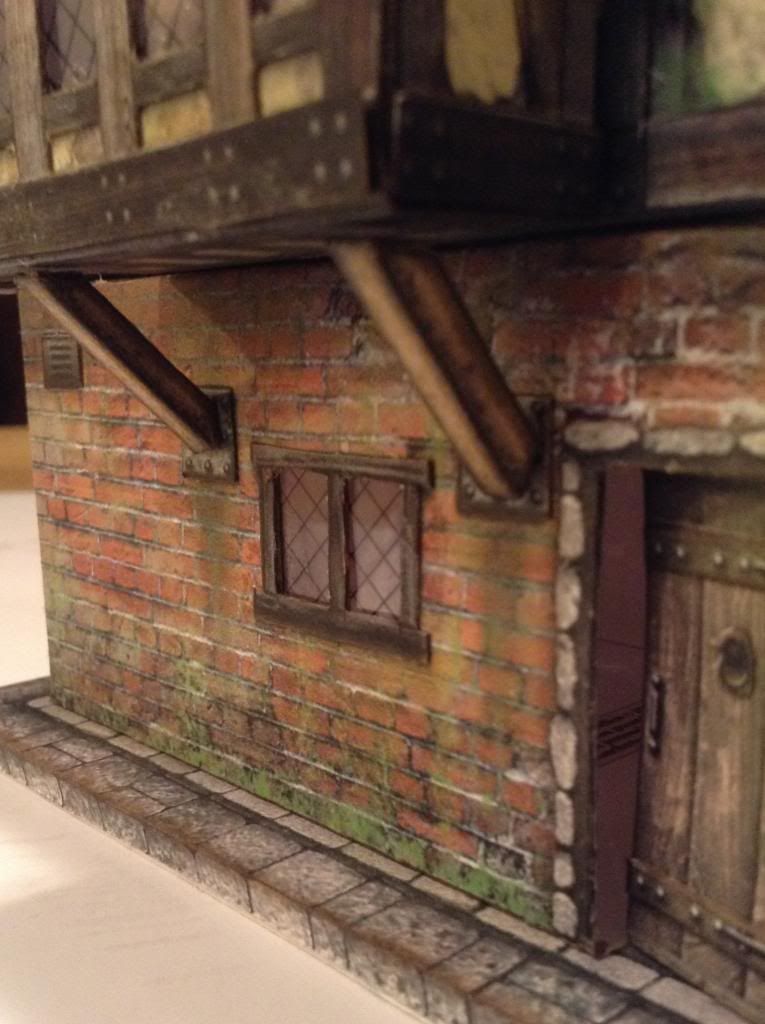
[/URL] In this pic you can see some more windows, and it is also a bit easier to see that the timber beams are a separate layer. [URL=http://s194.photobucket.com/user/misterdroid/media/image-42.jpg.html]
[/URL] This one you can see the layering pretty well… The door handle, knocker and cross beams are all extra layers… Is hard to see. [URL=http://s194.photobucket.com/user/misterdroid/media/image-45.jpg.html]
[/URL] I have been wanting to "shingle" the roof with separate layers, but haven't had the guts yet. Seems like it might get overly thick. Have been thinking of trying layers cut from regular paper for the roof. In an case, hope these help… But I do definitely suggest trying out some paper scenery. It can really come together quite nicely. Thanks for the interest! |
| John Treadaway | 16 Jan 2014 11:50 p.m. PST |
That's probably the best use of printed buildings I've ever seen. Well done. Looks like a heck of a lot of work… John T |
| Cacique Caribe | 17 Jan 2014 12:10 p.m. PST |
Mister Droid, That is absolutely amazing work! Love that layering idea. Incredibly inspiring. I can only hope I can be as patient and dedicated. Thanks so so much! Dan |
| Cloudy | 19 Jan 2014 7:57 a.m. PST |
I have made scalloped and hexagonal style paper shingles in 1/87th scale but only to shingle a piece of styrene that I made a mold of. I would then cast pieces which I put together to get the size of roof desired. You probably realize that you cut strips of shingles rather than individual pieces and you should be able to cut enough strips by printing multiple copies of the roof. It is still tedious though but perhaps good therapy :-) In your example building above you may want to try cutting out the edges of the occasional shingle and bending them up slightly and then gluing the roof to another piece of paper or styrene (if you haven't already). It won't look right but may give the illusion of some depth at a distance. Your building looks good and the effort expended certainly shows. It's the little things that count! |
| Cacique Caribe | 19 Jan 2014 10:35 a.m. PST |
1) Have any paper terrain enthusiasts ever tried printing on adhesive printer paper? If so, it would come to about 50 cents per sheet: link 2) Or have you perhaps used the foamboard (or really thin mounting board?) that already comes with an adhesive side? Though it seems like the pricier of the two options: link link Any thoughts? Dan |
|