
Also includes new and completely revised army lists, and clarifications for the core rules.
| Rob Fletcher (rwf1@canterbury.ac.uk) |
|---|
| I bought a copy of this game from a second-hand dealer (since good old Grenadier went out of business). First off, the rule book is well set out and interesting to read. There are 2 generals who pop up with fairly obvious advice from time to time, but the system is easy to pick up, espacially if you are a WFBattler. This system works for me, because it has a bunch of extras from page one that give the game a feel of the fantasy setting without resorting to loads of heroes and supertroops. I'm thinking of the use of day and night, priests, omens and soothsayers, boasts by the leaders - "Seek for me in the heat of battle." - which whilst they are true will give your troops a morale boost. There is a workable command system that requires you to change commands during the battle to make your army do what you want, using couriers. The combat system is d6 based and simple, but it is good enough. All troops have the possibility of losing control and going into Bloodlust, which is a nice touch. There are threats between oposing units, fear, dread and all that stuff. The magic is nicely understated and the use of priests as anti-magic is effective. The army lists are a bit limited. This is a good basic set of rules, one that has a good feel, but not the detail that will differentiate the armies. It kinda needs the army books from WFB, for personalisation. But play this against Goblins, and you will be fighting against the fall of night when they all become fanatic, rather than poor. Simple and effective enough. I haven't been able to play test it much, but have borrowed a bunch of the ideas for the games that I play. |
| Andy Skinner (andy.skinner@tseng.com) |
| I like a lot of the individual parts of the game (boasting, orders, etc), but it sure seems messy to play. I didn't like counting up the +1, -1 for everything. I suppose that will get easier, but it made things take longer. We played a 500 pt game to get familiar with the rules, with Dwarf and Orc armies made up from the Companion. (We threw in some HeroQuest figures to help tell leaders from others.) I didn't notice that I didn't get to make a scouting roll at all if I didn't have a whole command for Scouting, and so my Orcs had to fight the entire battle in the day, which is bad light for them. The Dwarf scouts (with crossbows) didn't really suffer any penalty from scouting -- their range ate up the distance they had to set up from their warchief. There were several (3 or 4) turns of moving and shooting before we got to hand-to-hand, and that really took out a lot of my side, while hardly touching the Dwarfs. We were both noticing how many more figures I had than he, but it wasn't long before we saw that wasn't a problem. Until the last two turns or so, every hit he made was a kill, and I had several turns of rolling way-too-many-dice, with no kills ever being made. Our next game will be a 1000-point game, and I will not neglect Scouting this time. |
| Mikko Kurki-Suonio (maxxon@swob.dna.fi) |
| As with so many other fantasy miniature games, Fantasy Warriors has a number of strong points and a number of weak points. To begin with the strengths of the system, I personally feel it has the best pre-battle rules of any fantasy miniature game I've ever seen. These rules include a working scouting system and a number of nice bonuses like reading the omens or boasting to your troops before battle. Command control is one of the strong points of the game. All units must belong to commands and each command is restricted by the orders its been given. All but the most straightforward of plans require the commander to send messengers scurrying across the battlefield with vital new orders. Just keeping your troops under command is a major task without the omnipotent sergeants present in other games. "Sit back and shoot 'til they drop" tactics are nicely limited by restricted ammunition rules and no creature is totally immune to any other. Certain gamers may complain when a lucky arrow fells their mercenary dragon, but that's just a fact of life in Fantasy Warriors. Magic is also nicely fickle as an element and certainly not an overpowering one. On the downside, there is no provision for creating your own troop types or races. Even adjusting the equipment of given examples is impossible, unless you forego point costs. The rules also contain some interesting glitches. For instance, human knights are armed with hand weapons and lances -- however in game terms, hand weapons are a better choice for cavalry in every regard, thus the knights would never have any reason to actually use their lances. The Companion is practically a necessity, the army lists in the basic game are just too full of bugs. Even the revised army lists are too prone for abuse, unless you can trust your opponent to make sensible choices. Combat is bloody and simple, maybe even too much so. There is no provision for retreating from melee, and no substantial bonus for sneaking in for a rear attack to give some examples. The production quality might be better. The miniatures are ok, but the rulebook is flimsy and the quick reference charts could have used a quality printer. Fantasy Warriors captures the feel of fantasy battles rather well. Warchiefs consult soothsayers before battle, the sun may set and turn the goblin rabble into deadly fanatics and so on. Even if you don't like the whole game, the pre-battle and command-control rules would not be too hard to implement in your favorite system.
|
If you would like to add your opinion here, send email to the editor.
As the designers explain:
In Fantasy Warriors there's much more to battle than launching your army in a head-on attack -- discover the perils and rewards of scouting, boasts, omens, threats and, of course, magic...Giving the right orders and changing them when the moment is right is the essence of generalship...
Before play begins, the players must construct their armies. They agree on a point total which each can spend. Each player pays points for his units, according to the costs listed in the various Army Lists.
At the head of every army is the Warchief, the ultimate giver of orders. His army is divided into Commands, each of which is led by a Battle Leader. (The Warchief can, if the player desires, directly take charge of one of his army's Commands.)
Each Command is made up of one or more Units. A unit is composed of Warriors, all of which must be of the same type. The type of warrior determines the maximum and minimum possible size of the unit.
In addition to Warriors, Units also include a number of Specials. There are four types of Specials --
| Leader | Every unit must include one. Aids morale. |
|---|---|
| Champion | Optional. Aids unit's fighting power. |
| Standard Bearers | Optional. Aids morale. |
| Musician | They help the unit when making Threats. Any number may exist in a unit. |
Lastly, the player can add Individuals to his army. They exist outside of the normal units, but are assigned to the various Commands. Not all armies have access to all types of Individuals. The posssible Individuals are --
| Priest | Can sometimes alter past events (that is, allow a re-roll). Can also attack wizards to drain them of power. |
|---|---|
| Soothsayer | Improves chances of obtaining good omens. If killed, the omens automatically turn bad. |
| Wizard | Can make magical attacks. His magical power must be purchased separately. |
| Hero | Powerful characters who aid morale. |
| Banner Bearer | Optional character who bears the banner of a Battle Leader. Extends leader's range. |
| Herald | Optional character who can extend range of the Battle Leader, and can act as a musician. |
| Scout | Aids with pre-battle Scouting Rolls. |
| Courier | Characters skilled at transporting and delivering orders. |
EXAMPLE OF ARMY CONSTRUCTION: Let's spend 1,000 point to build a Barbarian Army. Our basic concept is to build the force in three wings -- one Command of ranged weapons, another of basic infantry, and a third Command of elite fighters under the direct command of the Warchief. We'll also want a Hero and a Soothsayer.
If the designer was willing to cut one of his units (and possibly consolidate down to two Commands), he could afford to beef up his units with more Specials or Individuals. | ||||||||||||||||||||||||||||||
There are eight steps to be taken before the tabletop clash can begin.
| Set Terms | Decide whether to fight to the Bitter End, or for a pre-determined number of turns. |
|---|---|
| Scouting | Both players allocate their units to Scouting. Units which scout begin at a disadvantage when the battle begins. Based on the scouting forces and dierolls, one of the players might outscout or (better yet) outmanoeuvre the other. |
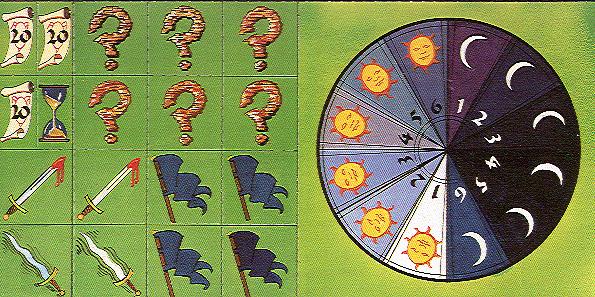
| Set Time | If one player outmanoeuvred the other, he sets the starting hour of battle. Otherwise, the starting hour is determined randomly. (If one player outscouted the other, he can call for a second time roll if he dislikes the first.) |
| Layout Terrain | The number of Terrain Features to be used depends upon the size of the playing area. One player (the one with the scouting advantage, if any) places the terrain, but the other player rolls dice to see how many of those features he can relocate or remove. If a player outmanouevres the other, he can set the battlefield as he pleases. |
| Deploy Armies | The armies are set up within one foot of opposite sides of the tabletop. The player with the scouting advantage (if any) sets up last. |
| Make Boasts | A Warchief can make one or more Boasts prior to battle. When the boast is true, his army will obtain a advantage during Command Tests; when it is not true, the army suffers a penalty. The boasts are limited to those in the rules (for instance, "I have no need of a bodyguard" allows a Command Test bonus when the Warchief is not attached to any unit). |
| Determine Omens | Players have the option of "reading the omens." If the omens are good, the player receives a bonus during Command Tests; if bad, a penalty. Soothsayers provide a bonus when determining omens. |
| Issue Orders | Each Battle Leader must be given Orders. The possible orders are Attack, Oppose, or Hold. |
Once battle has begun, the game is played in Battle Turns. Both players share the turn. Each Battle Turn consists of seven steps --
| Threats | Units can taunt or challenge one another. |
|---|---|
| Shooting | Ranged weapons now attack. Afterwards, resolve any required Casualty Tests. |
| Movement | Units move according to Initiative. Disorganized formations can regroup. Wizards can rest in order to regain power. |
| Close Combat | Units fight in close combat. Afterwards, resolve Combat Tests. |
| New Orders | Battle Leaders respond to attempts to change their orders. |
| Influence | Battle Leaders try to bring Shaken or Bloodlusting units under control. |
| Command Tests | When leaders or certain Individuals are lost, the army must succeed at a Command Test to avoid becoming Shaken or Routing from the field. |
At the start of each Battle Turn, Tribal and Fanatic units have the chance to threaten their enemies. If two units threaten each other, only the larger unit's threat counts.
The victim must then make a Threat Test. A die is rolled, and the result is correlated versus the unit's Type on the Threat Test Results Chart. The dieroll is modified due to the victim's Quality, situation (i.e., bad light, Terrible creatures nearby, etc.), morale status, and the presence of Specials or Individuals. Musicians have great influence, particularly if with the threatening unit.
As a result of a Threat Test, the target unit could:
| Become Shaken | Unit becomes Disorganized, and suffers penalties to many types of dierolls. |
|---|---|
| Rout | Unit is removed from battle. |
| Suffer Bloodlust | A unit in this condition charges the nearest enemy, closing for combat. Missile units will first fire off all of their available volleys. |
A unit which survives the Threat Test without suffering any result has the option of counter-threatening the unit which initiated the threat. (Exception: Stupid units cannot counter-threaten.)
EXAMPLE: Two units both threaten each other -- a unit of nine Goblin Rabble (including a Leader, Standard, and Musician, vs. a unit of eleven barbarian infantry (including a leader). The larger unit (barbarians) prevails. The Goblins must take the Threat Test. They are Tribal, and receive these modifiers: Poor (-1), lower Worth (-1), daylight (-1), have musicians (+1), have standardbearer (+1), have leader (+1), for a total modifier of 0. Rolling a "5", the Goblins suffer no result. The offended Goblins now choose to counter-threaten their enemies. The barbarian infantry are Fanatics, with these modifiers: Average Quality (+0), enemy musician (-1), leader present (+1), for a final result of no modifier. Rolling a "6", the barbarians become enflamed with Bloodlust! |
During this part of the Battle Turn, both players may resolve attacks with troops capable of ranged combat (i.e., bowmen, gunners, and large projectile weapons). All combat is considered simultaneous.
At the start of play, each ranged-combat unit is issued several Volley Counters. During the Shooting Phase, the unit may spend one or more of its Volley Counters for its attack, subject to a limit due to its type (for instance, bowmen can use their Volleys faster than crowwbowmen).
To resolve the attack, a number of dice are thrown equalling the number of figures in the unit times the number of Volleys being used. Any "6" is an automatic Hit; any "1" is an automatic failure. Any other result is modified due to Quality, range, rate of firing, morale, and situation -- any modified result of 4 or better scores a Hit.
For each Hit, one die is rolled. Any "6" is an automatic Kill; any "1" is an automatic failure. Any other result is modified due to the attacker's Strength, target's Resilience, and whether the target is in favorable terrain or has a shield. The final result is then compared to the Shooting Chart, correlated for weapon type and target's armor, to see if any additional Kills are scored.
At the end of the Shooting Phase, any unit which lost a fourth of its figures this phase must take a Casualty Test. A die is rolled, and the result modified by Quality, losses, morale, situation, and the presence of Specials or Individuals. Depending upon the unit's Type, it might become Shaken, Rout, or suffer Bloodlust.
EXAMPLE OF SHOOTING: A small unit of Wood Elf Archers lets fly at long range versus a unit of Orc Giant Wolf Riders. The 10 Elves fire two volleys (half their maximum rate), and so roll 2 x 10 = 20 dice. They score four automatic hits, two automatic misses, plus four 4's, eight 3's, and two 2's. These modifiers apply: +2 (Elite), -1 (using high rate of fire), -1 (long range), resulting in no modifier. Therefore, the four 4's score Hits, but the other results do not. This means a total of eight Hits, and the Elven player rolls the dice again. He scores one automatic Kill, plus two 5's, a 4, a 3, and two 2's. The results are modified by Orc Resilience (-1) and shields (-1), to become two 3's, a 2, a 1, and two 0's. Comparing the Longbow vs. Medium Armor on the Shooting Chart, the Elves find they need a 4 or better to score a Kill. Since none of the modified scores are high enough, the Orcs suffer only the single automatic Kill. The Orcs' loss is too small to force a Casualty Test this phase. |
Unlike the other steps of the Battle Turn, actions during the Movement Step are not simultaneous. Instead, both players dice for Initiative.
Initiative. There are two systems for resolving Initiative. Using the Movement By Armies system, both players roll dice, adding their warchief's leadership to the result. (Leadership is a score which is paid for in points when the army is built.) The player with the high score decides which player will conduct movement first. When that player has moved all of his units, the opposing army may move.
The Movement By Commands system provides more tactical options. First, both players roll a number of dice roughly equal to the number of Commands in play, adding a bonus for the combined Leadership of the Warchief and Battle Leaders. The players then alternate placing numbered markers next to the Commands, starting with the player who won Initiative. Once all of the counters are placed, the Commands are moved in the order of the numbered markers assigned to them.
Orders. What a unit can do depends in part upon the Order which it currently has. If the Command has Hold orders, none of its units may move. On the other hand, units with Attack orders MUST advance toward the enemy. Lastly, units with Oppose orders can move more or less freely, except that they cannot move into contact with the enemy.
Maneuvers and Formations. A unit can move straight ahead or veer at an angle of up to 45 degrees from such a course. It can make a turn, but only if the turn comes before any movement in that step. Wheeling is also allowed. Before or after movement, a unit may attempt to change its frontage (width) -- a dieroll indicates how many figures can be moved, with Quality modifying the result.
A unit in contact with an enemy unit cannot move.
Disorganization. Units which are Disorganized (often as a result of having been Shaken) may Reorganize during the Movement Step, if they do not move and are no longer Shaken or in Bloodlust.
Similarly, a Wizard which is low on Power Points can opt to Rest during the Movement Step. He can either accept the standard Power Point reinforcement, or can risk a dieroll to either double his current power or lose yet another Point!
During the Combat Step, all units in base-to-base contact with enemy units engage in battle. Only the figures on the front row can fight, unless the unit is equipped with long-reaching weapons (such as polearms). All fighting is considered simultaneous.
To resolve a unit's attack, the player totals the Worth of the figures able to fight, and rolls that number of dice. Bonus dice are added if a Champion is present, or if the unit has Attack orders.
Any "6" is an automatic hit; any "1" is an automatic miss. Any other results are modified due to Quality, Disorganization, whether polearms are being used, and whether the enemy has shields. Any modified result of "4" or better scores a Hit.
Now, one die is rolled for each Hit. Any "6" is an automatic Kill; any "1" is an automatic failure. The remaining results are modified due to the enemy's Resilience, and whether the attacking unit is in Bloodlust. The modified results are compared against the Combat Chart, correlated versus Weapon and Armour types, to see if any additional Kills are scored.
Capturing the Standard. When making an attack, a unit can declare that it is trying to capture the Standard of the opposing unit (only if it has a Standard Bearer, of course). If the attacker causes more Kills during this Combat Step than its opponent, the Standard is captured (and the Standard Bearer becomes a bonus Kill). However, a unit which is defending its Standard gets a bonus on its Kill Rolls...
Combat Tests. All units which suffer casualties during the Combat Step must attempt a Combat Test. A die is rolled, with the result modified due to Quality, casualties, orders, morale, and the presence (or absence) of Specials or Individuals. The final result is compared against Troop Type on the Combat Test Results Chart to see if the unit suffers Bloodlust, Routs, or becomes Shaken.
EXAMPLE OF COMBAT: A unit of 10 Knight Cavalry is locked in combat with a unit of 30 Goblin Infantry. The Knights are in a single row, while the Goblins are in two equal ranks. It turns out that each side has 10 figures which are eligible to fight. We'll resolve the Knights' attack first. That player has the option of attacking with the rider (receiving the benefit of his weapon) or the horse (no weapon, but greater Worth). He goes for the horses, which gives him a total Worth of 30 (3 x 10 figures). In addition, he receives a bonus of 6 more dice due to having Attack orders, for a total of 36 dice. Rolling the dice, he scores six automatic Hits, seven automatic misses, seven 5's, five 4's, five 3's, and six 2's. There is a +1 modifier for being of higher Quality than the Goblins, so any result of 3 or better is a Hit -- 17 more Hits, for a total of 6 + 17 = 23 Hits. The Knights now roll 23 Kill dice, getting six automatic Kills, three automatic failures, two 5's, six 4's, three 3's, and three 2's. No modifiers happen to apply, so the results are checked on the Horn & Hoof vs. Light Armor portion of the Combat Chart, which indicates that a "3" or better is a Kill. Therefore, the Knights score (6 + 2 + 6 + 3 = 17) 17 Kills against the Goblins. Combat is simultaneous, so the Goblins can attack before taking the Kills. With a total Worth of 10 and Hold orders, they roll 10 dice, receiving three automatic Hits, one automatic miss, two 5's, three 3's, and a 2. There is a -1 modifier for being of lesser Quality than the Knights, but this is offset by a +1 modifier for fighting an enemy without shields. Therefore, all results of "4" or better are also Hits -- meaning that the Goblins get their three automatic Hits, plus the two 5's convert into Hits as well (5 total Hits). Rolling five Kill dice, they receive three automatic failures, plus a 4 and 2. There is a -1 penalty due to the Knights' Resilience stat, reducing the results to a 3 and 1. On the One-Handed Weapon vs. Heavy Armor portion of the Combat Chart, we find it takes a "5" or better to score a Kill -- the Goblins fail to injure the Knights... At the end of the Combat Step, the Knights do not need to take a Combat Test (they had no losses), but the Goblins do. The modifiers are: -2 (heavy losses), -1 (greater losses than enemy this turn), +1 (Hold orders), +1 (leader present), for a final modifier of -1. The Goblin Player rolls a "4", modified to a "3", which for a Fanatic unit causes no adverse effect. |
A Command must operate under the Orders given it at the start of the battle, until the Warchief changes those orders. If the Warchief is lost, new orders cannot be given. If a Battle Leader is out of action, his Command cannot receive new orders for the duration of the game.
The Warchief may give new orders to a Battle Leader by moving into base-to-base contact, or by sending a messenger (any available figure) or courier (a type of Individual trained to deliver orders). The Battle Leader can only receive orders when he is within command range of all of the units he commands.
When a messenger or courier is sent, the new order must be designated (the appropriate counter is given to that figure). When the messenger arrives at its destination, that order must be given -- even if the player has changed his mind in the interim.
When a Battle Leader receives a new order (either by messenger or a visit by the Warchief), a Battle Leader Test is made. A die is rolled, modified by the Battle Leader's Leadership (a stat bought when the army is designed) as well as situational factors. (For instance, there is a bonus when a warchief personally delivers orders, or sends a courier rather than a messenger; there is a penalty if the Command includes Shaken, Disorganized, or Bloodlust units.)
As a result of the Test, the orders might be refused, the entire Command might be set into Disorganization, the wrong order might be implemented, the Battle Leader might require further explanation (try again next turn!), or panic might occur (the entire Command is Shaken, and an attempt is made to kill the messenger...). Or the new orders might take effect.
During the Influence Step, Battle Leaders (only) may attempt to influence the units in their Command. They must be in base-to-base contact with the unit in order to do this. A die is rolled, and compared with the figure's Leadership stat.
In the event of Success, a Bloodlust or Shaken unit returns to normal status. However, Disorganization is not affected.
If the leader fails by a large amount, something Horribly Wrong occurs. A Shaken unit will rout, taking the leader with them. A unit in Bloodlust will try to kill the leader...
Under certain conditions, the Warchief and each of his Commands must attempt a Command Test. For instance, the death or loss of a Warchief, Battle Leader, or Hero forces the army to undergo the Command Test. This takes place during the Command Tests Step, at the end of the Battle Turn.
The player decides which order to make the individual Command Tests in. For each Test, one die is rolled, with the result modified due to Leadership, omens, boasting, status of the other Commands, and other tactical considerations.
Depending upon the result, all units in the Command may become Disorganized, Shaken, or may even Rout. If the Warchief fails the Test and routs, all Individuals in the army also rout.
When Kills are received, normally this means that a unit must remove one figure for every Kill. However, Specials and Individuals are a special case.
For every three Kills, the attacker may roll to see if he scored any bonus Kills versus Specials or Individuals. If so, he can designate which of these special figures to remove from play. (Exception: Standard Bearers can't be selected unless they are the only figure left.)
However, Individuals, high-ranking leaders, and some unusual troop types receive the benefit of a Saving Throw. This allows them a chance to ignore a Kill, if they succeed at their dieroll.
If a unit receives more Kills than it has figures, Annihiliation rules apply. All troops without Saving Throws die instantly, while the other figures must make multiple dierolls (depending upon the number of Kills) to stay alive.
The rules also provide for:
| Army Standards | This is a banner for the entire army, and is erected at the start of play. It cannot be moved, but it can be taken down. An Army Standard must be purchased as part of the army, and provides a bonus during Command Tests (unless wrecked by the enemy). |
|---|---|
| Beloved Personages | A player can spend points to declare one Individual, Special, or Leader to be Beloved. While a Beloved figure is on the field, there is a bonus to Command Tests; when the figure is removed from play, the army must take a Command Test. |
| Sacred Items | Almost any inanimate object can be declared a Sacred Item (at a cost in army points). As long as a high-ranking leader or Individual is near the item, the army receives a bonus during Command Tests. If the sacred item is defiled by the enemy, the army is forced to take a Command Test. |
A Wizard can cast a spell at any time during the Battle Turn, except in the middle of combat resolution. A Wizard's ability to cast spells is determined by his Power Points, which are purchased at the start of the game. The Power Cost of a spell is random, but is partly determined by the strength of the effect which the spellcaster desires.
If a spell turns out to cost more Power than a Wizard has, the spell fails, the Wizard dies, and that army must attempt a Command Test.
The spells are:
| Hasten Day/Night | Advances the turn counter. |
|---|---|
| Eldritch Command | Allows new orders to be sent without use of a messenger. |
| Blast | Allows Wizard to attack any target he can see. Cost is highly random. |
| Banish Magic | Suppresses all magic for 12 hours. |
| Portent of Doom | Forces enemy army to take a Command Test. |
| Arcane Eye | Adds to scouting ability. |
| Fudge the Omens | Allows a re-roll of the omens dice. |
| Spellbreak | If cast immediately afterward, can be used to stop any spell except Banish Magic. |
| Finger of Death | Similar to Blast, but allows Wizard to attack individual figures within or attached to units. |
| Protection | Saves a figure from a Kill, but only if no Saving Throw has been attempted. |
When designing an army, players must choose troop types from one of the six Army Lists provided. These armies are:
| BARBARIAN ARMY | Barbarian infantry (with or without shields), archers, berserkers (with alternate stats when in Bloodlust), elite Bodyguards, plus leaders and assorted individuals. |
|---|---|
| DWARF ARMY | Dwarven infantry (with or without shields), crossbowmen, archers, ursine cavalry, a giant crossbow, plus leaders and assorted individuals. |
| GOBLIN ARMY | Goblin rabble, infantry, archers, Great Goblins, Hobgoblins, plus leaders and assorted individuals. |
| ARMY OF MEN | Men-at-Arms (polearms, foot or mounted), longbowmen, crossbowmen, handgunners, city guard, knights (foot or mounted), plus leaders and assorted individuals. |
| ORC ARMY | Orcish infantry (with or without shields), archers, giant wolf riders, a ballista, plus leaders and assorted individuals. |
| WOOD ELF ARMY | Elven infantry (swords or spears), archers, cavalry, eagleriders, shapechangers (werebears), plus leaders and assorted individuals. |
Provided as supplemental troop types are Trolls and Ogres. Each army can also include one Command from another army list, if that list is allowed as an ally for that army.
Players are not necessarily limited to the armies and troop types listed in the rules. Though no rules are provided for designing your own forces, inventing the stats is easily done...except for arriving at a point cost for new units. In a friendly game, however, or in a battle based on a campaign, point costs might not matter.
| Last Updates | |
|---|---|
| 28 May 1999 | comments by Rob Fletcher |
| 6 October 1997 | illustrations added |
| 19 June 1996 | reformatted |
| 17 April 1996 | reorganized |
| 1 June 1995 | first published |
| Comments or corrections? | |