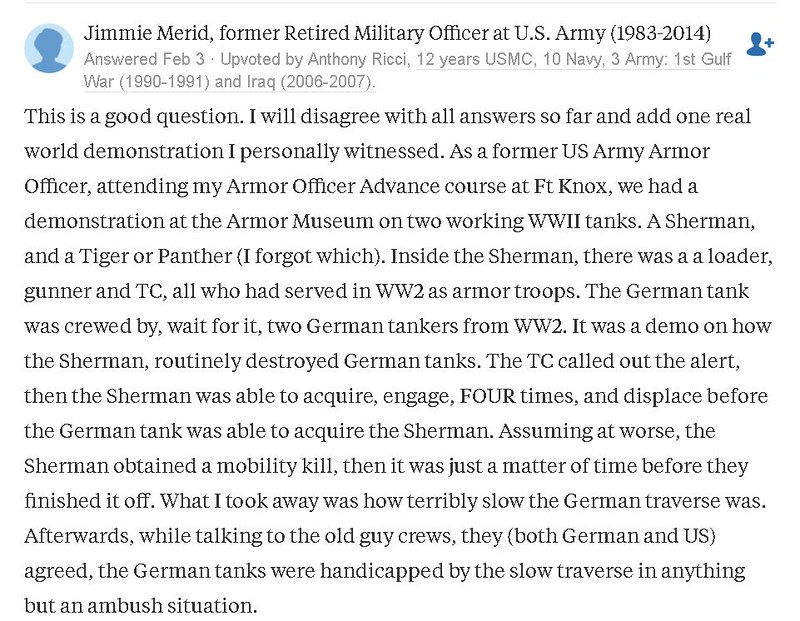
In World War II armored warfare, a tank gun's practical rate of fire and target acquisition speed frequently proved more decisive than maximum armor thickness or heavy caliber gun range. This was most explicitly demonstrated during the Battle of Arracourt (September 18–29, 1944), where the U.S. 4th Armored Division used the fast-firing M4 Sherman to decisively defeat the heavily armored German 5th Panzer Army.
While a German Panther or Tiger tank possessed superior armor and a longer-range gun, their crews often averaged only 3 to 5 rounds per minute in active combat due to heavy, cumbersome ammunition and slow, engine-dependent turret traverse. By contrast, the American M3 75mm gun boasted a massive rate of fire of up to 20 rounds per minute.
The Decisive Factor: Rate of Fire & Acquisition Speed
In close-quarters or low-visibility encounters, the ability to put multiple shells downrange before the enemy could fire a single shot became a massive tactical advantage. However, in Western Europe the Germans were on the defensive and sat in concealed positions for ambushes giving them the initiative to shoot first on many occasions.
The Double-Shot Rule: In typical surprise or maneuvering engagements, a Sherman crew could traverse its motorized turret, spot a target through its wide-field periscopes, and fire two shots before a Panther could even finish slewing its turret and aiming through its narrow-view telescopic sight. This was especially true just after D-Day where most of the Panthers were the "D" model with a turret traverse rate of 6 degrees per second and the Sherman 25 degrees per second.
Optics: German tanks did not have a panoramic periscope for the gunner or commander. The gunner had only his gunsight with a 10-25 degree field of view and the commander relied on the cupola. Some did have a scissors periscope but that had only a 10 degree field of view. All Allied tanks had a separate periscope for the gunner and/or commander, some with a field of view of up to 60 degrees.
Commander turret traverse and sight: The Sherman was the only tank where the commander could manually traverse the turret to the target and using a crude external sight on the turret roof, line up the shot and shoot within 10-12 seconds and then turn fire control over to the gunner. This was especially effective at ranges under 500m.
Recon by Fire: The American Sherman's used a tactic of firing HE from the main gun and machine guns at suspected enemy locations and tree lines. A delay fuse HE round could ricochet and produce an air burst as could on hitting into the trees. This was especially effective against anti-tank gun crews. It would be even more effective using a gun stabilizer.
Continuous Adjustment: The high rate of fire allowed the gunner to use "walking fire" tactics, quickly correcting their aim based on the impact of the previous shell without losing the target. At short ranges gunners could target weak spots like the turret ring, shot traps and bow machine guns.
Volume of Fire vs. Penetration: Because a single shot was rarely guaranteed to knock out a tank, the side capable of delivering rapid, successive impacts could crack armor plates, destroy external tracks or optics, and panic enemy crews. Some tanks like the Panther had a shot trap on the lower mantlet which a Sherman 75mm HE shell could crack and spall the roof armor.
Key Engagement: The Battle of Arracourt (1944)
During this multi-day engagement in Lorraine, France, U.S. Combat Command A (CCA) faced an overwhelming force of late-model Panther tanks.
The Outcome: The combination of rapid rate of fire, superior target detection, and agile maneuvering allowed the U.S. forces to completely outclass their theoretically heavier opponents. The Germans lost 200 tanks and assault guns (86 completely destroyed), while the Americans lost only 25 tanks and 7 tank destroyers.
On the Eastern Front, the Soviet Red Army relied heavily on high-volume, aggressive closing tactics out of operational necessity. While early-war T-34/76 models suffered from terrible internal ergonomics and ammo storage in the floor—averaging a low 2 to 4 rounds per minute due to a cramped two-man turret. The KV-1 had a two man turret but some ammo was stored on the turret side for quicker reloading. The introduction of the T-34/85 in early 1944 completely shifted the mechanical balance having a ready ammo rack in the turret rear.
Featuring a redesigned, spacious three-man turret and an expanded turret ring, a well-trained T-34/85 crew could rapidly pump out 10 to 12 rounds per minute while stationary. This rapid fire, combined with massive numerical superiority and specific small-unit ambush doctrines, was deployed effectively in key Eastern Front actions.
The Core Tactic: "The Death Hug" (Gryaznaya Obslyuga)
Unlike the Americans at Arracourt who used hull-down terrain maneuvers, Soviet small-unit commanders developed a high-volume closing tactic designed specifically to counter heavy German Tiger and Panther tanks.
Because the German 88mm and long 75mm guns could effortlessly penetrate a T-34 from over 1,500 meters, Soviet platoons were ordered to sprint directly toward the enemy at maximum speed to close the distance to under 500 meters. Once within close proximity, the T-34 crews used their fast-turning turrets and upgraded rate of fire to overwhelm the slow traverse rates of the German heavy vehicles, unleashing a high volume of armor-piercing shells into the weaker side and rear quadrants.
The Action at Lisów (January 1945)
During the massive crossing of the Vistula River, elements of the Soviet 4th Guards Tank Army utilized high-volume fire to clear out entrenched German armor blocking strategic crossroads.
The Tactic: Soviet T-34/85 platoons advanced in "wave formations" of 3 to 5 tanks.
How It Worked: Instead of taking carefully aimed, stationary shots, the lead Soviet tanks would fire continuously on the move while charging forward (or Halt Fire and Shoot & Scoot) to suppress German anti-tank positions. While firing on the move severely reduced pinpoint accuracy, the psychological effect and sheer volume of incoming 85mm high-explosive fire forced German gunners to duck or lose their aim. Hits in the trees would cause an air burst.
The Payoff: Once the T-34s broke through the outer defensive ring, they swarmed the slower-moving German Tiger and Panzer IV units at point-blank range, firing multiple successive rounds into the sides of the vehicles before the German crews could manually rotate their heavy turrets to respond.
One of my play testers preferred playing the Russian T-34/85s rather than the Germans. We used historical (not balanced) scenarios where the Russians had a 2 or 3:1 advantage but the Germans were defending and concealed. While moving at a 45-60 degree angle (increases armor thickness and chance of ricochet) to the German position, the Russian player would have a German target engaged. When the German fired at a moving T-34 and missed, the Russian tank could halt fire and the Shoot & Scoot and be moving before the German could reload and shoot again at a static target. This is a perfect example of getting inside the opponents "OODA Decision Loop".
The T-34 had to get within 800m to penetrate a Panther so he fired HE and MGs forcing the German crews to button up and hoping for a lucky hit.
The German player countered by using two tanks to engage the T-34s. One shot at it while moving and the other waited until it halted to shoot. The Russian player countered by continuing to move keeping two tanks occupied.
One of the reasons I developed my own rules is that any version of IGYG or activations could not duplicate these tactics and most importantly, the interactive various rates of fire of different guns and crews.
Here is a real life example:
Wolfhag


 been building and painting his own army for Flames of War for a while now.