Setup:
The battle for Aerin III continues, with an initial Rebel ambush of Imperial troops resulting in their retreat. The planetary governor, shaken by the loss, has responded by scrambling his forces to try to smash the Rebel outpost. The Rebels have sent out word, and their forces are gathering to try to retreat off-planet before the Imperials can respond in force. The Imperials have dispatched all available forces to try to smash the Rebels before they can flee. The battlefield is the same as before (Defending the Farm), only this time the Imperials are ready.
Terrain:
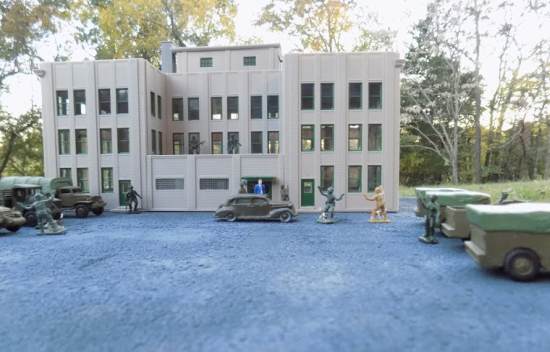
The battle was set up on a 4'x6' table, with the entry point for the Imperials being on a 4' edge. Opposite the Imperial edge was the Ranch Proper, consisting of a large (18"x10", two story) building complex, and an outbuilding (5"x5", one story). A roadway lead from the Imperial side to the building (right down the middle of the table), and made a circle in front of the ranch. Inside the circle (about 18" wide x 12" deep) was a large pool, and a large tree. Nominating the side of the table with the ranch complex north, and the Imperial entrance side south, there was a forest on the western edge of the table, and a lawn on the eastern edge. A sparse hedge of trees lined the road up to the building on both sides of the road.
Forces:
The Rebels had three squads, as follow:
Lando's Lancers
Col. Lando Calrissian
Commandos x7
Commando Fireteam (2) w/ Defense Blaster x1
Erraw's Irregulars
Cpt. Timor Erraw
Rebel Soldiers x10
Rebel Fireteam (2) w/ Repeating Blaster
Rebel Fireteam (2) w/ Repeating Blaster
Rebel Fireteam (2) w/ Repeating Blaster
Aerin III Free Company
Cpt. Aldori Kalroi
Rebel Militia x23
The Imperials had four squads, as follow:
Planetary Defense Force 148, Suun's Slashers
Cpt. Tomar Ilni'al'Suun
PDF Trooper x21
Imperial Stormtrooper Squad Storm Cloud-119-Alpha
Sgt. SCA-429
Stormtrooper x6
Support Stormtrooper x1
Imperial Stormtrooper Squad Storm Cloud-119-Beta
Sgt. SCB-332
Stormtrooper x6
Support Stormtrooper x1
AT-ST SC-119-A1, Storm Crow
HC-LT SC-119-A1, Razik's Hammer
Objectives:
IMPERIAL OBJECTIVES
1. Capture/Kill Lando Calrissian
Major if Captured, Minor if Killed
2. Destroy the Rebel Escape Transport
Major if Destroyed, Minor if Crippled
3. Capture/Kill Tiber Relis'al'Hasil
Major if Captured, Minor if Killed
REBEL OBJECTIVES
1. Defeat Stormtrooper Squad Alpha
Major if wiped out, Minor if under ½ Strength
2. Defend the Rebel Escape Transport
Major if undamaged, Minor if it escapes Crippled.
3. Capture/Kill Cpt. Tomar Ilni'al'Suun
Major if captured, Minor if killed
Placement:
Rebels set up with the Commandos in the forest to the west of the Ranch Complex. The Rebel Soldiers set up in the forest to the south of the Complex, as did the Milita. The Imperials entered from the southern border.
Game:
Pictures were taken from the game, and will be available once I find a place to host them. The Imperials started off strong, entering onto the board and making their way towards the Ranch Complex. The Hover Tank took the initiative, and rocketed across the board quickly, until a surprise shot from the commandos hidden in the forest took out it's power system, forcing the tank down. The AT-ST, more heavily armored than the Hover Tank, charged the forest with the commandos, dropping grenades and firing it's anti-personel laser into the forest for almost the entirety of the game – but wiping out the Commandos almost single-handedly. Imperial troops marched towards the Ranch Complex, and tried to divert around the forest, but the Rebels engaged them and managed to stop them from even reaching the 1/2 way point on the board the entire game. The cost, however, was attrocious in Rebel lives. By the end of the game, the Imperial AT-ST had fired once on the Rebel transport, doing some minor damage, but the Transport was able to flee. The Rebel forces were in tatters, with only Lando and a few Soldiers and Militia left. The Imperial forces had suffered noticable losses among the PDF, but only marginal losses among the Storm Troopers. The Hover Tank was down, but could be repaired – the AT-ST had only a few scorch marks.
Results:
With only Rebel objectives met, the game still wound up an Imperial victory, though just barely. The Imperials managed to inflict enough losses on the Rebels that the Rebels could not claim a draw, but neither could the Imperials claim a complete victory, either, as the leaders of the Rebelion had fled, along with vital supplies and recruits.
The game was completed in less than 4 hours, and it flowed really well. I had pumped up the stormtroopers a bit, but will have to tone them back down a little, as they seemed to dominate their battlefield (though the Rebel tactics used against them were a little less than effectual). All in all, though, a really good time.