| Bobsalt | 17 Sep 2023 12:02 p.m. PST |
I'm hoping some of you more experienced builders can help we. Everything I paint in this scale seems really, really dark. In addition, the paint I'm using (Mission Models) darkens by a shade or two when I apply the dullcote finish. It's obvious when using olive green or panzer gray I need to lighten the paints. Rather than trial and error can anyone provide me with some guidance on how you do this? How much light color by percentage to add? Do you use white or some other color based on what the base color is? |
| JimDuncanUK | 17 Sep 2023 1:41 p.m. PST |
Just use lighter shades all round. |
| FlyXwire | 17 Sep 2023 1:57 p.m. PST |
Jim is spot on IMO especially for small scale gaming models. You'll want to go lighter-looking equivalent colors of standard, off-the-shelf military paints meant for larger model use, if you think they look too dark on your completed minis. If this doesn't seem the route you want to go, then consider light-colored dry-brushing over each completed model (this will "pop" the raised surface details off the model, and compensate for what was looking like a too-dark, undistinguished paint job). Help the model do some of the detailing work for you by using washes to create shading effect in a model's cracks and seams then dry-brushing to further pop the raised parts 'away' from those shaded areas. Think "3D" as you consider your painting where does natural light have difficulty going? down into the seams/cracks/grates (that's where the wash will seep into also). Where does natural light always play upon? on the top surfaces and edges that's also where some dry-brushing will highlight a model too. Your initial military color applied? that's just the color that ends up in the 'middle' of a more interactive, eye-catching 'sandwich', meant to compensate for the fact that small-scale minis don't dazzle too much without some fake, 3D-light-like help. |
| Striker | 17 Sep 2023 4:00 p.m. PST |
This is what I found:
To adjust the color: From the 1988 The IPMS Color Cross-Reference Guide, the following metric to add lighteners to the paint were: 1/32 add 7% white to your color
1/48 add 10% white
1/72 add 15% white
1/144 add 23% white One caveat: Adding white as a lightening color might not be the best. For figure painting, often buff is used, but it differs depending on what the base color is. For example, if you have a red base coat, and add white to lighten it, you really would have pink highlights. However, if you look closely, yellow or buff may actually be a better work-around to lighten the color. Best advicepractice off the model or on a scrap test piece with the various effects.
link |
greenknight4  | 17 Sep 2023 4:33 p.m. PST |
Sometimes thinning them and treating them as a wash helps. That is what I do. |
| machinehead | 17 Sep 2023 4:48 p.m. PST |
Just my opinion but too much white leaves the paint chalky looking. For greens at least I only use beige or dunklegelb to lighten them up. |
| HansPeterB | 17 Sep 2023 10:16 p.m. PST |
Just my 2 cents, but small scales do indeed come across as really dark and you need to go not just lighter but brighter as well, so you might try using colors that would seem almost garish if scaled up. You also need to enhance contrast, so you might try this: prime black and then dry brush white, then paint being careful to leave the recesses black. Contrast paint (or equivalent) can help speed up the process. I'm also not sure that you need dullcote, since at this scale you won't pick up a lot of excess shine using normal acrylic paint. I usually apply vallejo matte varnish with a brush (which is not nearly as "anti-shine" as dullcote) or give a very light spray with Windsor Newton Matte varnish (which likewise). |
| TheNorthernFront | 19 Sep 2023 9:16 a.m. PST |
Dry brush a lighter shade over the top will give it some detail and dimension and help with realism. Do not add white to your paint color this will lighten your paint but also make it too "chalky" and dull. |
 Dye4minis Dye4minis  | 20 Sep 2023 10:03 p.m. PST |
I guess that I am the elephant in the room. I intentionally use darker colors for my 6 and 10mm figs. Why? Because that is the way they appear at an arm's length in nature. Since I paint historical figures, go to great lengths to have the appropriate colors and invested in research materials to get those details as close as I can, why not take it to th next level? Painting to scale. In real life, the farther away an object is the darker it appears. Why? Because in the distance between the object and your retina, the true colors seem darker due to the amount of white light which dilutes the registration of what you see. The closer you get to the actual subject (IE the bigger it looks) the brighter the actual color )and visible detail can be seen- less white light diluting the actual color of the object. So why not go the full monty in painting your historical figures like they would look when you spread your thumb and forefinger at an arm's length to the size of the figure you want to paint? Try it next time you venture out of your mancave on an actual person outside. I know, you use brighter colors because you think it looks cool. That's fine- they are your figures and if enjoy doing that, carry on! Just know that some of us use the idea above to add another dimention to our historicals. If you do, don't be surprised if you mistake a unit of the enemy as being yours….like happened in real life! For my UK breathern, "STAY CALM….and Wargame!" |
| FlyXwire | 21 Sep 2023 4:58 a.m. PST |
Very cool, and maybe a little funny at the same time too. ;)
|
 Yellow Admiral Yellow Admiral | 23 Sep 2023 7:37 p.m. PST |
This photo could also serve as a tour of Tamiya green spray paints. :-) |
| UshCha | 24 Sep 2023 3:05 a.m. PST |
Dye4minis I quite agree. I was at Armourgeddon in Leictershire (UK) some months ago. They have some 432's for folk to ride in and a museum. When parked om the grass outside they look frankly a bit absured, very dark green and black against, well to be honest on that day grass as bright as the Noch gress on my Hexon II, really bright. However even a few hundred yards away, as they move off and there shape merges with a hedge line, theylargely "dissapear", The hedge line not in the sun, and distant is far darker than the grass. So much so that detail on the vehicle dissapears almost completely and is little more than a sillouette, shading would make it more unrealistic.
So as you say it is all about personal taste as what you want your army to look like. The real world vehicles start to look at best like blobs at a distance, but that is there intention, to stand out as little as possible, you could call that realistic distance painting. However I guess if you are into models then thats not what you want, you want close up on the grass detail even at distance. By the way FlyXwire – love the picture, now do I deliberately buy lots of diffrent coloures? Probably not (have too much of the current coloure in stock) but I don't have to worry in the future if I can't match it. |
| FlyXwire | 24 Sep 2023 7:08 a.m. PST |
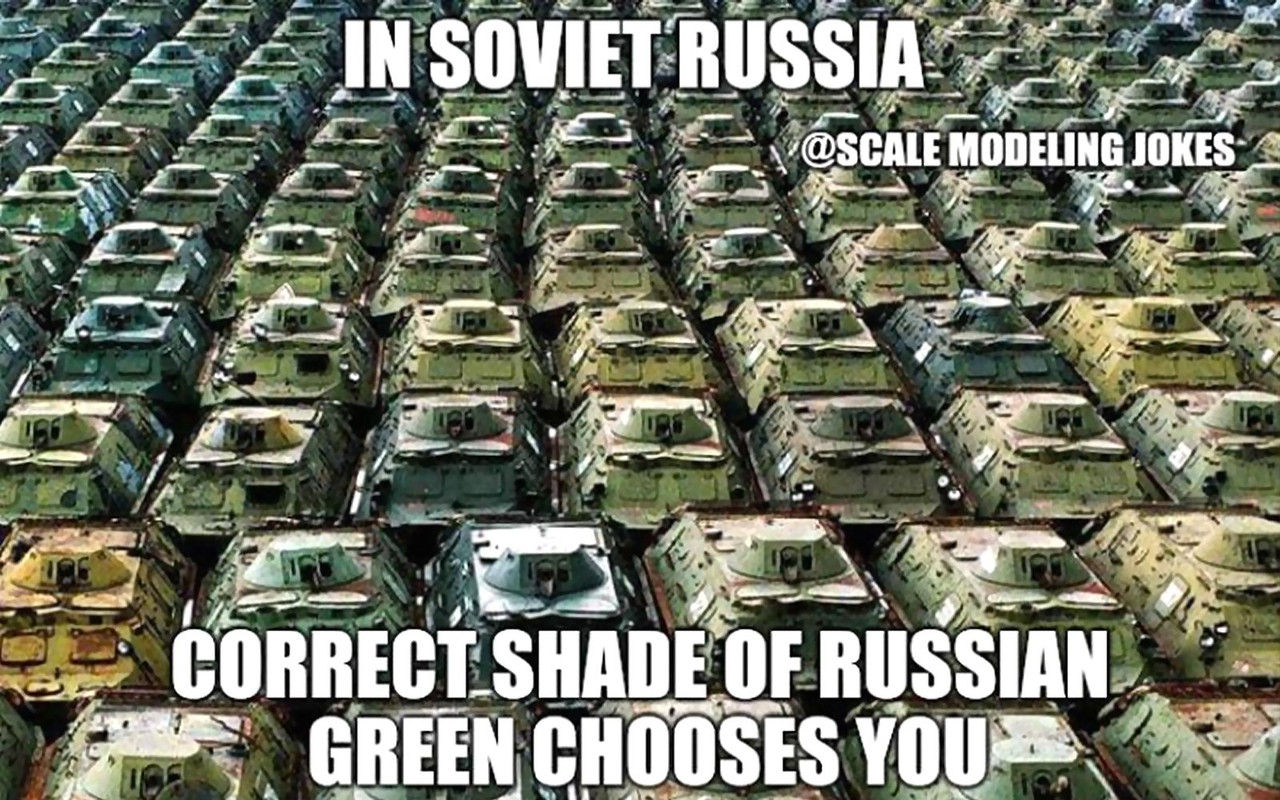
On Soviet-era armor, finished a BMP-1 platoon for the Conflict Donbas collection this weekend, a closeup of one (1/144th scale) -
I white dry-brush as the final kick to the model's fine scale detailing, that would never register to the eyes at regular game-viewing distance. Way back when GHQ came out with their 2nd-generation Micro-Armor models, the hobby buzzed over the exaggerated detailing etched onto/into the new models. Engine grates, plate joints, hand-holds took on a heightened appearance from what would have been scale-sized (the difference easily seen from 1st-gen models compared to the new ones). With a primer coat, and a base coat, at times the 1st-gen details could actually fill in with a regular paint job (those little etched seams, although accurate in scale, could disappear and didn't fulfill the hobby 'application'). No one much thinks GHQ minis won't paint up nicely these days but there's underlying reasons why they look so good on the tabletop. |
| UshCha | 24 Sep 2023 9:44 a.m. PST |
FlyXwire again its personal preference, To me this is getting to far to the Zombie tanks approach (the worst I ever saw was on GHQ 6mm) where it wAS a white skelaton with a bit of colour underneath. It shows the detail but at (for me and I recognise I am not "maintrean") too higher "price". Again it is personal preference, I don't shade, as the models look far more in line with the real world viewed from a distance. I should really as one ex AfV driver noted, just spraye the models in mud/dust colour. Alas I heve never had the enthusiasm to buy a decent spray system and then spend the hours to get my technique to even barely acceptable minimum. |
| FlyXwire | 24 Sep 2023 11:00 a.m. PST |
It's just degrees of personal preference. What I show on the forum here isn't meant to make someone else feel negatively I give advice based on my experience, and it doesn't mean that advice applies to someone's particular time and place in their hobby experience either. I will though continue to give advice, whether someone thinks it pertinent to them or not. |
| UshCha | 25 Sep 2023 1:22 a.m. PST |
FlyXwire – Sorry if this offened you, it was not meant too. Its interesting to see how other folk view the objectives in portraying a minatures for wargaming purposes. |
| FlyXwire | 25 Sep 2023 6:32 a.m. PST |
Hey, "Art is in the eye of the beholder, and everyone will have their own interpretation." That is if we think hobby painting is artful. At the same time, we can look at minis as just being game tools, and the terrain map is where the real art of the battle ought to be going (but that's another conversation). |
| Captain Pete | 25 Sep 2023 3:59 p.m. PST |
Excellent work on the BMP-1, FlyXwire! That is definitely a work of art. I do think miniature painting is artful and we are all artists trying to breath life and character into our miniatures. I am also in the lighter is better camp of miniature painting.
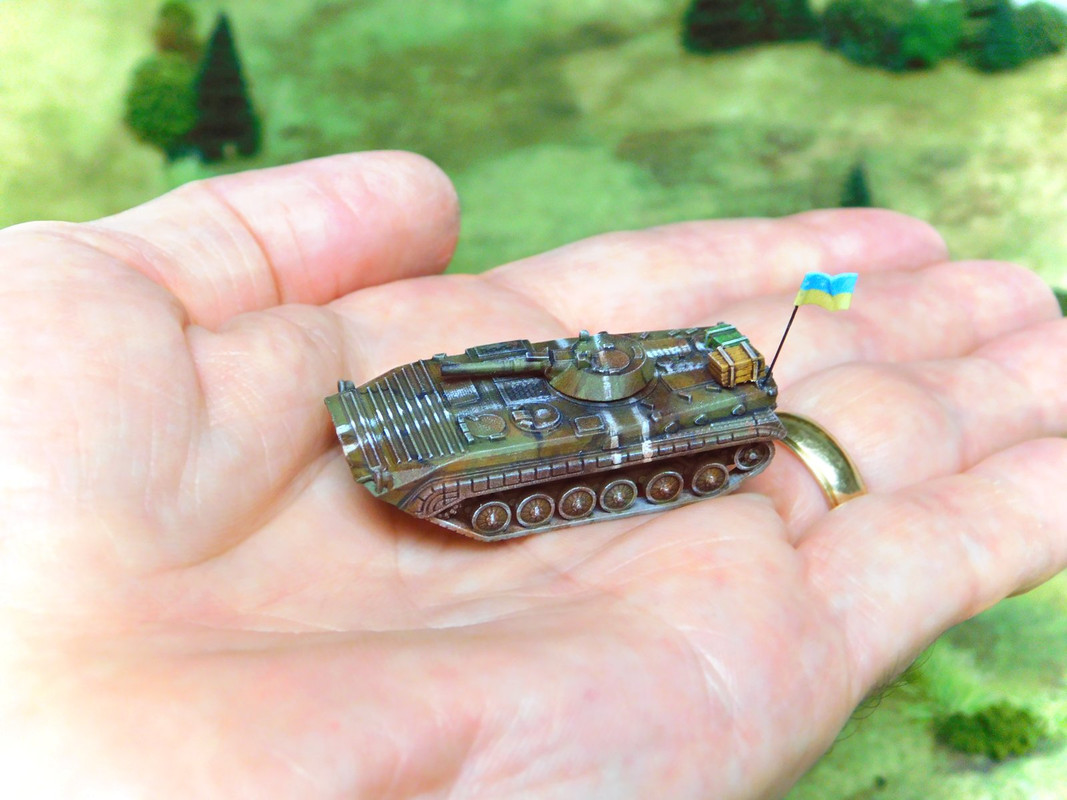
My primary scale is 1/285th. I used to paint some of the colors straight out of the tin but have learned over the years to lighten them a bit with white(usually). I do not have a particular formula for this as noted in Striker's post. I just add the lighter color till it looks right to me. As evidenced by FlyXwire's picture of the BTRs in a yard, there is a lot of leeway in interpreting what is the exact color of things as well. My basic philosophy is a close approximation is just fine as paint and uniforms may come from different sources and not all be exactly the same. I also do washes on my vehicles and little tiny men so that tends to darken them a bit after going lighter with the base colors. On my 6mm stuff, I don't really do dry brushing per se but go back over the raised areas and make them stand out a bit more for more contrast.
Here is a solo game I am currently playing at my house featuring British Crusader IIs vs German Panzer IIIs. From this distance everything kind of blends in.
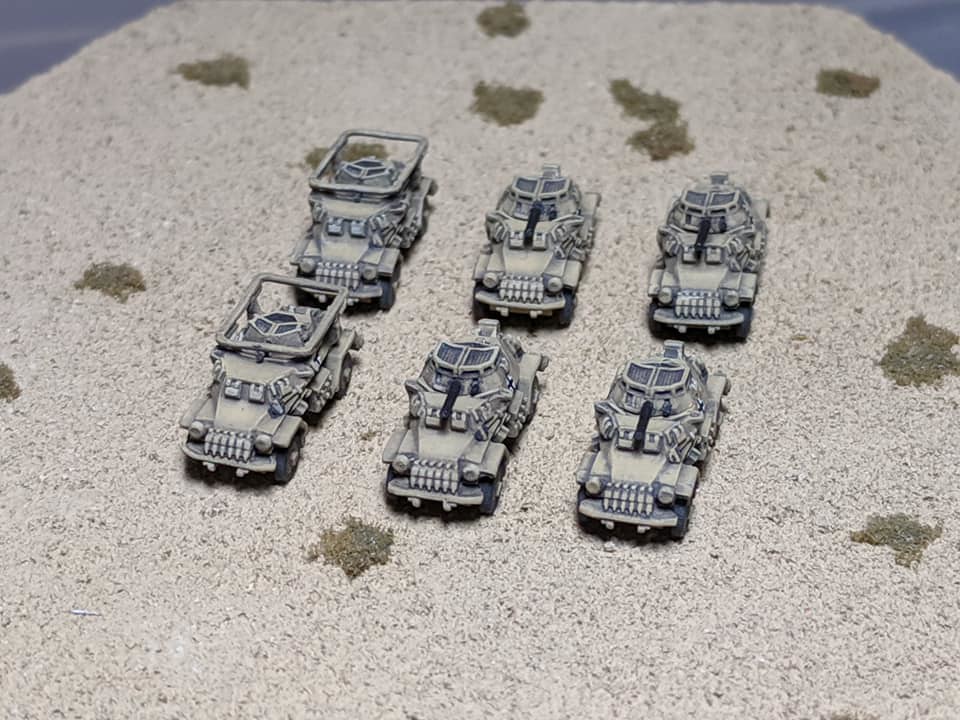
Here is a platoon of German Sdkfz 222 and 223 armored cars more close-up.
Here is another view of the same table. The Crusaders are closer and some of the details can be seen. The Panzer IIIs are further away and the vehicles tend to appear a bit darker and less detailed than they actually are. I am happy with the way these look whether close up or at distance. |
| UshCha | 26 Sep 2023 1:57 a.m. PST |
Interesting terrain. Handmade hex I assume, looking at the edges. I made my own years ago from Cork tiles when they were a "Thing". Interesting mix of "Dog Bones" (two hex together and singles) and singles. Interstingly when I went to Commecial hex (Hexon II) interesting ly of a similar size, I tryed Dog Bones and gave them up. Strange wolrd we live in, more about ease of staorage than speed of laying which Dog Bones help. With your relatively small table, homeade is great, not so exepensive and not TOO many to cut. We gave up on homemade as for us we made large amounts and it got very heavy (sand texture is super tuugh but really really heavy. Plastic hex is light which is why we went that way otherwise we may have still been homemade. Out of curiosity we did stepped hills in the day, as that was not that uncommon in those days. Did you go for stepped or the added complexity of slopes? |
| Captain Pete | 26 Sep 2023 7:24 a.m. PST |
Hi UshCha The terrain tiles are Terrain Maker by GHQ and already pre-cut into 4 inch hexes. The hexes come in several thicknesses with 1/2" being the standard thickness and other thickness to make streams/rivers at 1/4" and hills at 1" and finally mountains at 1 1/2". On my Terrain Maker, the slopes are natural and in this case for the gentle slopes, I used more 1/2 " hexes. All the flocking and coloring is done by me as the hexes are plain white styrofoam. |
| UshCha | 27 Sep 2023 5:23 a.m. PST |
How do you find styrofoam? We tried trhis and found it too prone to damage. We did move into Blue Stryrafoam the stuff used for model aircraft wings which was significantly better. However the sand to toughen up the surface was still the dominant issue and still to heavy. I'ts interesting about 4" is typical, my HexonII is about 4" Across flats, my homemade stuff was about 4" across points, all similar in size. Clearly we all saw that as about the optimum size. Interesting you use hex roads, even homemade we got tired, too many specialist hex and impossible to get a straight road like on the maps, too many constraints. How do you find hex roads?
Don't even get me started in Rivers and canals, they were near impossible in hex. Canals are typically straight and only having 3 Axis was far too few to do a decent map. |
| Captain Pete | 28 Sep 2023 9:07 a.m. PST |
Hi UshCha I have found the GHQ Terrain Maker styrofoam to be very durable. I have 3 basic layouts that I have created over the last 30 years or so. 1. Europe – Summer
2. Europe – Winter
3. North Africa – Desert Some day I may do a Vietnam layout but that is down the road a ways as I have so much WWII and Modern to do, both vehicles, infantry, and more terrain including buildings and fields. Roads. My roads are fully integrated in each hex. I carefully measure the dimensions of my roads to be sure they align properly. I do the same with my rivers and streams. I do not have any canals as yet but my make some at some point. I do occasionally add special pieces to my various sets of terrain. Since this thread started as a how to paint and not a terrain specific topic, I won't hijack the original thread too much longer. Here are a couple more pictures showing a paved road in the desert and a couple river/streams I did.
Desert road
Stream with ford |
| Yellow Admiral | 27 Oct 2023 6:19 p.m. PST |
On my 6mm stuff, I don't really do dry brushing per se but go back over the raised areas and make them stand out a bit more for more contrast. I've taken to using this same technique on super-small scale miniature machines over a certain size. I find that dry-brushing a 1/2400 or 1/1200 naval vessel or 1/200-1/300 airplanes makes them look "frosty", which is not the impression I'm going for. Instead I start with the "correct" color as a base, put down a wash that shades everything and brings out the highlights, then re-apply the original shade or one shade lighter on the physical highlights makes them stand out. |
| Yellow Admiral | 27 Oct 2023 6:23 p.m. PST |
Don't even get me started in Rivers and canals, they were near impossible in hex. Canals are typically straight and only having 3 Axis was far too few to do a decent map. Railroads too. It's really hard to find curved sections that fit the radius into the hex grain. Even flex track doesn't really solve this problem. - Ix |