I am sharing reports of some games I played solo using Ross MacFarlane's "A Whiff of Dice" horse and musket rules and my homemade "Azules y Colorados" 30mm armies. I played with the version used during the Huzza! 2023 but with the ABBAM game sequence.
The "ABBAM" game sequence was created by Donald Featherstone and works like this:
A moves, B moves, B shoots, A shoots, then both sides simultaneously resolve melee combat. At the beginning of each turn the players decide, by chance, who is A and who is B.
For all these games I used scenario 4 "Take the high ground" from the Neil Thomas´s "One Hour Wargames" book and the following armies:
Blue Army
3 Infantry Units (1st, 2nd and 3rd Battalions)
1 Cavalry Unit (1st Squadron)
1 Artillery Unit (Battery B)
1 Skirmisher Unit (skirmishers from the 1st and 2nd Battalions)
Red Army
3 Infantry Units (1st, 2nd and 3rd Battalions)
2 Cavalry Units (1st and 2nd Squadrons)
1 Artillery Unit (Battery A)
1st Battle
Turn 1
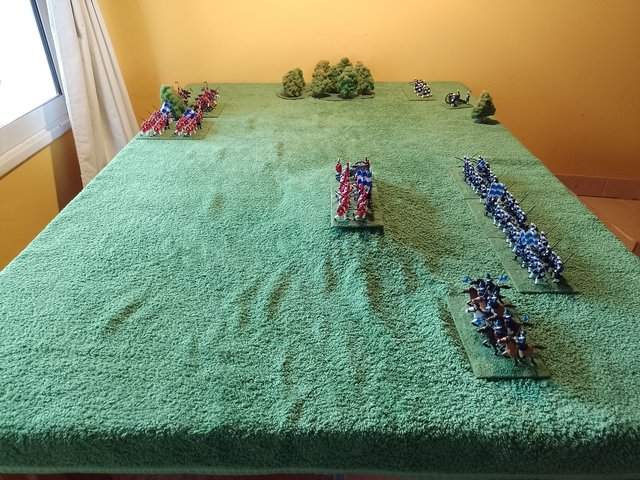
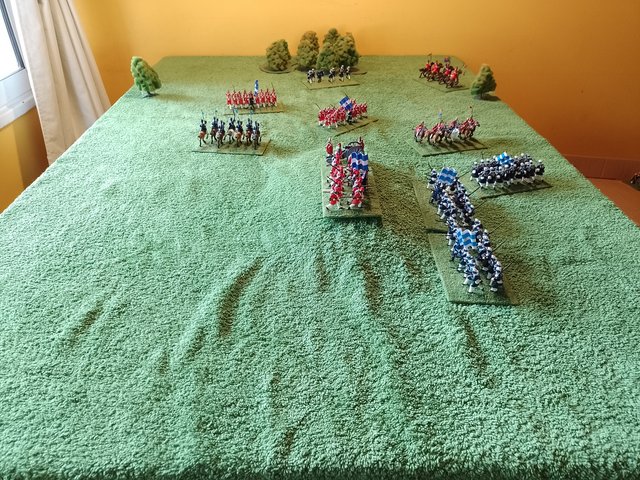
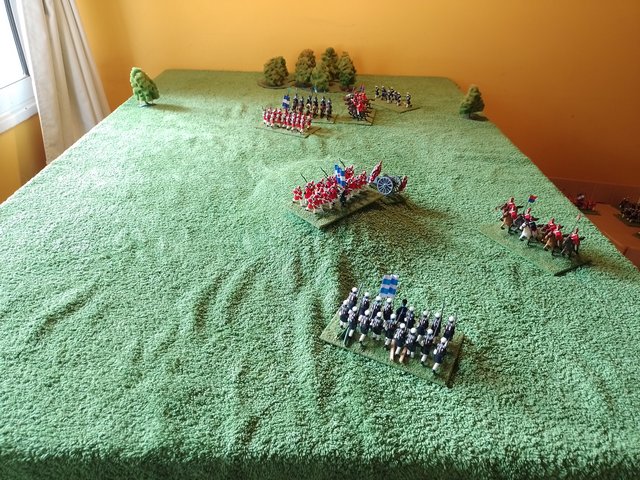
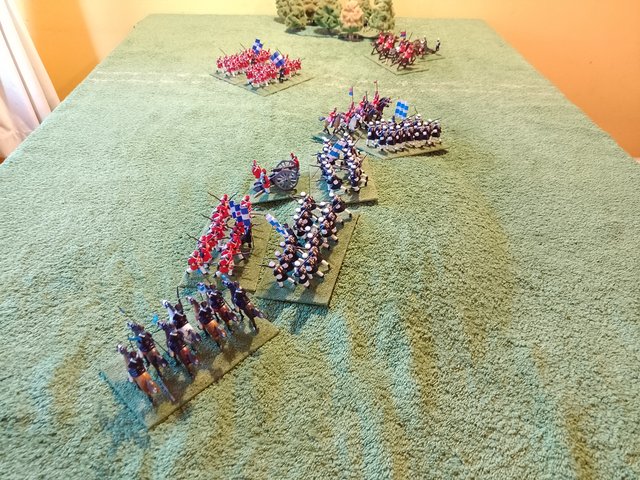
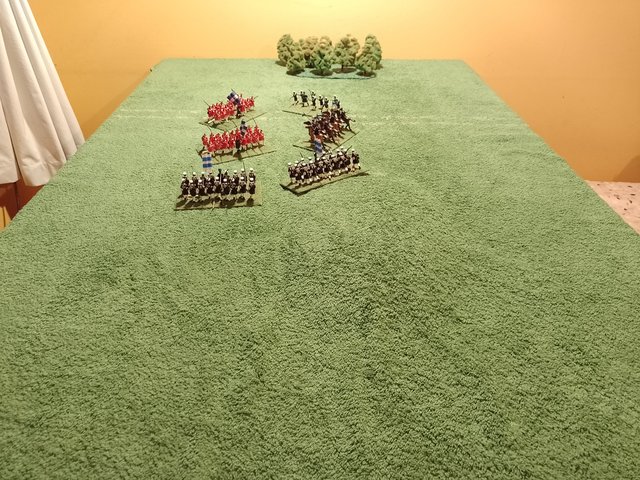
Red Army occupies the hill with the 3rd Infantry Battalion and Battery A.
Blue Army advances along the entire front.
On the right flank, Battery B moves seeking to cover one of its flanks with the woods while the skirmishers of the 1st and 2nd Battalions head towards it, from where they can control the road, cooperate with the artillery and (above all) remain safe from the probably numerous (and definitely dangerous) cavalry of the Red side.
On the left flank, the 2nd, 3rd and 1st Infantry Battalions advance towards the hill in a brigade movement.
Blue 1st cavalry Squadron tries to outflank the defenders.
Red artillery fires with cannister on the Blue infantry.
theminiaturespage.com
"TMP link
Turn 2
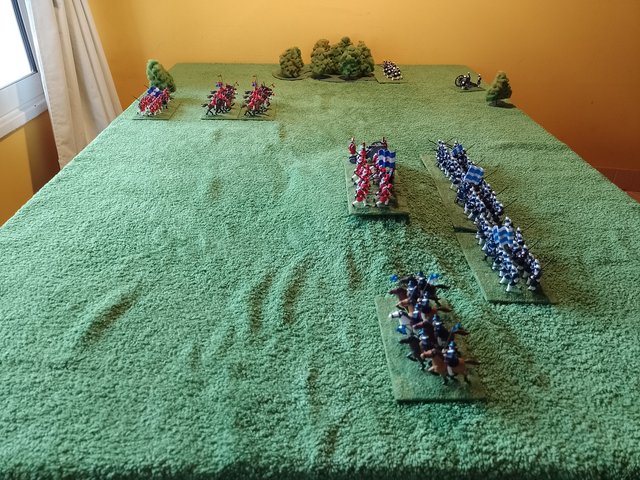
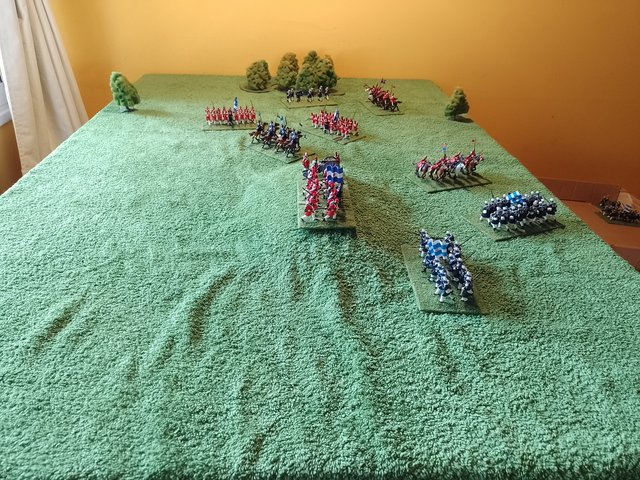
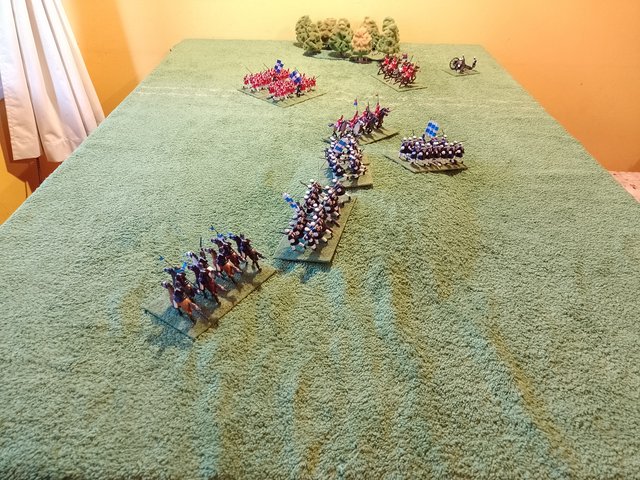
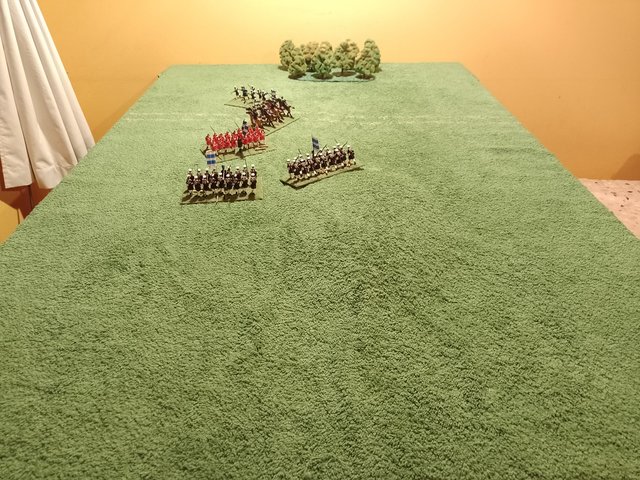
Along the way, reinforcements for the Red army arrive, they are the 2nd and 1st cavalry Squadrons and the 1st Infantry Battalion.
The left wing of the Blue side and the skirmishers continue their advance while their artillery opens fire on the enemy cavalry.
The Red units that defend the hill fire on the Blue infantry
theminiaturespage.com
"TMP link
Turn 3
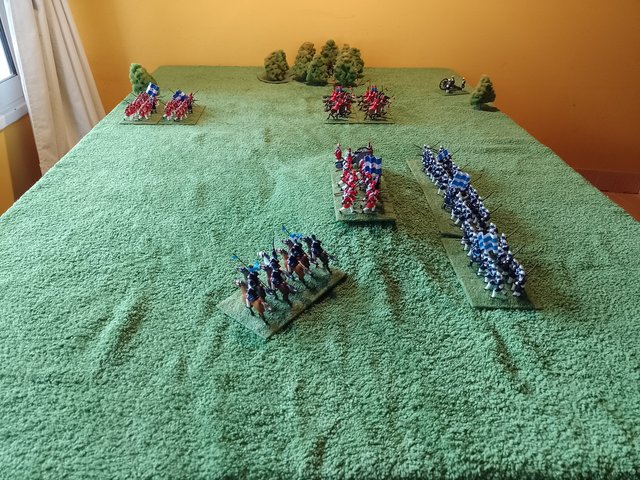
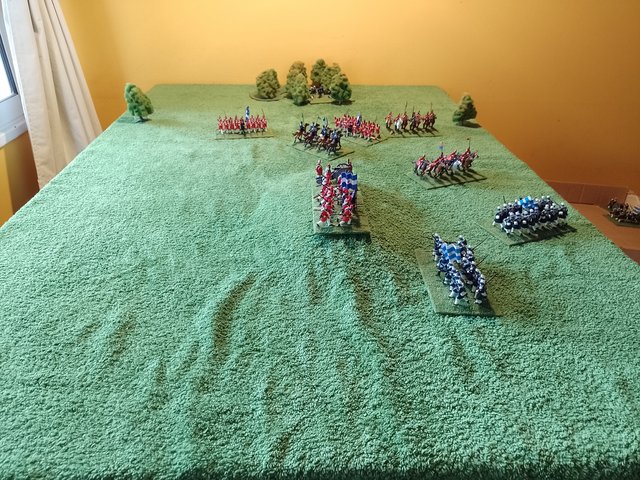
While the left wing of the Red army continues its advance along the road, the second reinforcement infantry unit arrives along the road, it is the 2nd Battalion.
Blue cavalry continues its flanking maneuver.
Blue artillery and the skirmishers fired against the Red cavalry.
Blue infantry exchange shots with the defenders of the hill.
theminiaturespage.com
"TMP link
Turn 4
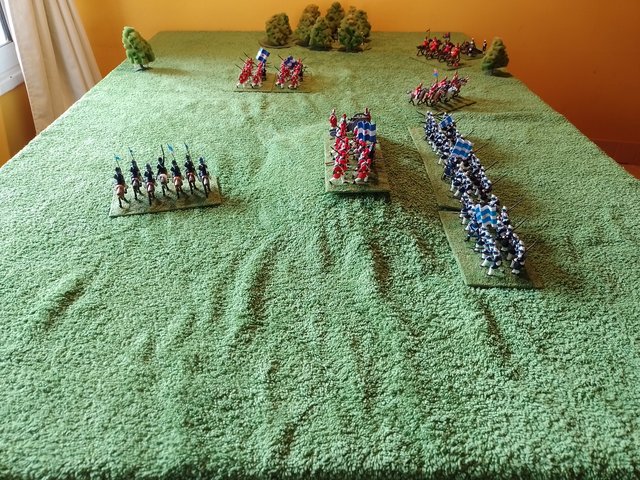
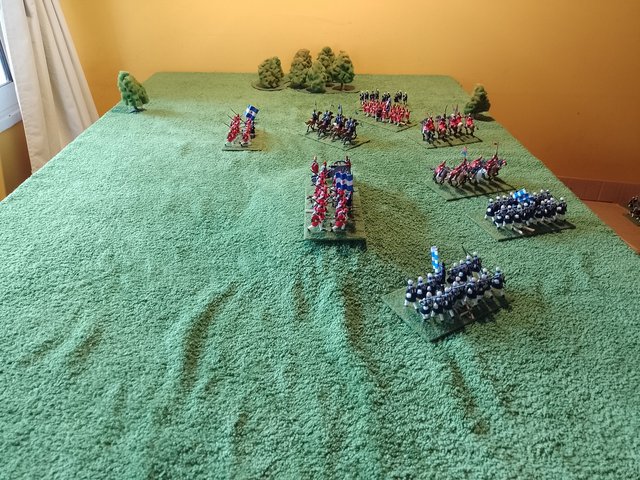
The 2nd Red cavalry charges and pushes back the Blue artillery. The 1st Red cavalry seeks to flank the Blue infantry.
The Red infantry reinforcements are fired upon from the woods as they continue their advance down the road.
On the hill the shooting duel continues while Blue cavalry moves looking to threaten the Red infantry.
theminiaturespage.com
"TMP link
Turn 5
The Blue artillery is destroyed, the infantry units threatened by cavalry maneuver to repel the attacks, the skirmishers leave the woods to continue participating in the combat. The firefight continues on the hill.
theminiaturespage.com
"TMP link
Turn 6
While the 2nd Red cavalry Squadron charges and pushes back the 1st Blue Infantry, the 1st maneuvers threatening the flank of the skirmishers. The Blue cavalry charges and pushes back the 1st Red infantry. The defenders of the hill destroy the 3rd Blue Infantry.
theminiaturespage.com
"TMP link
Turn 7
The charges follow one another, the 1st Infantry and the 1st Red cavalry are forced to retreat. The skirmishers take refuge in the woods and the 2nd Red cavalry then moves towards the hill. On the hill the exchange of shots continues.
theminiaturespage.com
"TMP link
Turn 8
Blue cavalry, aided by the skirmishers, charged and drove the 1st Red infantry back again. The 2nd Red cavalry, which advanced towards the hill, turned and retraced its steps to help the surrounded infantry. The 1st Red cavalry charges and is forced to retreat. The only unit of the Blue army that remains assaulting the hill (the 2nd infantry) maneuvers, under fire from the Red infantry, trying to get out of the artillery firing range and protect itself from an imminent cavalry charge.
theminiaturespage.com
"TMP link
Turn 9
The defenders of the hill maneuver to be able to continue beating the 2nd Blue infantry that fires at them. The cavalry charges continue, the 1st Blue infantry and the 1st Red infantry are forced to retreat.
theminiaturespage.com
"TMP link
Turn 10
The charges already raised and the firefight on the hill continue. The skirmishers repel a charge from the 2nd Red cavalry!
theminiaturespage.com
"TMP link
Turn 11
The shooting fight continues along the hill. The 1st Blue infantry and the skirmishers each repel a cavalry charge. Blue cavalry charges and pushes back the 1st Red infantry.
theminiaturespage.com
"TMP link
Turn 12
The skirmishers, on the brink of demoralization, take refuge in the woods. The 2nd Red cavalry, which was threatening them, maneuvers to attack the Blue cavalry whose charge is repulsed. The 1st Blue Infantry repel another charge from the 2nd Red Cavalry and on the hill, the firefight continue.
theminiaturespage.com
"TMP link
Turn 13
Blue cavalry manages to destroy the 1st Red infantry and repel the 2nd cavalry that charges from the flank. The 1st Red cavalry charges and destroys the 1st Blue Infantry. The duel for the hill continues, the Blue infantry unit that attacks it only has 1 morale point left.
theminiaturespage.com
"TMP link
Turn 14
The Blue cavalry repulses another charge from the flank, the skirmishers leave the woods to assist them. The 2nd Blue infantry maneuvers, under fire from the Red infantry, to protect itself from the cavalry.
theminiaturespage.com
"TMP link
Turn 15
The Red cavalry charges but fails to destroy any Blue units, but it is turn 15 and the game must end. Victory for the Colorado side that still controls the hill.
theminiaturespage.com
"TMP link
2nd Battle
Turn 1
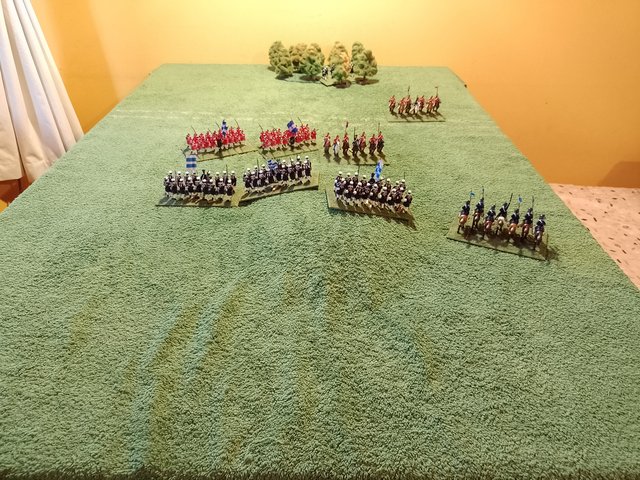
Red Army occupies the hill with the 3rd Infantry Battalion and Battery A.
Blue Army advances along the entire front.
On the right flank, Battery B moves seeking to cover one of its flanks with the woods while the skirmishers of the 1st and 2nd Battalions head towards it, from where they can control the road, cooperate with the artillery and (above all) remain safe from the probably numerous (and definitely dangerous) cavalry of the Red side.
On the left flank, the 2nd, 1st and 3rd Infantry Battalions advance towards the hill in a brigade movement.
Blue 1st cavalry Squadron tries to outflank the defenders.
Red artillery fires with cannister on the Blue infantry.
theminiaturespage.com
"TMP link
Turn 2
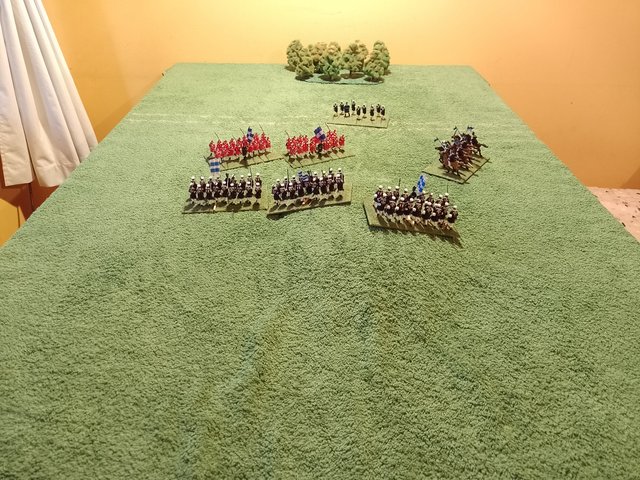
The infantry of the Blue side continues its advance towards the hill, while its cavalry maneuvers to charge the flank of the defenders.
The skirmishers take possession of the woods.
The Red units that defend the hill fire on the Blue infantry
theminiaturespage.com
"TMP link
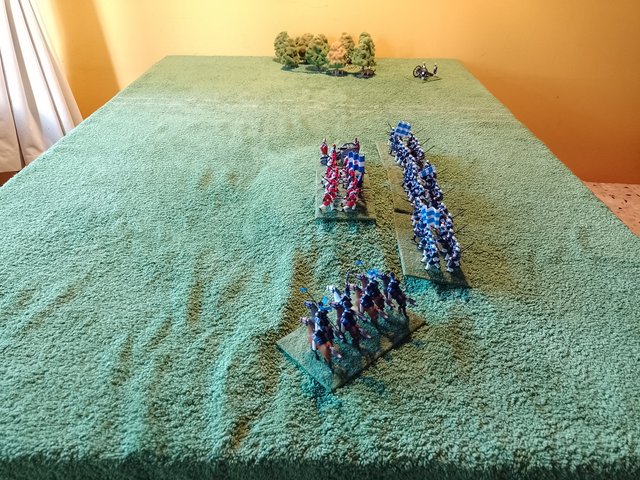
Turn 3-1
Four units of the Blue army charge the defenders of the hill uphill, the infantry in front and the cavalry in the flank.
theminiaturespage.com
"TMP link
Turn 3-2
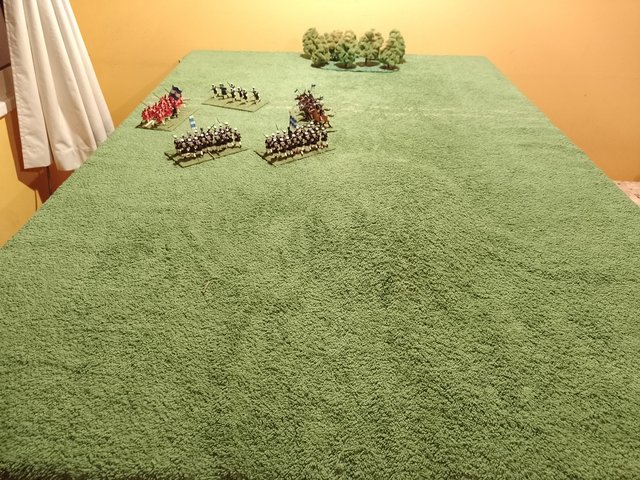
Red artillery resists but the infantry is forced to retreat.
The skirmishers occupy the woods and the Blue artillery advances seeking to protect one of their flanks with it.
Using brigade movements, reinforcements arrive for the Colorado side. The 1st and 2nd cavalry squadrons along the road and the 1st and 2nd infantry battalions to the East of it, cross country.
theminiaturespage.com
"TMP link
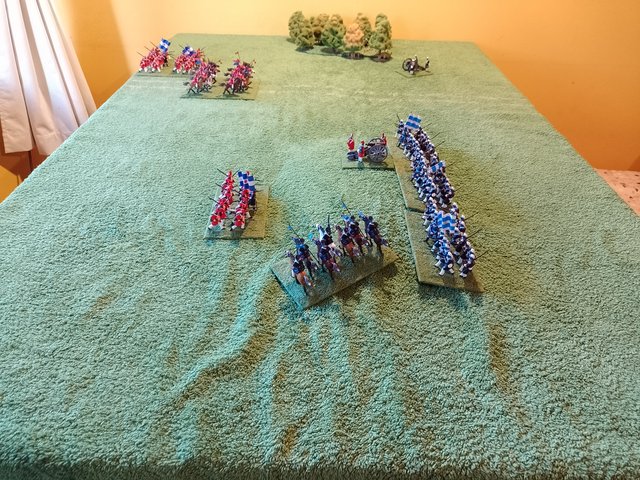
Turn 4
The 1st Red cavalry advances to charge the Blue artillery that fires at them with cannister. They also take close range flank fire from skirmishers occupying the woods.
The 2nd Red cavalry maneuvers to threaten the flank of the Blue infantry while the Red infantry reinforcements continue their cross-country advance.
On the hill, the Red artillery is forced to retreat by the 1st and 3rd Blue infantry. The 2nd Blue Infantry maneuvers to beat the flank of the artillery while Blue cavalry charges and is repulsed by the 3rd Red Infantry.
theminiaturespage.com
"TMP link
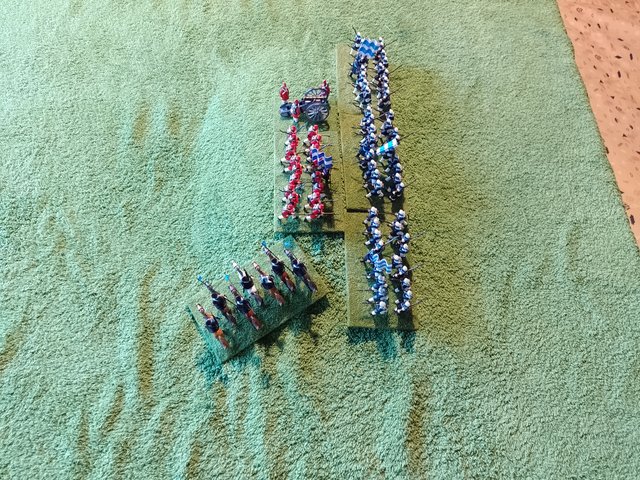
Turn 5-1
Charges during turn 5
theminiaturespage.com
"TMP link
Turn 5-2
The Red units that occupied the hill are destroyed by the cavalry charges and the 2nd and 1st Battalions of Blue infantry. The charges of Red cavalry units are repulsed.
Red infantry reinforcements continue their advance using a brigade movement.
theminiaturespage.com
"TMP link
Turn 6
The Blue infantry takes possession of the hill and maneuvers to face the units of the Red army that threaten them.
Blue cavalry maneuvers and begins to move to cover the right flank of their infantry.
Blue artillery is destroyed by a charge of Red cavalry.
theminiaturespage.com
"TMP link
Turn 7
The 2nd Red Cavalry charges uphill and is repelled by the 3rd Blue Infantry. Meanwhile, the 1st Blue Infantry exchanges fire with the 1st Red Infantry, the 2nd Blue Infantry and the 2nd Red Infantry maneuver to get within range.
The Blue cavalry takes up position covering the right flank of their infantry, ready to engage the approaching 1st Red cavalry.
The skirmishers remain in the woods.
theminiaturespage.com
"TMP link
Turn 8
The 1st and 2nd Infantry Battalions of both sides exchange shots. The 3rd Blue Infantry is charged and forced to retreat by the 2nd Red Cavalry.
Blue cavalry charges and destroys the 1st Red cavalry. They immediately charged the 2nd Red cavalry on the flank and also destroyed it.
The skirmishers leave the woods and head towards the hill.
theminiaturespage.com
"TMP link
Turn 9
In a shooting duel with the Blue Army units, the two Red infantry units remaining on the ground eliminate the 1st Battalion of enemy infantry,
Blue cavalry, the skirmishers and the 3rd Blue infantry, maneuver.
theminiaturespage.com
"TMP link
Turn 10
Blue cavalry charges, aided by the skirmishers, and pushes back the 1st Red infantry, the 2nd exchanges shots with the Blue infantry.
theminiaturespage.com
"TMP link
Turn 11
A new charge of the Blue cavalry and the skirmishers, destroyed the 1st Red infantry, the 2nd continued exchanging shots with the Blue infantry.
theminiaturespage.com
"TMP link
Turns 12, 13 and 14
The last unit of the Red side is successively attacked and finally destroyed by the enemy units. Victory for the Blue side!
theminiaturespage.com
"TMP link
theminiaturespage.com
"TMP link
theminiaturespage.com
"TMP link
I sculpted the masters of these with FIMO Soft and two part epoxy putty. I used polyurethane resin to cast the infantrymen, horses and riders, metal for the muskets and two part epoxi putty for the gunners, wheels and gun tubes.
The swords are made of wood and the spears are broom hair.
Uniforms are from the Civil Wars in Argentina circa 1840.