Here are some views of a game I did at a con some (many) years back.
First, the challenge -- always wanted to do some gaming of Kursk, and in particular some reasonable portion of that swirling set of actions that have come to be called the battle of Prokhorovka.
For this case, I chose the engagements of the 3rd SS Panzer, which was continuing to push back the remnants of the 52nd Rifle and 9th Airborne Divisions when they were struck by the 24th Guards Tank Brigade, all of which took place on the other side of the River Psel from the main actions that are so often described.
For the gaming con action, I prepared player briefings for each side. These were provided to the commanders prior to the game. Here is the commander's briefing for the German players:
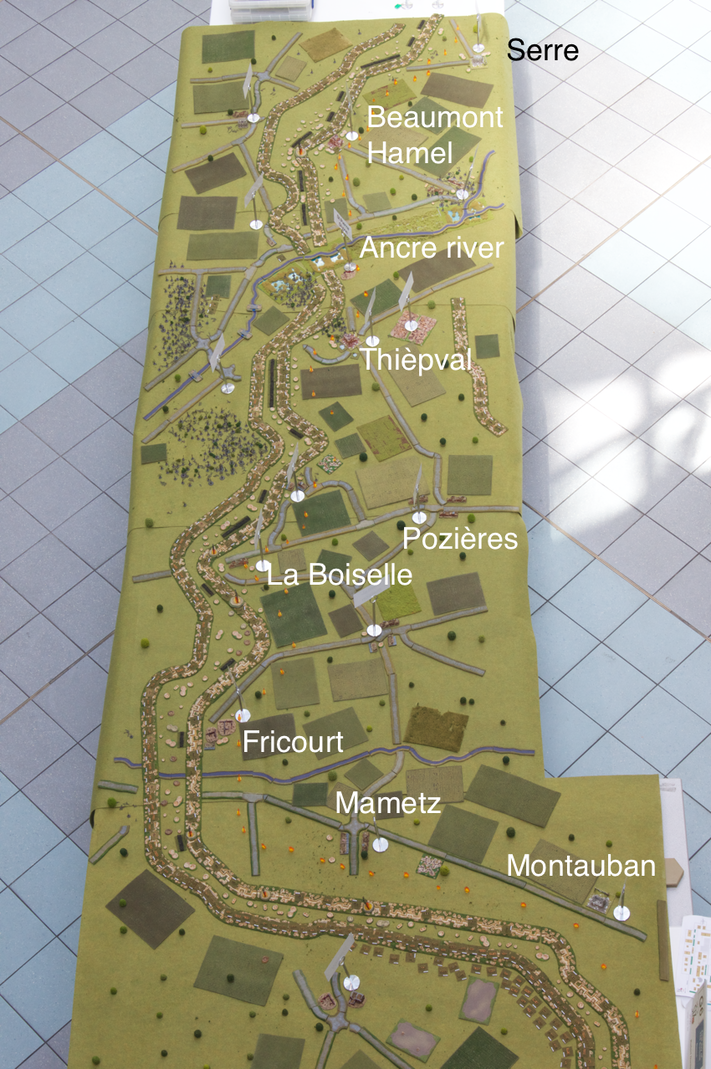
I also prepared a map of the actual table, which covered a smaller area than the overall briefing maps. This was give to players only at game time.
The table itself was then only a subset of this map -- running roughly from Kliutchi to Polyashaev, focused on the high ground that the Germans designated as Hill 226.5 (Hill 222.6 to the Soviets) running from SW to NE, with the Psel and the bridges at Mikhajlovka to the SE.
(This pic shows the table as seen from the North, which was a corner view as the table ran SW to NE.)
Through this process I hoped to challenge the gamers to orient themselves on their maps, giving them one more issue to deal with that is common to commanders.
In my games I use paper chits in place of the miniatures to provide some measure of hidden movement. Each chit gets replaced by a model only when that element is spotted. This has a substantial impact on players who are more frequently accustomed to making tactical decisions with a "God's Eye" view.
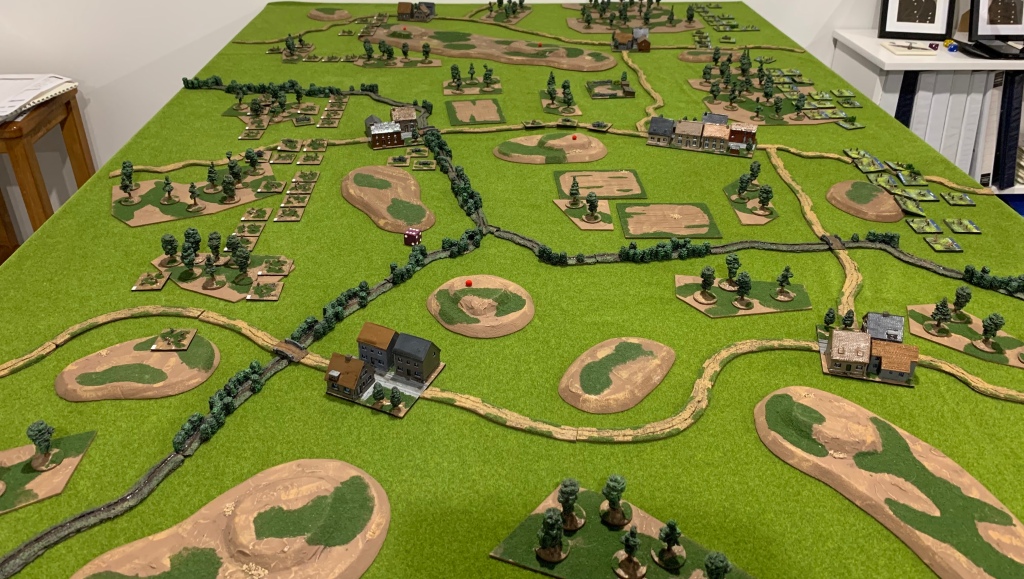
In this view down the Psel, the game area edge is marked by a masking tape border, which also gives gridline indications. This should have been done with a different colored tape, as I was also using masking tape for the dirt roads. My game terrain techniques were not as well developed at this time.
Often missing from the popular mythology of Kursk is that fully 1 out of 3 Soviet tanks were light tanks. Pz IVs could, and did, do deadly execution of T-70s on this day.
Tigers in hull-down positions were almost impossible to counter for the Soviets.
The mass rush was about the only tactic that showed any likelyhood of results.
Even with all the space this table provided, gamers who have played larger scales were still inclined to place their miniatures bumper-to-bumper. Tsk tsk. If the Germans had been able to get their artillery on target fast enough … but would these gamers learn even then?
After all is said and done, with tables and games as large as I like to create, the core of the game almost always focuses down to an action by a company or even a platoon, at an area that is less than 1/8th of the total game area. In this case the vital action was a platoon of German Pioneers who charged through the hail of tank fire in their Hannomags to get to, and blow up, the bridges over the Psel, thereby achieving a critical victory condition for the Germans and winning the game.
I see larger scales as being very appropriate for actions like the Pioneers at the bridge. But for all of the maneuver that took place around that action, and for the question of WHY there were no T-70s to in place to slaughter the halftracks as they made their rush, I need more maneuver room and larger formations.
I don't want to get units to deploy, or reinforcements, at some magic beam-me-down position because some die role on a table says I get them. I want to get units or reinforcements at some location because, in the game, the player(s) recognized the requirement, made the tactical decision to move those units, and suffered the costs and met the challenges that those decisions entailed.
At least that's what makes the gaming so engaging for me.
-Mark
(aka: Mk 1)