I recently completed some of the most beautiful and satisfying terrain that I've done in years. I'd like to share.
I wouldn't call it typical 40K terrain. In fact, most gamers would say it's more useful for historical gaming. But it was inspired by a desire to really "up my game" when it comes to creating tables for my Tau-vs.-Imperial battles on the agri-world of Dar Sai.
(I have a six-year-old narrative 40K campaign called The Corvus Cluster where I document everything my club does.)
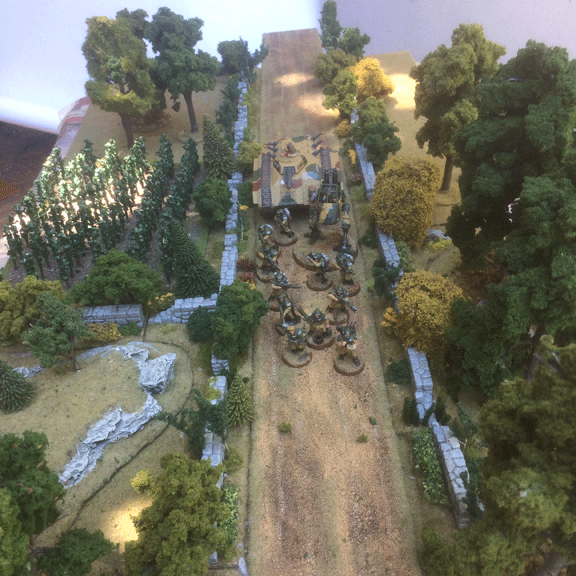
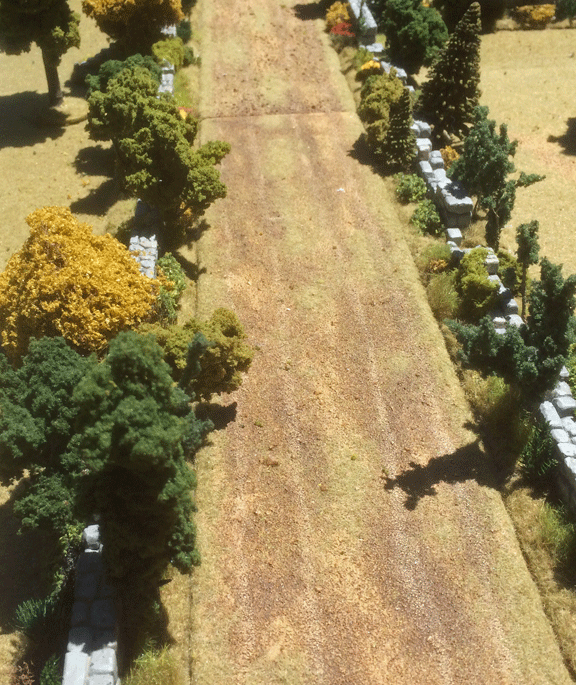
You really don't need roadside terrain when playing 40K. But I've set up some very nice battlefields over the years, and those are the games I enjoy the most. So, as I was thinking about a modest terrain project that would really "wow" my table, I thought about my roads. I sometimes line them with crop fields, but what I really wanted was to frame my roads. I wanted them to have the same overgrown fences and walls you so often see lining a country road.
As you can see from the photos, I did pretty well.
This is how I want a wargame table to look like. Yes, the extensive terrain isn't conducive to a regular 40K game, but not every battle is fought in open fields. Sometimes, you just want to fight on a "pretty" table.
The simplicity of the project makes any detailed how-to rather silly. But I'll share a few highlights:
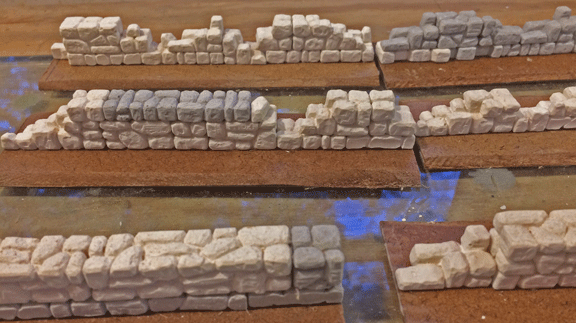
The bases are one-quarter-inch-thick MDF cut into six-inch-long bases. A rasp was used on the long edges of each base to slope the edges, so they blend better with my tabletop terrain tiles and don't leave a distracting vertical edge along each base..
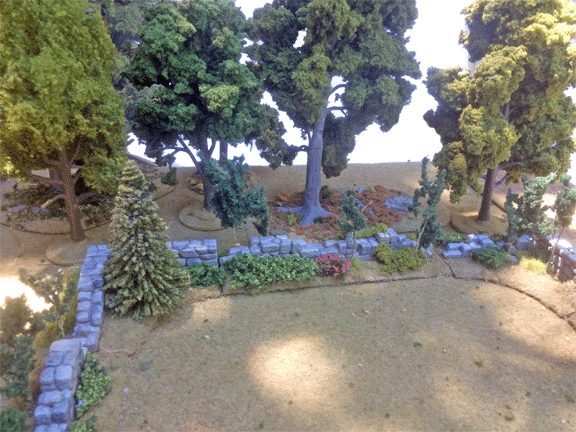
The stone walls are castings of Hirst Arts cobblestone molds. I used dental cement in the molds, and glued the castings together with tacky white glue. After the glue dried, I filled in any gaps between the castings with brushed-on dental cement.
After applying a gray spray primer over the based walls, I broke up the uniform color of the primer by touching up about half the stones with watered-down coats of various browns, yellows, and grays.. I wasn't too worried if the colors were a bit bright, as several watered-down coats of Games Workshop's Administratum Gray then toned down the colors and gave each stone just enough of the same gray to blend everything together.
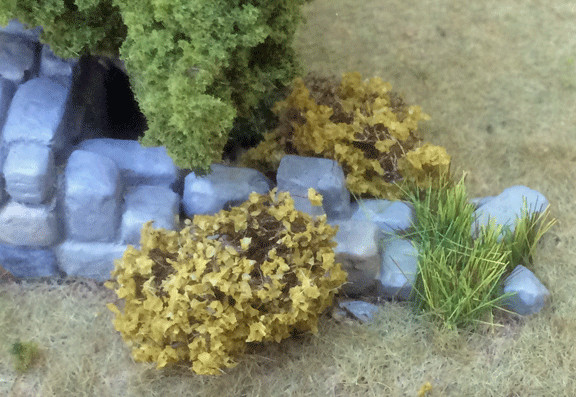
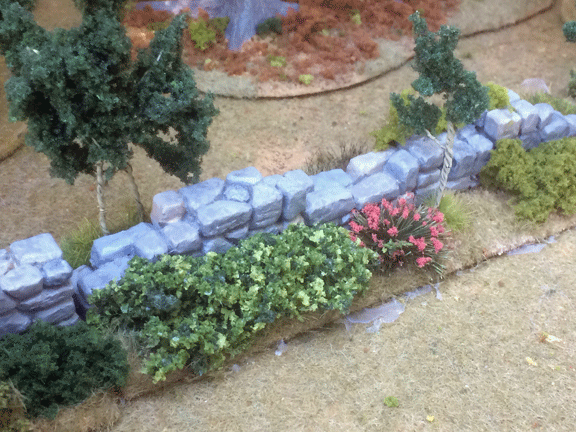
The fun part was adding the vegetation. I used about eight packages of model railroad trees, bushes, flowers, and vines to create the impression that the roadside walls were overgrown. I then applied a mix of Woodland Scenic fiber grass to any bare ground, so the bases would blend in with my tabletop tiles.
A spray of Woodland Scenics liquid white glue locked down any loose flocking, and a spray of Dull-Cote took away any sheen.
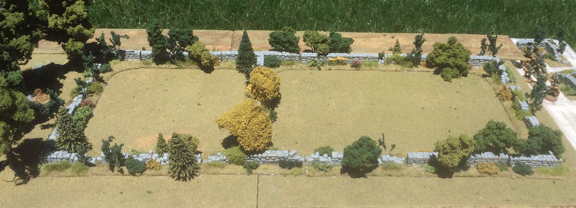
What I've completed is only the first stage of this project. Right now, I have completed about six feet of straight roadsenough to line both sides of a road for about three feet. Another configurationwith the help of four T-shaped walls and four corner pieceswill create two walled enclosures, connected by a shared wall, that covers about three feet by one foot.
Warhammer 40K blog
In total, I built 17 wall sections: nine straight sections, two T-shaped sections, and eight corners. The extra corners allow me to create two separate wall enclosuresyet another configuration.
I overlooked the need for gates into these enclosures, so, at some point, I'll start a second round of walls. These will consist entirely of straight sessions, so I can make enclosed fields largeror allow me to line my roads with a few more feet of walls. Some of these walls will have the wooden gates that are needed.
Next on my to-do list, however, is a series of fences. I'll build the same configurations as the stone wall set, although I'll remember this time to add some gates.
What I'm not sure about is what kind of fences to represent. Wood plank fences would have the most utility (useful in almost any historical period), but I may go for a more futuristic look, which could mean barbed wire (tangle wire in 40K terminology), steel piping, sheet metal, or . . . who knows what?