| Baranovich | 31 Dec 2019 5:41 p.m. PST |
After a long period of having all the various components in storage, I finally broke everything out and began my long-anticipated Tiger I winter diorama. The tank itself is an AFV Club early production Tiger. The crew and miscellaneous soldiers are Tamiya's Panzer Grenadier set and Verlinden's German soldiers in winter coats with fire barrel.
|
| Baranovich | 31 Dec 2019 5:51 p.m. PST |
My vision for the diorama is a subdued, quiet scene that is as much about the cold and winter as it is about the war. I gave the tank itself a typical white, sprayed winter camo scheme. I used three layers of sprays to achieve a whitish but still slightly gray color. For the crew and foot soldiers I used a generic gray Rustoleum gray primer. I used a few different Citadel Contrast colors on the clothing and flesh. I used Space Wolves Grey over their gray uniforms, Apothecary White to provide shading for the white winter suits, and finally Guilliman Flesh over a base coat of Wraithbone on the faces and hands.
For the diorama base I bought a generic wooden craft base from Michaels Crafts. I put a layer of acrylic modeling paste to create the groundwork, which I sanded down after it had dried.
|
| Baranovich | 31 Dec 2019 5:58 p.m. PST |
For the fire barrel I used a Vallejo silver on the outside and then I put a coat of Citadel Nuln Oil over it. I then used some enamel-based rust effects to weather the barrel a bit. For the burning coals in the barrel I used several layers of paint colors building up from dark red to bright yellow/off-white.
|
| Baranovich | 31 Dec 2019 6:08 p.m. PST |
I'm envision this to be a Tiger I somewhere on the Eastern Front any time from 1942-1945. I'm keeping the Tiger crew and the foot soldiers very generic, mostly in gray with just two of the crew in actual white, winter suits. I'm going to do a fair amount of weathering on the Tiger but not excessively so. I want the Tiger to have weathering more based on the cold and snow than I do necessarily dirt, mud, etc. I will however give the entire Tiger a layer of "road film/road grime" and then put other effects like paint chipping/peeling and rusted areas. These pictures and photos are the general look I'm trying to achieve:
|
Frederick  | 31 Dec 2019 7:32 p.m. PST |
Looking good! Anticipating greatly seeing the finished diorama! |
| korsun0 | 01 Jan 2020 5:22 a.m. PST |
This looks very interesting, I too will keep an eye out, cheers
Jon. |
 Choctaw Choctaw | 03 Jan 2020 9:41 a.m. PST |
Very nice so far. I'm in. |
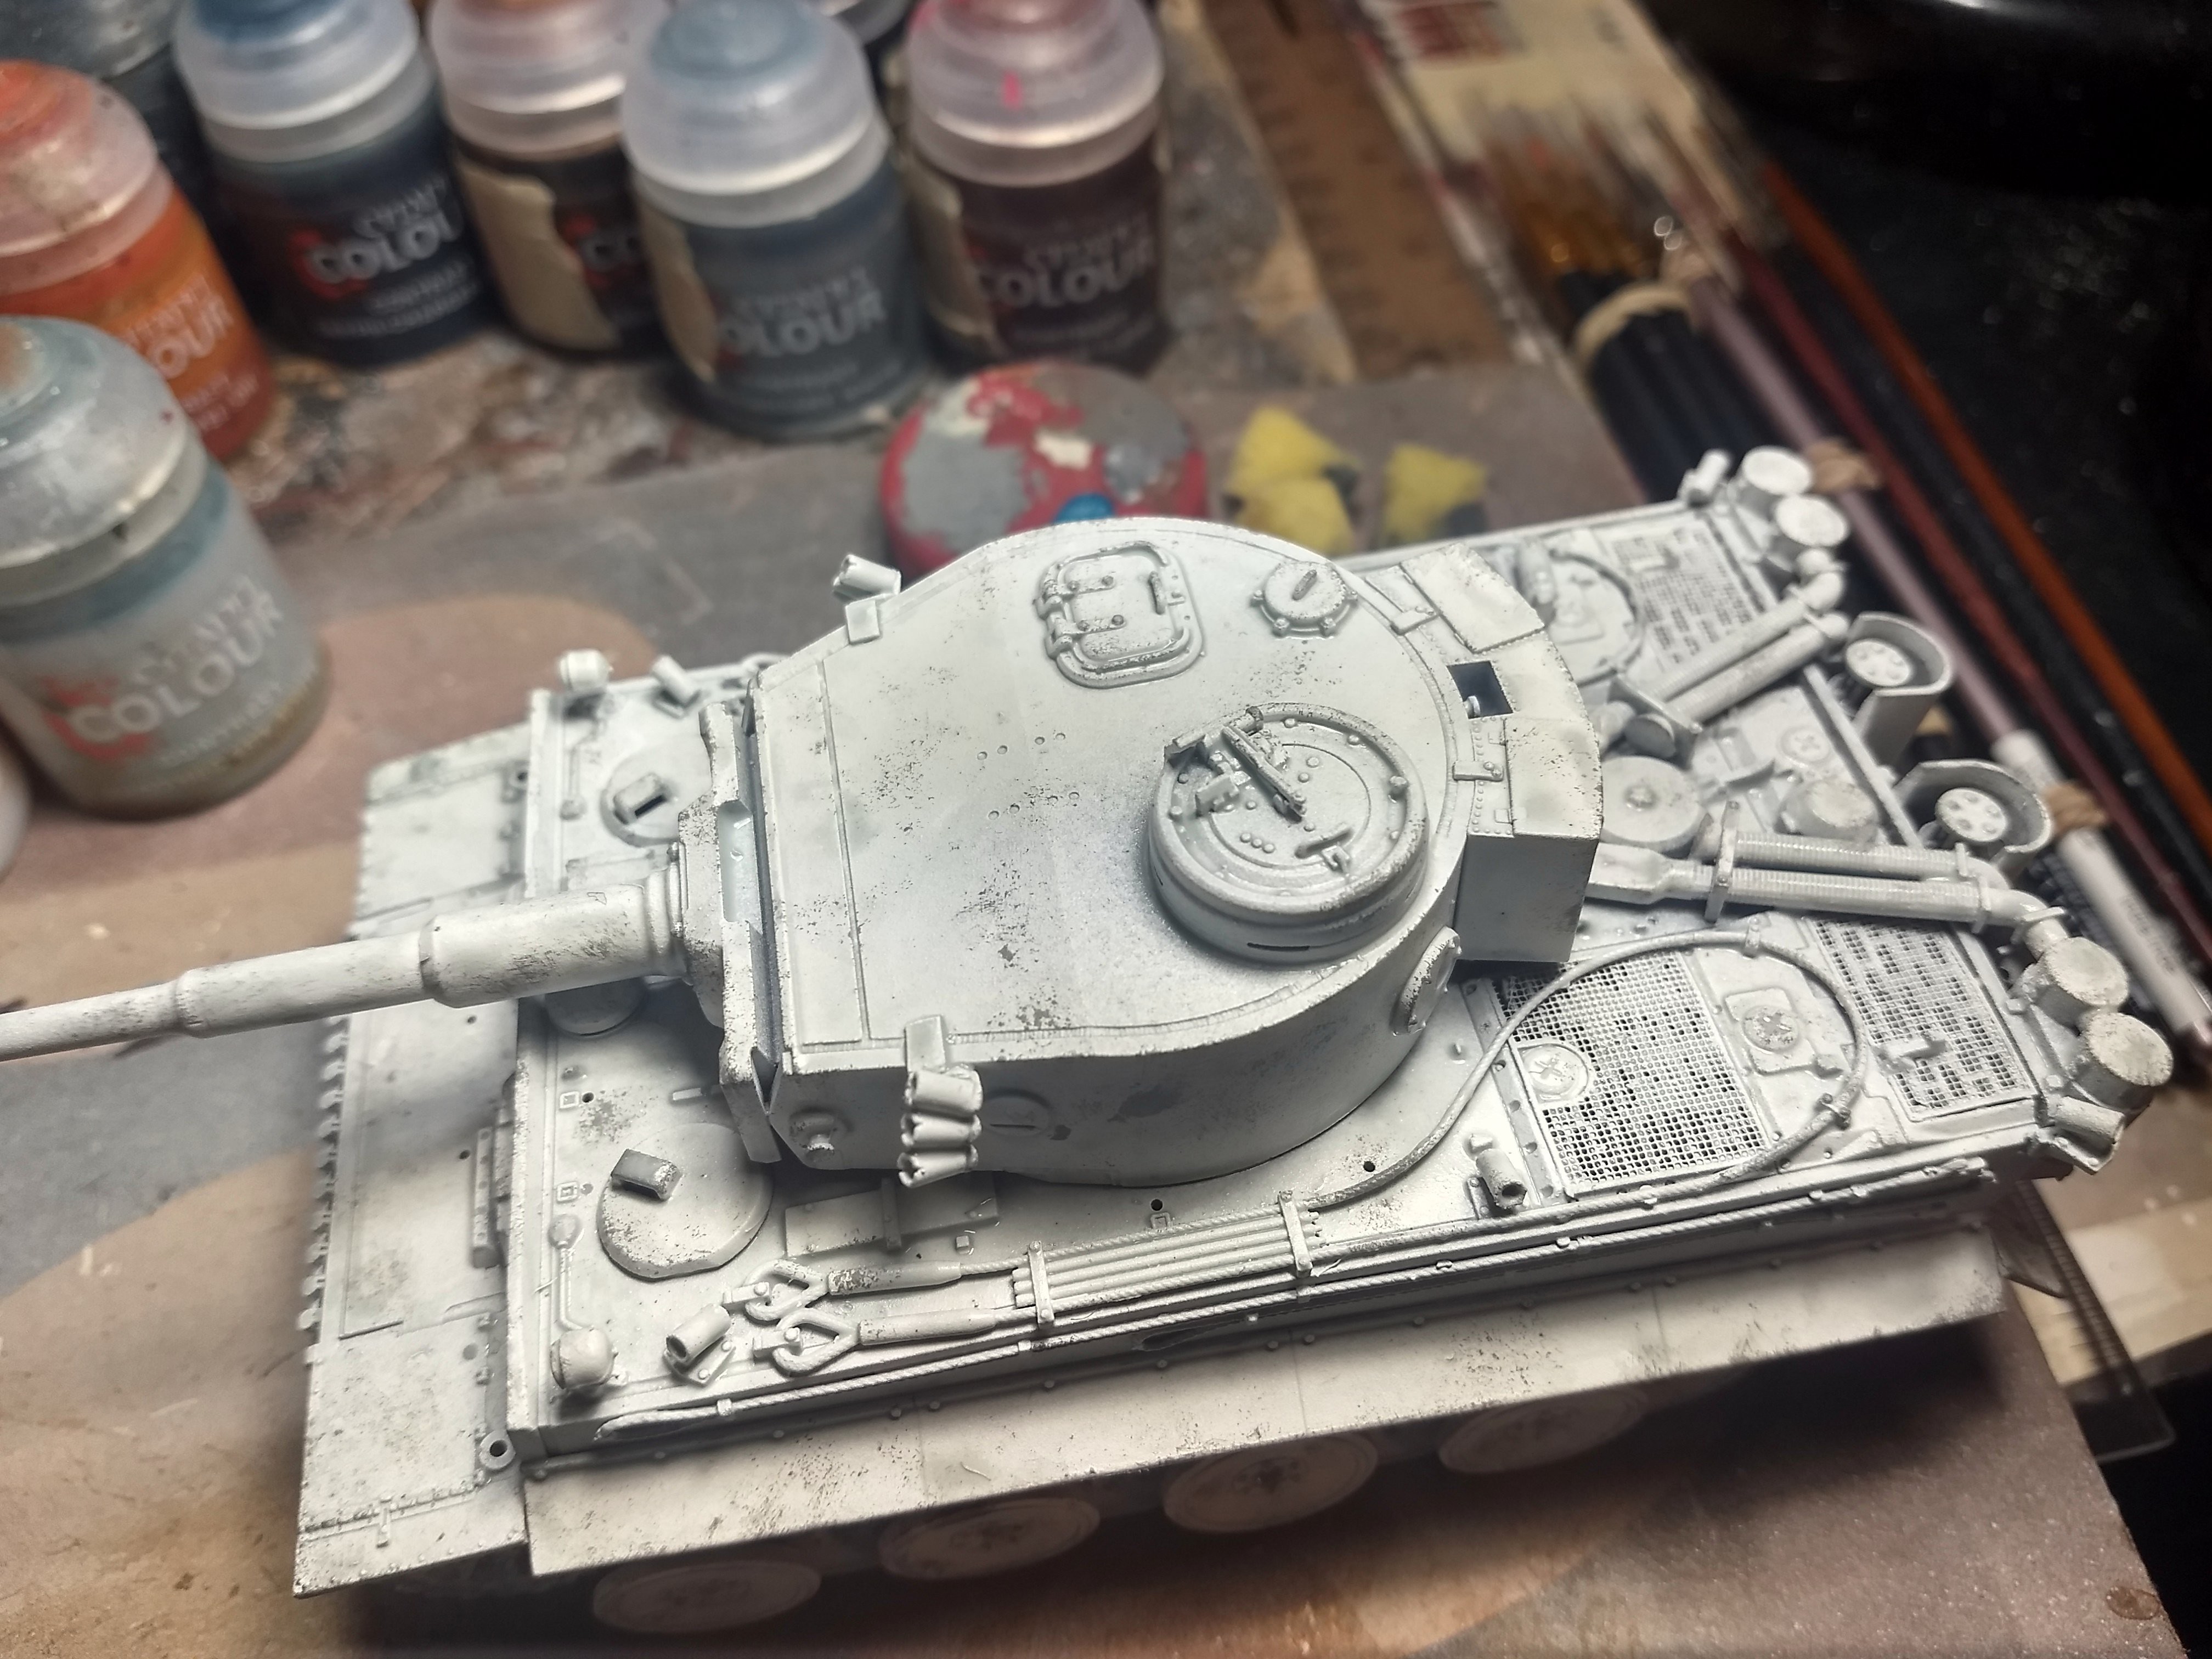
| Baranovich | 12 Jan 2020 4:59 p.m. PST |
Hello folks. Quite a bit of progress on the diorama. The crew and great coat soldiers are essentially done and waiting to be place in the diorama. Most of the work over the past week has been on the Tiger I itself. The very first step of weathering was to do some sponge stippling with some black paint to achieve some paint chipping:
|
| Baranovich | 12 Jan 2020 5:03 p.m. PST |
The second stage of weathering was done by turning yet again to Citadel Contrasts, which turned out to be very useful as a weathering product! Since the tank has a white camouflage coat It thought that it should actually get a wash of some shade of gray rather than a black or a brown. Apothecary White turned out to be the perfect shade for the white base coat:
|
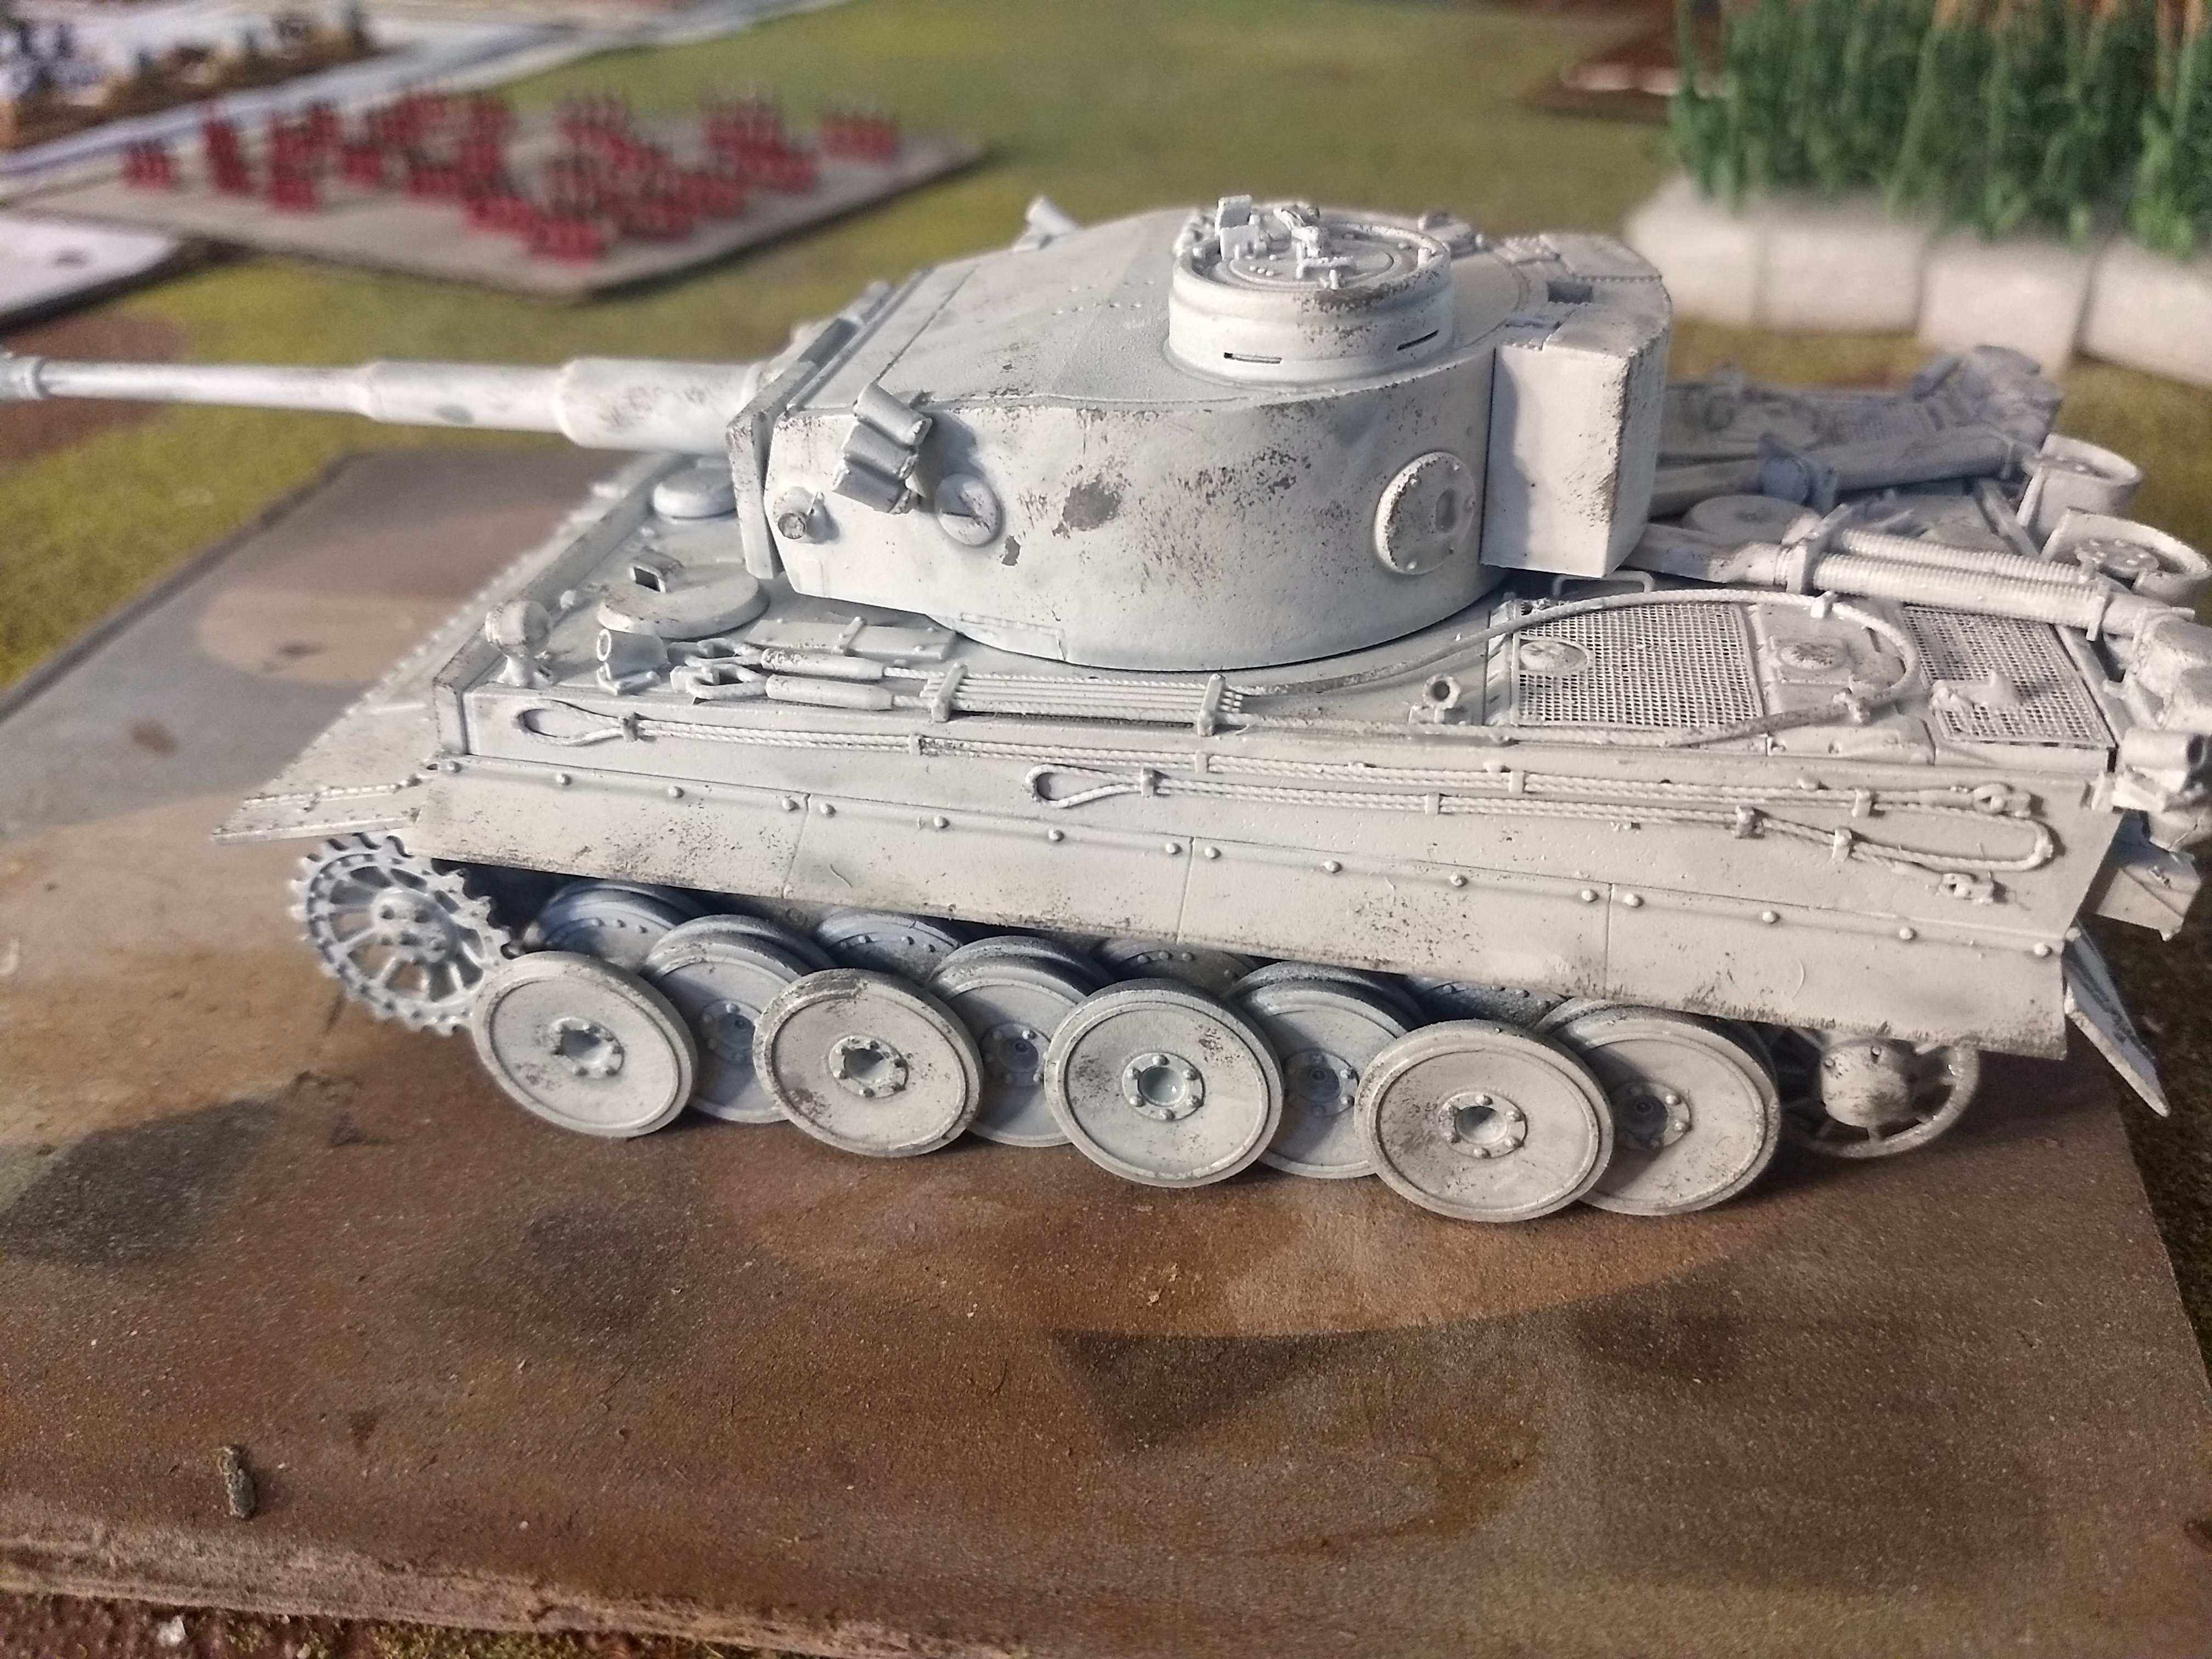
| Baranovich | 12 Jan 2020 5:07 p.m. PST |
For the tank tracks, I used a very simple approach. I simply base coated them with Citadel Corax White spray and then gave them a wash of Citadel Contrast Skeleton Bone. This gave them a really nice dirty metal feel. And since I would be adding rust, mud, snow effects over them all they needed was some kind of color to dull them down a bit:
|
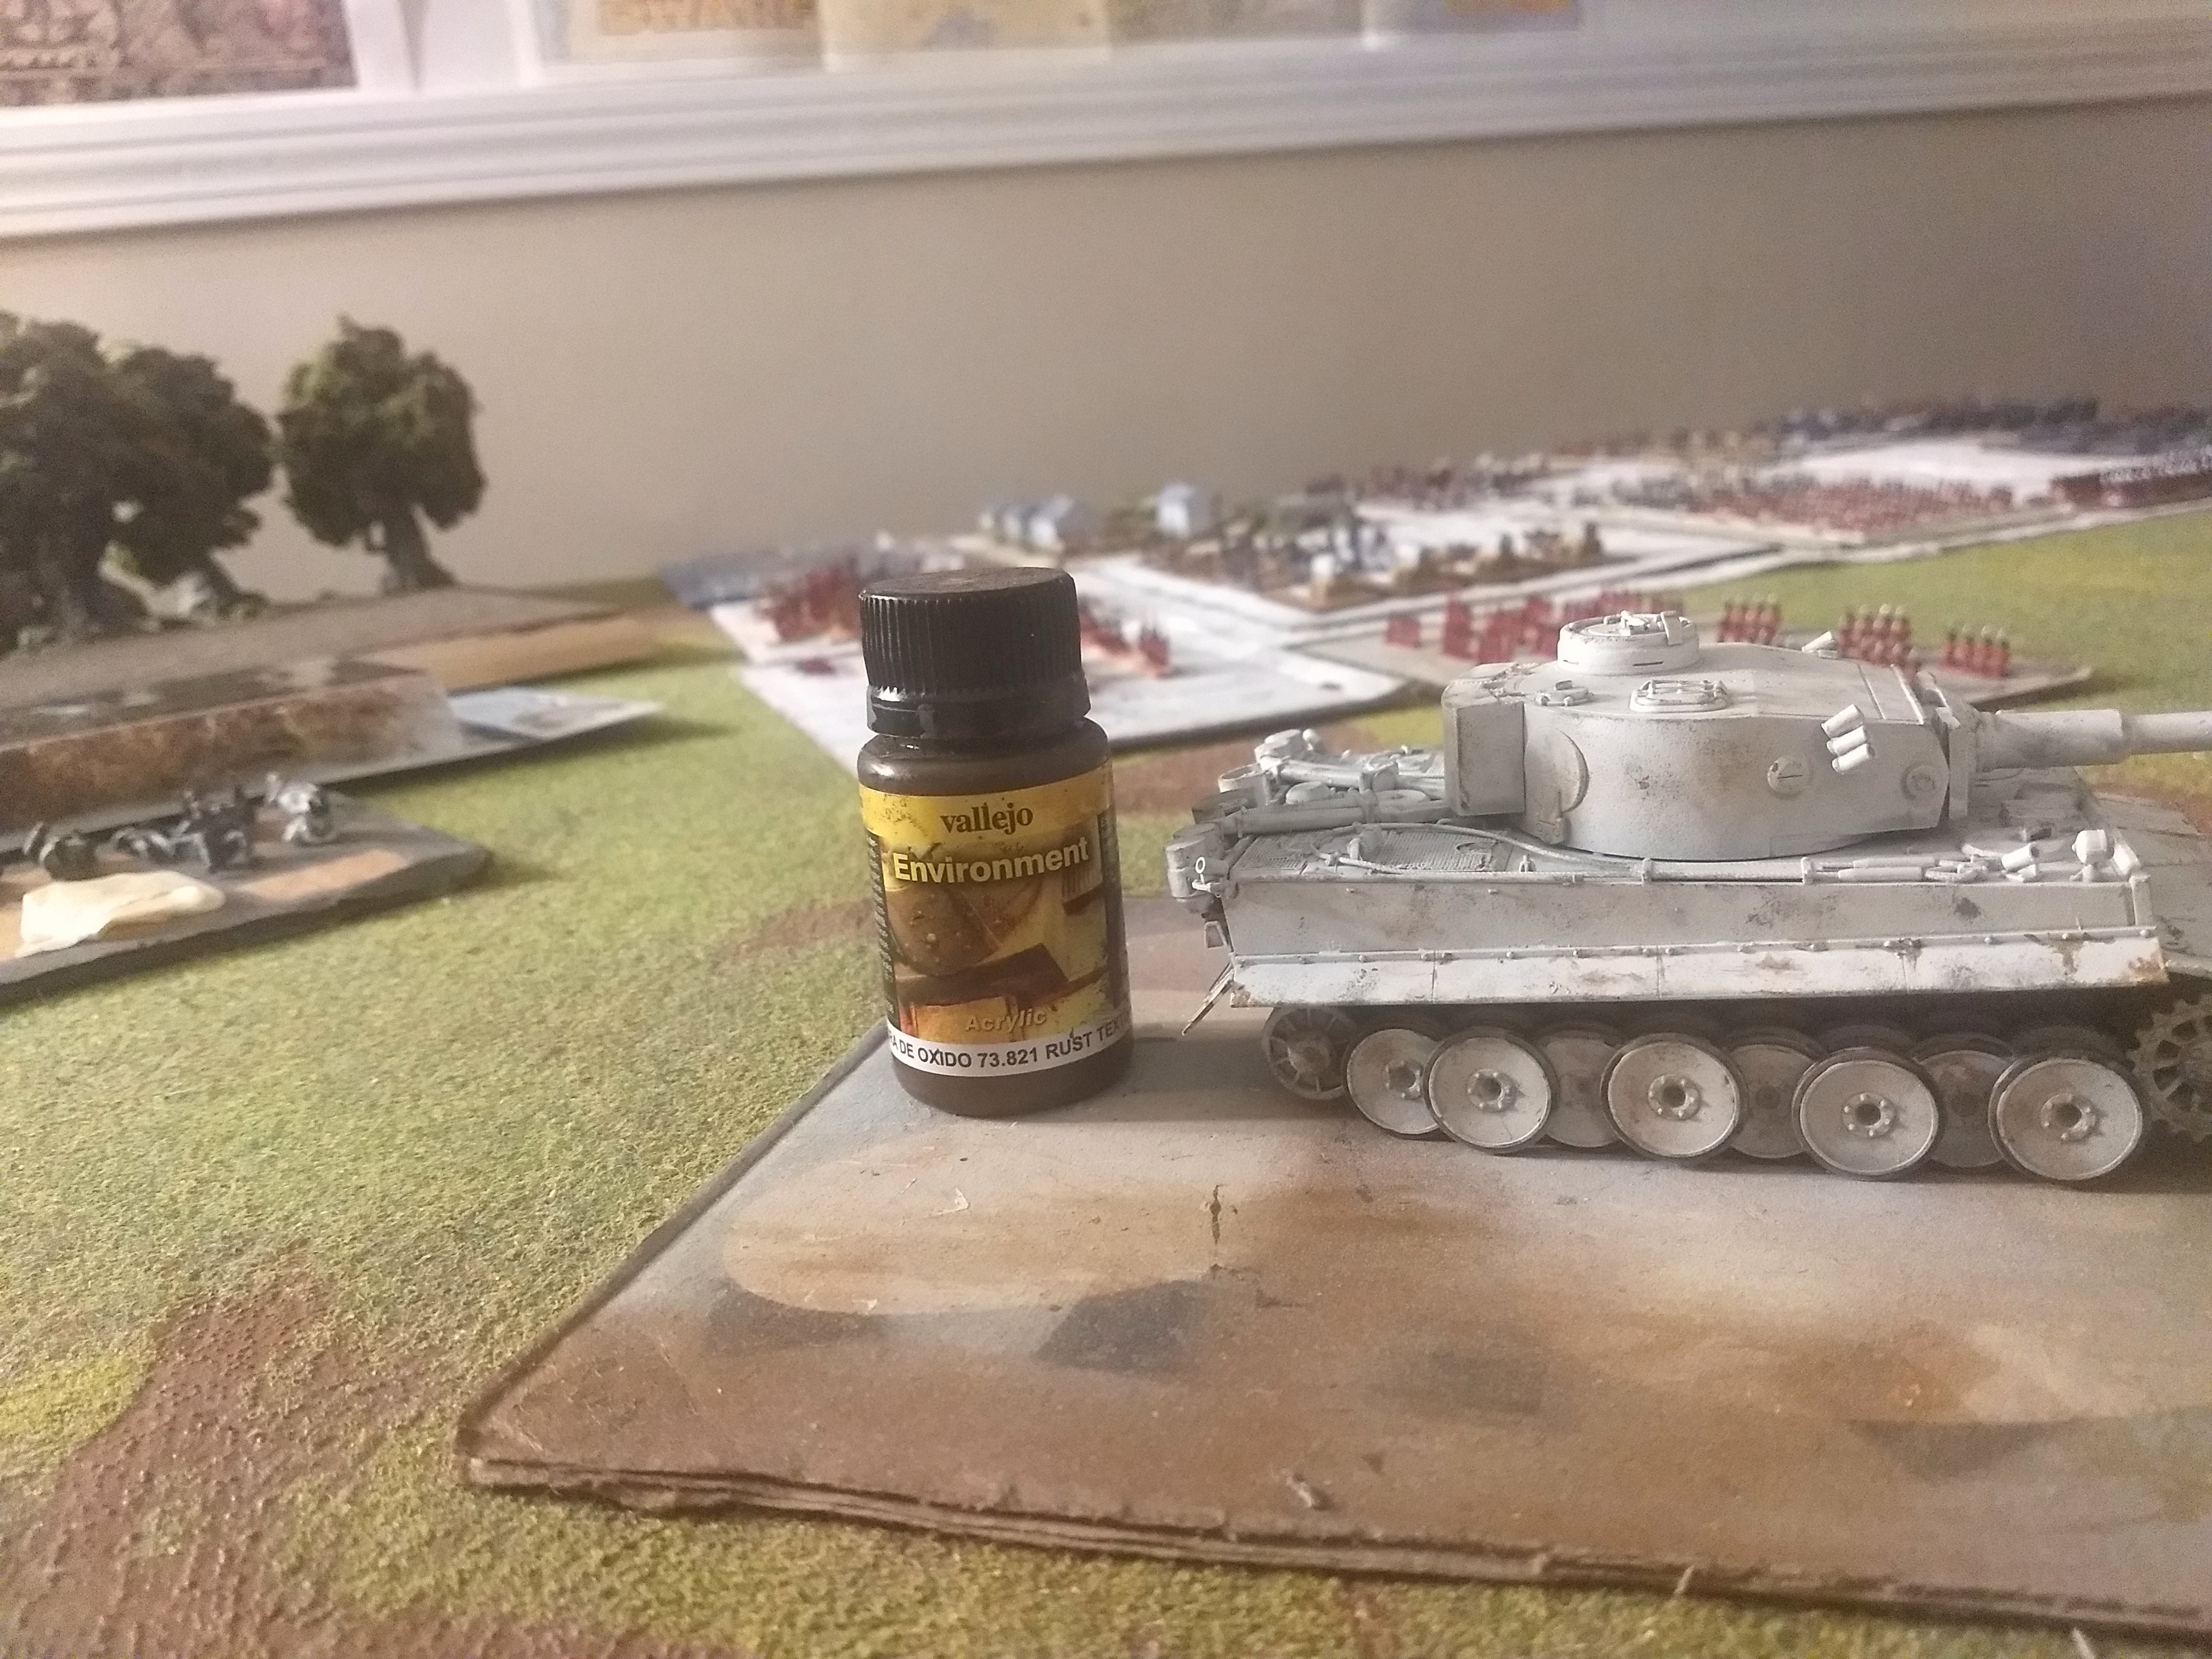
| Baranovich | 12 Jan 2020 5:10 p.m. PST |
For the third stage of weathering on the tank I used a Vallejo Environmental weathering product, their liquid rust. I discovered that it works best if you apply it to edges and seams and full strength with a very small brush, and then use a drybrush technique to spread it over larger areas where you want more subtle rust/rust staining effects:
|
| Baranovich | 12 Jan 2020 5:15 p.m. PST |
For the fourth stage of weathering on the Tiger included attaching the tracks to the wheels and then applying mud effects to the tracks and wheels, as well as the various metal guards around the tracks. For this I turned again to another Vallejo Environmental effects product, this time their Thick Mud:
|
| Baranovich | 12 Jan 2020 5:18 p.m. PST |
For the fifth stage of weathering on the Tiger I turned to the exhaust shields on the back of the tank. I used a simple flat black paint and did a dry brushing on the exhaust shields and surrounding area to create the blackish soot/exhaust residue effects:
|
| Baranovich | 12 Jan 2020 5:22 p.m. PST |
So that's my progress so far! I currently have some decals in the mail that should be here any day now. I decided on doing an earlier war scene. Since I chose to not do any Zimmerit on the tank it needed to be a Tiger from 41 or 42, or earlier 43. If I understood the research I did correctly, Zimmerit was not applied to any German vehicles until later 1943. So doing a scene near Leningrad in 42 Zimmerit would not need to be present on the tank. I decided on doing a scene near Leningrad during the winter of 42. |