"Changing Card for MDF Floor Plans..." Topic
13 Posts
All members in good standing are free to post here. Opinions expressed here are solely those of the posters, and have not been cleared with nor are they endorsed by The Miniatures Page.
Please remember that some of our members are children, and act appropriately.
For more information, see the TMP FAQ.
Back to the Dungeoncrawls Message Board
Areas of InterestFantasy
Featured Hobby News Article
Featured Link
Top-Rated Ruleset
Featured Showcase Article
Featured Workbench Article
Featured Profile Article The Editor is invited to tour the factory of Simtac, a U.S. manufacturer of figures in nearly all periods, scales, and genres.
Current Poll
|
| ROUWetPatchBehindTheSofa | 30 Sep 2019 10:22 p.m. PST |
Okay, thinking of ditching my old card dungeon floor plans for MDF, I'm also switching figure scale to 15mm. Never got around to sorting out the issue of bits of card just drifting across the table, and Lord help us if anyone sneezed, but does anyone have any suggestions for what to do with MDF pieces to minimize drift? Felt backing? I haven't come across any with interlocking connections or similar. |
 Sgt Slag Sgt Slag  | 01 Oct 2019 7:51 a.m. PST |
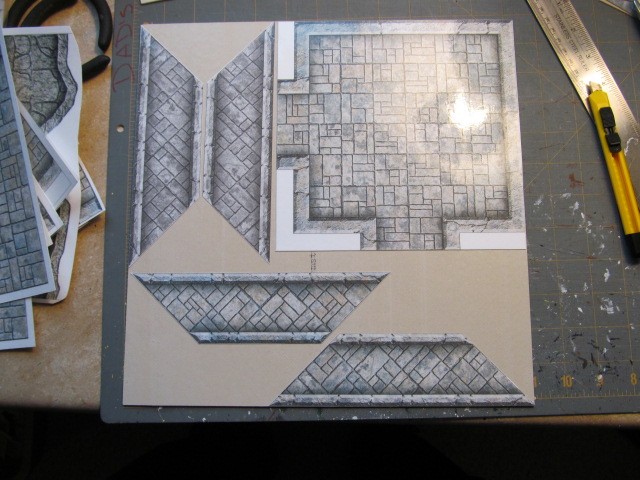
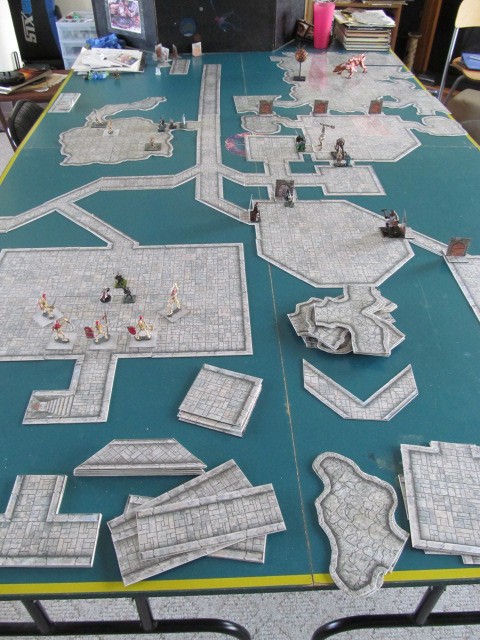
I use printable, 2-D dungeon artwork, printing it on regular paper, then attaching it to peel-n-stick vinyl floor tiles. I covered a piece of 2-foot-square plywood, with black felt. I use the plywood as a base, laying the vinyl pieces on top of it. The square-cut corners of the vinyl pieces keep them from drifting too much. The vinyl pieces are also quite hefty. It works well enough for me. Here is my blog, with photo's, scroll down to #4, around 40% down from the top of the page. The felt-covered plywood is not shown, as I came up with using that, after I did the original photo's for the blog. I wrapped the black felt over the edges of the plywood, then I stapled them to the bottom, with the felt gently stretched taut. Make several, keep them at hand, and deploy them onto your table, as needed. The dungeon pieces will not slide easily, once placed (the rough side of the MDF, see below, will not slide at all…).


Caveats to using vinyl: it is heavy! If you stack the pieces in a container, make sure you check its weight, to make sure it is not too heavy to lift and carry around! It curls, over time: simply flex it back into shape, before placing upon the tabletop. Covering the printed pages with Clear Contact Paper (translucent vinyl, really; for lining cupboards) makes it easy to mark with Crayola Markers (will wash off, months after being applied, without leaving a mark!). Durable, heavy, and inexpensive, at around $0.59 USD/square foot tile, at your local DIY stores -- get the thin, cheap tiles, without worrying about the pattern, which will be down, out of sight. The vinyl tiles cut easily, with utility scissors. The MDF, see below, needs to be cut with a Coping Saw, Jig Saw, Band Saw, or a Table Saw…
Alternatively, print them out on full-sheet label paper (Amazon product), apply them to the smooth side of the MDF, and then the rough side of the MDF will not slide so easily. You can use a felt base, as previously described, or use a large piece of fabric, as the rough side of the MDF will not slide easily across it. Cheers! |
| Biomckill | 02 Oct 2019 1:06 a.m. PST |
Well, it looks gorgeous… No idea if this can work, but I would print the dungeon floor in a vinyl adhesive label (A4 sheets available anywhere) and then cut, peel and stick to the MDF. That would reduce the weight. No idea about the cost. I have used a similar solution for a scratchmade monopoly game. You can also magnetize the MDF using that magnetic rubber used for fridge magnets, but you must use something on the table. In my case, it is the table itself, I use a thin metallic sheet on a board for playing. That avoids unexpected movements of the tiles. |
 Sgt Slag Sgt Slag  | 02 Oct 2019 5:39 a.m. PST |
Another option to consider… My Ping Pong Table, shown in the photo's above, taken more than five years ago, has been recovered with burgundy vinyl. The wooden table surface was roached, having been purchased back in 1994, and gamed upon, ever since. I bought burgundy vinyl 'fabric' from the local Jo Ann's Fabric Store. I had to seam it with carpet tape, but I then wrapped it over the edges, gently pulled it taut, then I stapled it in place, on the underside. The vinyl tile pieces do not slide easily across the vinyl table surface cover. The vinyl covering is durable, beautiful, and long-lasting. I've had it on the table for two years, so far, without issue. Makes the table look great, and it's waterproof, and easy to clean. Fabric stores have many colors, and textures, to choose from. Not terribly expensive to cover a table with it, and it is easy to do. Cheers! |
| catavar | 02 Oct 2019 10:14 a.m. PST |
|
| ROUWetPatchBehindTheSofa | 04 Oct 2019 1:14 p.m. PST |
Thanks very interesting idea and good looking set up. Vinyl is nice and weighty and will stay put. Vinyl seems to be quite a popular material for wargamers. I remember someone awhile ago someone mentioned finding vinyl with a hex pattern on a black background which made a cheap space gaming mat! |
| ROUWetPatchBehindTheSofa | 10 Oct 2019 12:06 p.m. PST |
Went with MDF, mainly for the immediate convenience of not having to do much myself. But does anyone have any painting tips for MDF dungeon tiles? All the YouTube tutorials seem to be for fancy cast 3D tiles and the like. |
| DungeonDelver | 16 Oct 2019 5:16 p.m. PST |
For sticking dungeon tiles in place, I bought a large piece of very thin sheet steel, primed it with gray auto primer and a flat sealer- and then used the craft store thin sheet magnets on my tiles. Once set up, these stay in place despite bumps, vigorous dice rolling, phones dropped while taking pictures etc. Robust. |
 Sgt Slag Sgt Slag  | 18 Oct 2019 7:01 a.m. PST |
ROUWetPatchBehindTheSofa, do you want to make 2-D, or 3-D? MDF will adhere to MDF, as long as there is no paint, or other material to interfere with the Wood Glue. I took MDF squares, glued them upright to a larger MDF base, to form a "T". I then applied 2-D dungeon tiles from Fat Dragaon Games (FDG), printed on full-sheet label paper. I put their door images on the upright MDF pieces, and a piece of dungeon floor on the floor pieces. This gives me upright, 2.75-D doors, to place on top of my 2-D dungeon tiles. Little muss, little fuss, and zero painting! The FDG dungeon tiles can be printed, and applied to MDF, as a substructure/base, quite easily. Print on full-sheet label paper, cut to size, peel, and stick to the smooth side of the MDF. With the MDF that has one smooth, and one rough side, the rough side will stick, rather well, to any cloth fabric it is laid upon. There are numerous 2-D dungeon tile companies to choose from. I am a big fan of FDG, so that is what I shared. They are easy to use, quick to deploy, and relatively inexpensive to make. Cheers! |
 Sgt Slag Sgt Slag  | 18 Oct 2019 7:12 a.m. PST |
If you want full 3-D, how about printing FDG's 3-D cardstock dungeon on label paper, applying it to MDF, and gluing the MDF to form your dungeon sections, and rooms? Make sure to leave some bare MDF along the edges to be glued (MDF-edge to MDF-edge, using quality Wood Glue). ONly use Wood Glue (much stronger than White Glue of any type…). This will allow you to simply cut the MDF to the required sizes, for each piece/section. Print the designs, apply them, then glue the wall pieces to the floor pieces. Wood Glue will dry fully, within 24-hours (can be handled after 15 minutes), so construction will not involve long delays. AND NO PAINTING REQUIRED! Did I mention, there is no painting, with this method?… Cheers! |
 Sgt Slag Sgt Slag  | 18 Oct 2019 7:20 a.m. PST |
I plan on trying the label-to-MDF construction techniques this Winter, to build some durable castle models, using the original CastleWorks model, which launched Denny Unger's short career, as the leading cardstock modeling company, WorldWorks. It is dated, and old, but still a decent model. I plan on printing the label sheets in my color laser printer. This will give me a non-gray colored castle, as my FDG castle is mostly gray. It should be a lot of fun to build a castle with this technique. I have already used this approach to build FDG castles, wall sections, etc., using 3mm cardboard, in lieu of MDF. It is lighter, but it also tends to warp. I had to glue in balsa wood square dowels, to reinforce the wall sections, to eliminate warping. They're fairly hefty, and stable on the table, but MDF would carry much greater weight, and much greater durability, without any warping, so long as I keep them dry! Happy crafting! Cheers! |
| ROUWetPatchBehindTheSofa | 21 Oct 2019 9:09 a.m. PST |
I've gone 2D, mainly for convenience of storage, and that with 3D I foresee incidents of cack-handedness. I'm going to go paint initially as the set has some incised detail and I can slip it into my terrain painting production line. But I've a shiney new printer sitting next to me so if looks pants I'll give the labelling technique ago. Already ahead on the glue – personally I swear by Evo-Stick wood glue (interior FWIW) for damn near everything! Once bought cheap DIY PVA from a Pound store (cf Dollar store) in a fit of misplaced economising. The stuff is frankly terrible and only gets wheeled out when I need to sand big bases or chunks of terrain. |
 Sgt Slag Sgt Slag  | 22 Oct 2019 5:22 a.m. PST |
I use 3-D for my 2e BattleSystem games. For my 2e AD&D games, I use a Chessex Battlemat. It is just too convenient! I pull out some 3-D models, occasionally, and put them on top of my Battlemat, to jazz it up, but otherwise, I go with the mat and Crayola markers. I pull out the printed, vinyl floor tiles for the occasional 2e BattleSystem Skirmish games. BS Skirmish is a miniatures game with a thin veneer of RPG over the top. It is a really fun game, but it is definitely a miniatures game, foremost. It plays fast, as combat is quite streamlined from the RPG. For these games, terrain is a must, preferably full 3-D, but 2.75-D works almost as well. I've pretty much given up on regular White (PVA) Glue. The yellow Wood (PVA) Glue is very much stronger, and thicker. I use the Wood Glue to secure sand mixtures on my bases, as well. The White Glue is just not worthwhile, IMO. Be sure to come back and share your work with the label techniques! Cheers! |
|

