Help support TMP


"Building a dwarf airship out of bits and sheer will" Topic


17 Posts

All members in good standing are free to post here. Opinions expressed here are solely those of the posters, and have not been cleared with nor are they endorsed by The Miniatures Page.

Please remember that some of our members are children, and act appropriately.

For more information, see the TMP FAQ.


Back to the Warhammer Message Board

Back to the 28mm Fantasy Message Board


Areas of Interest

Fantasy

Featured Hobby News Article


Featured Link


Featured Ruleset


Featured Showcase Article

Vendel's Mountain Troll

Vendel's big Mountain Troll, as painted by Adam of Pro Painted Miniatures.


Featured Profile Article

Plastic Skulls

Need skulls for your battlefield?


Current Poll


Featured Book Review


Featured Movie Review


1,773 hits since 30 Sep 2019
©1994-2024 Bill Armintrout
Comments or corrections?

Baranovich30 Sep 2019 11:34 a.m. PST

I was lacking only one model for my 28mm fantasy dwarf army and it was something that I had wanted for a long, long time but always assumed I would eventually have to resort to buying it outright.

But this past week, after finishing off the last of the other special units and characters for my dwarves I wondered if I had indeed already possessed all the components and bits I needed to make my own dwarf airship.

This is where my life-long OCD paid off in gold! I just might be the neatest modeler and painter on the planet. I am super ultra-organized and my bits are no exception. After building several fantasy armies back in 2017 and a 40k army in 2018 I carefully labelled and packed away in boxes dozens of leftover sprues of stuff, mostly GW bits but also quite a few resin bits and metal components from various other purchases.

Sure enough I had hundreds upon hundreds of left over GW dwarf bits. And not just heads and weapons. Whole unused cannon options, banners, shields, an observatory telescope, a field observation telescope, spare ammunition shells, etc. Suddenly I realized that a dwarf airship had been packed away in my closet all along, but was just waiting to be put together!

There was one major component that I honestly can't call a random "bit". I DID purchase the ship hull and decks specifically back in 2015 as a complete kit. I originally intended to build it and use it as a generic terrain piece on rivers and lakes for my fantasy games. But I never got around to building it. It was Grand Manner's Roman merchant boat. So I took the hull from that kit and instantly had the bottom portion of my dwarf airship.

But ultimately I purchased nothing new for this project, it was all old purchases and utilizing bits from previously purchased stuff.

The one major component for which I had no specific "bit" and that I would have to make myself from scratch was the actual balloon itself. I chose a simple foam craft egg that was close to the size I needed.

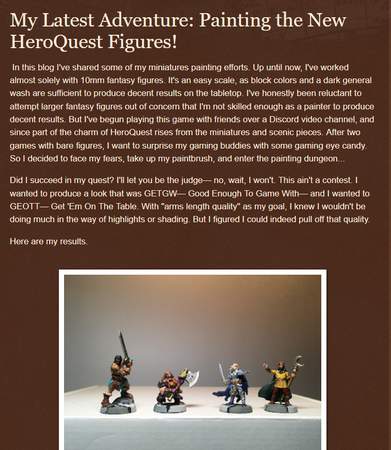
So I laid out all the bits I had that I thought would work for the project:

After looking at the foam egg I realized it was a bit too small for the overall scale so I resorted to using some leftover cutouts from some old miniature foam tray inserts. I glued them to the outside of the egg until I had sufficiently increased it's overall size:

With the balloon now a sufficient size I chose an old technique for covering the balloon in a proper texture. I used paper towels soaked in PVA and simply laid it over the surface of the egg shape:

Now with the egg looking more like a canvas balloon I need to make some tail fins. I cut some shapes out of ordinary cardboard and sealed off the edges with masking tape.

I then had to work out a way to actually attach the whole model to a base. I made two placement holes out of Green Stuff and drilled two holes in the bottom of the hull. I used two pieces of sturdy copper rod to pin the model to the base. The game The 9th Age requires the "Grudge Buster" model to be on a 50mm x 100mm which at first seemed VERY small. I was doubtful as to whether I could balance it on a base so small. So I decided to add as much weight to the base as possible to stabilize it. I use a bunch of craft glass and just glued it in piles underneath the ship:

End of Part 1!…

Baranovich30 Sep 2019 11:48 a.m. PST

Part 2 of the dwarf airship project!

With the hull securely fastened and stabilized on the base and with the base properly weighted down I turned back to all the various dwarf components I had picked out.

I had the entire organ gun option from the old Warhammer dwarf cannon boxed set. This was perfect for the ship's main gun, which in The 9th Age is a "Forge Repeater".

I also had the old observatory lens and arm from the old GW Skullvane Manse kit. I turned it vertically and realized that it looked exactly like some kind of crazy steam engine! And so these two components found homes on the deck of the ship:

The next thing I did was to seal the tail fins with PVA glue to secure the masking tape:

And now at last the model was beginning to come together! I had the hull secured to the base, the basic structure of the balloon worked out, and the first major components glued to the ship's deck itself. I first painted the entire ship hull and deck with brown Citadel Contrast followed by a drybrush highlight. I painted the engine in a copper base color followed by a series of brown washes to weather it. The anchor was painted silver with some rust effects added over it:

The tavern sign was a left over one from a set I got several years ago from The Miniature Building Authority. The beer mug shape was perfect for embellishing a dwarf airship!

Baranovich30 Sep 2019 11:56 a.m. PST

Part 3!

I painted all the craft glass in a gray craft paint followed by a brown wash, and then finally a lighter gray drybrush. I then finished off the scenic base with some clumps of foliage.

With the painting well under way, I turned to painting all of the numerous smaller bits, including the ship's gun and banner, etc:

I also had a leftover resin bird's nest and small birds which I decided to add to the scenic base:

I had hundreds of dwarf shield bits which I decided would make an excellent railing embellishment on both sides of the ship:

With all the bits finally painted, I turned to getting the balloon painted. I did a two-color scheme for the tail fins. I painted the balloon bag itself in a tan craft paint color followed by a white drybrush. I also added one of the dwarf banner bits to the nose of the balloon:

And finally at long last, everything was painted! And now it was just a matter of getting all the bits properly positioned on the ship's decks and figuring out a way to add the final details to the balloon and tethering the ship's hull to the balloon itself:

End of Part 3!

Baranovich30 Sep 2019 12:06 p.m. PST

Part 4!

I started adding all the bits to the ship. I glued the shields to both sides of the railings, the figurehead to the front of the ship, the telescope to the front deck, the main gun to the front of the ship, the banner behind the engine, and the crates and barrels in a pile in the center of the deck:

I added another banner bit to the back of the ship, lashed the tools to the outside of the railing as well as the ship's melee weapons. I glued them to the outside of the ship to represent the idea that it was a very cramped vessel and that every bit of space had to be utilized. So out of necessity some things had to be lashed to the outside to save space on the decks themselves:

I added the bird's nest to one of the rocky outcroppings:

End of Part 4…

Baranovich30 Sep 2019 12:14 p.m. PST

Part 5!

So finally all the various numerous bits were glued in place and the ship portion of the airship was essentially done!

The next major step was adding ropes to the outside of the balloon, and finally adding tethers to attach the balloon to the ship.

I turned to craft hemp cord which was the perfect scale for 28mm:

I used masking tape to hold the ropes in position so they stayed straight while I glued them down.

The very last thing I had to work out were the ship's balloon tethers. At first I was planning to use thick copper rod for the tethers as I was planning to have them bear the weight of the balloon and fully support it. However in looking at the thicker rod it looked too thick and artificial and not like proper thin cables. So I had to switch over to a thinner copper rod.

However in doing so the thinner copper rod could not hold up the weight of the balloon. So I added one additional support. I took a piece of a wooden dowel, sharpened one end and then cut a hole right behind the bottom fin. I pushed and twisted the dowel up into the balloon until there was a short section still sticking out. I drilled a hole in the bottom of the dowel as well as the top of the engine. I took two pieces of copper rod and pinned both components together. I then simply painted the wooden dowel in a matching copper color of the engine. With the additional support of the dowel being directly glued to the top of the engine the balloon was fully supported!

In the end, the tethers didn't need to support any weight of the balloon and were more or less just glued in place. The thin copper rod worked really well to represent cable tethers.

And…at long last my dream of making my own dwarf airship was realized!

This project really taught me a lot about the importance of saving old model bits, persevering and thinking through each individual phase of the project, and finishing one thing first before moving on the next thing. Overall I'm pretty proud of this model and I'm even more pleased that I was able to make this myself out of things that I already had stored away for years in the back of the closet!

I hope this project inspires you to dig into your own bits collection and do your own bit-bashing projects!

Raynman Supporting Member of TMP30 Sep 2019 12:21 p.m. PST

Very nice!

Stryderg Supporting Member of TMP30 Sep 2019 12:38 p.m. PST

WOW!

sillypoint30 Sep 2019 1:37 p.m. PST

Nice work! Thanks for taking the time to post the pictures here.

Night Owl III30 Sep 2019 3:48 p.m. PST

I honestly wasn't sold on the paper towel method in the early pics but I'll be darned if that didn't turn out fantastic. Well done!

Ragbones30 Sep 2019 4:03 p.m. PST

That's fantastic! thumbs up

Xintao30 Sep 2019 6:44 p.m. PST

Very cool

Asteroid X30 Sep 2019 7:41 p.m. PST

Pretty cool.

And a bit cheaper than buying a new model, I'd wager.

The H Man01 Oct 2019 6:55 a.m. PST

You know what they say. Where there's a Will there's a Riker.

The Angry Piper01 Oct 2019 8:03 a.m. PST

Dude, you rock! This looks amazing!

Personal logo Sgt Slag Supporting Member of TMP01 Oct 2019 9:46 a.m. PST

Looks superb! Well done! Cheers!

robert piepenbrink Supporting Member of TMP01 Oct 2019 3:36 p.m. PST

First rate work! Go forth and conquer!

Borderguy19011 Nov 2019 9:47 p.m. PST

Very cool!

Sorry - only verified members can post on the forums.