"Part 3 1/72 group build " Topic
7 Posts
All members in good standing are free to post here. Opinions expressed here are solely those of the posters, and have not been cleared with nor are they endorsed by The Miniatures Page.
Please do not post offers to buy and sell on the main forum.
For more information, see the TMP FAQ.
Back to the WWII Painting Guides Message Board Back to the Blogs of War Message Board Back to the WWII Land Gallery Message Board Back to the Wargaming in Australia Message Board Back to the 20mm WWII Message Board
Areas of InterestGeneral
World War Two on the Land
Featured Hobby News Article
Featured Link
Top-Rated Ruleset
Featured Showcase Article How to store and transport an army of giant apes?
Featured Profile Article Report from Day Two!
Featured Movie Review
|
Please sign in to your membership account, or, if you are not yet a member, please sign up for your free membership account.
| Gunner Dunbar | 12 Jun 2019 2:19 a.m. PST |
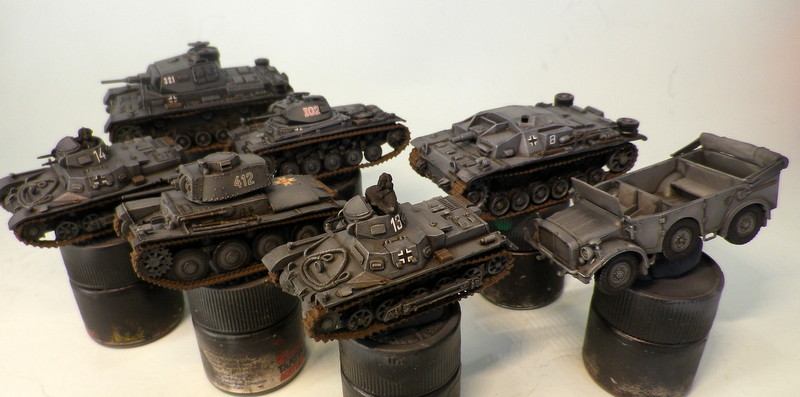
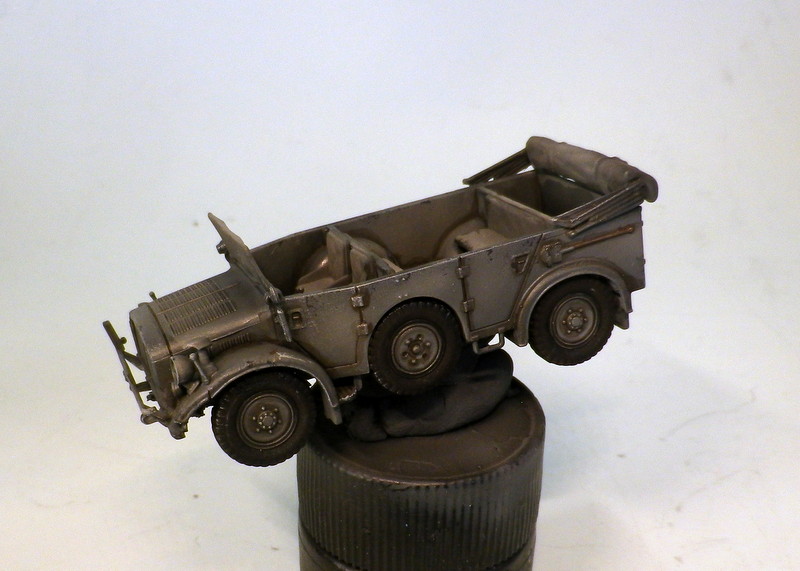
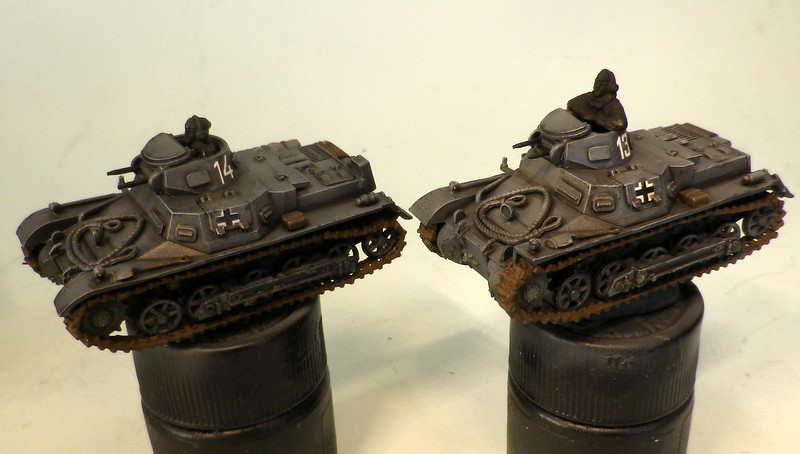
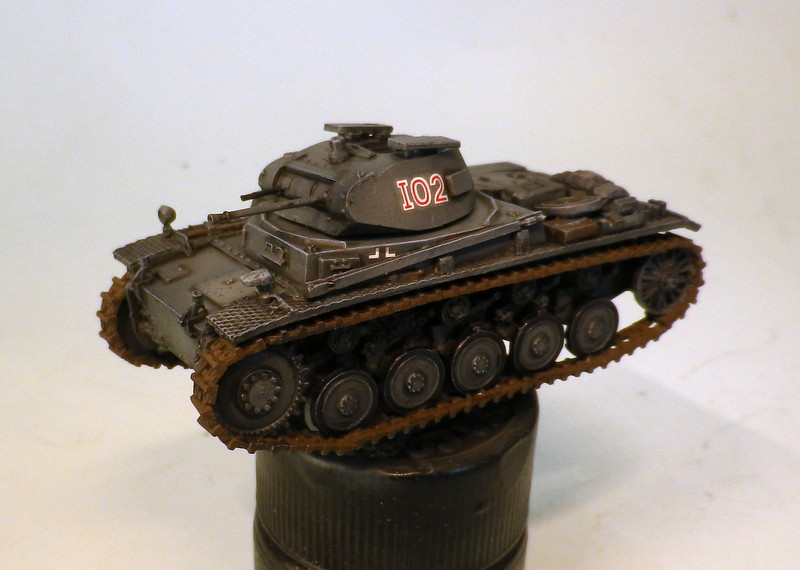
Hi guys Part 3 of the group build, previous steps taken.
1) Spray a dark grey base coat, Humbrol Pz grey with some black.
2) Mid grey sprayed, aiming for all the centres of panels, this leaves a nice shaded look.
4) Chipping added using dark grey and the sponge technique, trying to not overdo this step.
5) gave 4 of the vehicles a blue filter, and the other 3 a khaki filter.
6) paint the rubber wheels black, tracks and tools vellajo leather brown, you could use chocolate brown, but theres a little more red in the leather brown, which feels right to me.
7) a coat of gloss varnish.
8) add decals.
9) black pin wash. Latest steps 10) second brown pin wash, deliberately more messy then the black pin wash
11) Mat coat applied
12) light highlight dry brush Breaking out the oil paints to start the weathering process.
More pics here
gunnerswargamming.blogspot.com/2019/06/172-group-build-part-3.html
|
| Torquemada | 12 Jun 2019 2:45 a.m. PST |
Stop this madness! You're making me want to start collecting early war! |
| Fish | 12 Jun 2019 4:34 a.m. PST |
Very nice!
I'd make the wheels and lower portions a bit more messy and dirty though… |
| Gunner Dunbar | 12 Jun 2019 5:15 a.m. PST |
Yeah, this is a step by step tutorial, they are not finished. |
79thPA  | 12 Jun 2019 6:36 a.m. PST |
Great job. They looked finished to me. |
 Yellow Admiral Yellow Admiral | 12 Jun 2019 8:43 a.m. PST |
The results are already amazing, and they aren't even done yet…? - Ix |
| C M DODSON | 12 Jun 2019 11:51 p.m. PST |
There is a real feel' to these models that oozes realism. Fantastic work . Best wishes, Chris |
|

 Duty")