Howdy,
On Saturday evening at Historicon, a refight of the Battle of Port Republic was played with 15mm figures, using Volley & Bayonet. Battalion scale was used, so individual stands represent regiments and batteries.
The scenario will be No. 5 of 10 in the forthcoming scenario book: A Storm in the Valley 1862 The new supplement will be a scenario book for Volley & Bayonet Road to Glory (V&B 2nd edition). It covers battles of Jackson's 1862 Valley Campaign and battles on the Peninsula.
SITUATION: The day after Cross Keys, Jackson was faced with a tremendous dilemma. Fremont's divisions remained west of the Shenandoah River, with Shields' division east of the river. The river was in flood, and only crossable on the Port Republic bridges or to the north near Conrad's Store. In essence, Jackson had three options: (1) Attack Fremont, (2) Attack Shields, or (3) Retreat. If Jackson defeated Fremont, then Fremont could easily retreat to the Valley Turnpike, with Shields remaining to threaten Jackson's line of communications. If Jackson defeated Shields, then Shields would have to retreat up the poor road to Conrad's Store, and Fremont would be blocked by the river. Moreover, while Jackson did not know Shields strength, he believed Shields' command was the lesser force. The remaining option was to retreat into Brown's Gap.
Jackson attacked Shields' command. He ordered Trimble's and Patton's brigades to delay Fremont, and marched his other five brigades to the attack. Shields had not concentrated his force to attack Port Republic and only two of Shields' four brigades were on hand. Shields and the remainder of his command were to the north, near Conrad's Store. Yet, Jackson had also not massed his command for the attack and the Confederate forces were divided by the river. A piecemeal meeting engagement was fought, as Jackson's forces struggled to get into the fight. Moreover, as on the day prior, Fremont did not press his attack and did not arrive on the west bank until after The Battle of Port Republic had been decided, and Shields' command defeated.
After the battle, Shields was ordered to return to Fredericksburg and reinforce MG Irwin McDowell's Corps and Fremont retreated to Harrisonburg. The Shenandoah Valley Campaign had ended.
SCENARIO SCALE: Battalion scale, 1 inch = 50 yards, 1 turn = 30 minutes
The player's were not familiar with the rules prior to the start of play. The scenario variant where the remainder of Shield's Brigades march to reinforce was used.
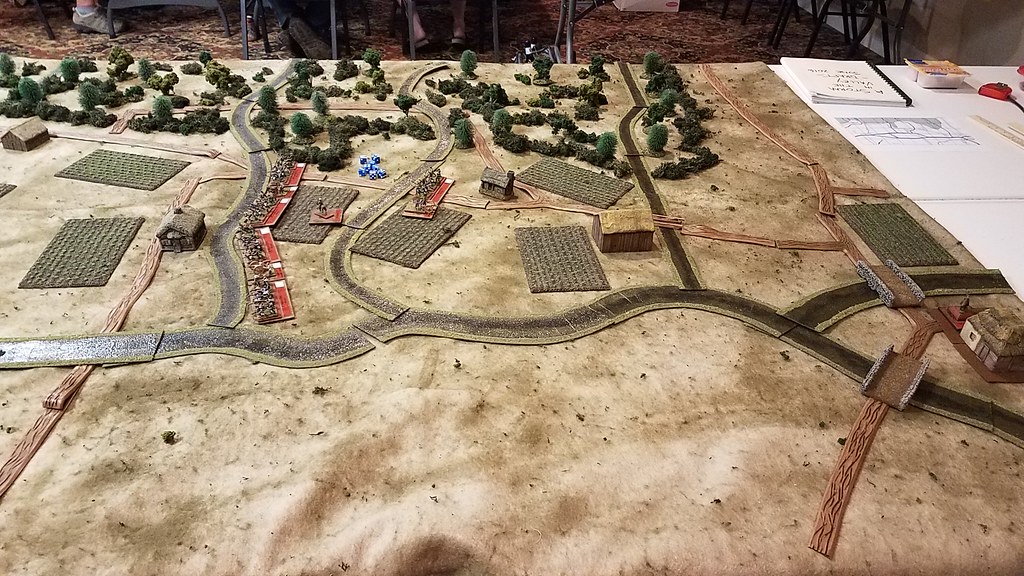
Photo 1 A view to the NE, looking down the Valley, Shenandoah River to left.
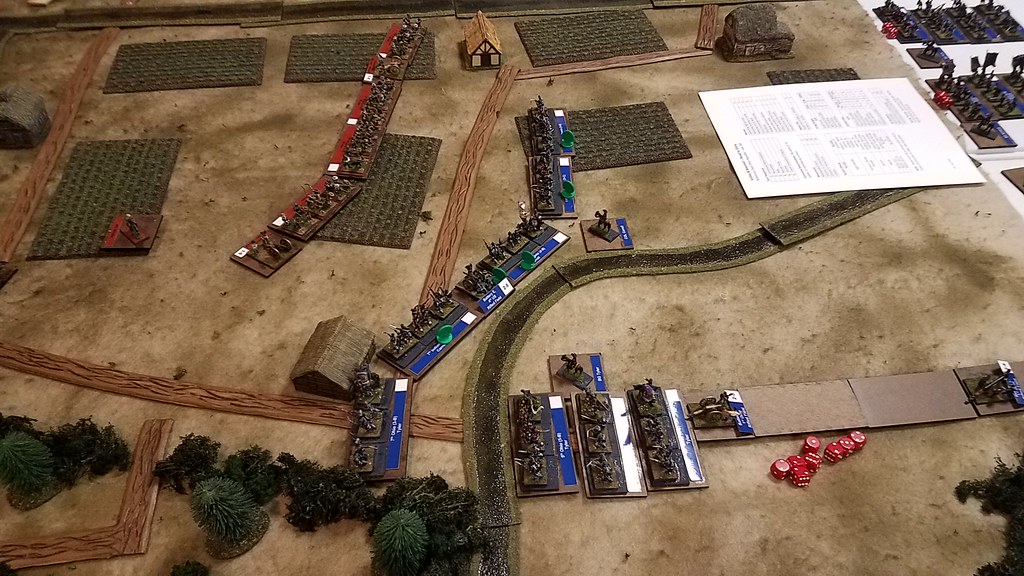
Photo 2 Winder's Brigade deployed at start
Photo 3 Carroll's Brigade deployed at start
Photo 4 Confederate Reinforcements 4 Bde (Taylor, Steuart, Walker, and Taliaferro)
Photo 5 Union Reinforcements 3 Bde (Tyler, Kimball, and Ferry)
Photo 6 Turn 1 (6am) Both sides advance, Tyler's Brigade marches onto the table and begins to deploy
Photo 7 Turn 1, Taylor's Louisiana Brigade marches onto the table
Photo 8 Turn 4 (7:30am) Taylor's Brigade marches thru the woods on the right flank, Winder's initial attack has been repulsed
Photo 9 Turn 4, Steuart's Brigade follows the main road.
Photo 10 Shortly thereafter, Taylor's Louisiana boys assault Tyler in the woods below "the coaling"
Photo 11 Winder exhausted, unluckily rolls a 1 and suffers morale collapse
Photo 12 Shortly thereafter, Steuart's brigade is also exhausted --- but so are Tyler & Carroll. Kimball just arriving.
We played nine turns. With the exhaustion of Tyler and Carroll's brigades, we called the game after 4 hrs of play. I believe all had a fun time. Perhaps they will chime in with comments on the game. The result was roughly historical, save the Confederates took greater casualties (notably to Winder's Brigade).
In game terms: For the Confederates, Winder suffered morale collapse, the brigade had been asked to do too much. While Winder's brigade had 5 regiments, its smaller Confederate regiments were brittle. Steuart was exhausted. Meanwhile for the Union, Tyler suffered morale collapse, and Carroll was exhausted. The special rules for the scenario held that if both Tyler and Carroll were exhausted before Turn 10 it was a Confederate Victory. The game highlighted the difficulty the Confederate's had in getting their forces into the battle. Deploying from road column takes time, and is difficult to do in the face of the enemy.
Ponder on,
JAS