Help support TMP


"Your Help Needed with Non-Player Enemy Planning Please" Topic


8 Posts

All members in good standing are free to post here. Opinions expressed here are solely those of the posters, and have not been cleared with nor are they endorsed by The Miniatures Page.

Please don't make fun of others' membernames.

For more information, see the TMP FAQ.


Back to the Napoleonics Scenarios Message Board

Back to the Black Powder Fantasy Message Board

Back to the 18th Century ImagiNations Message Board

Back to the Solo Wargamers Message Board


Areas of Interest

General
Fantasy
18th Century
Napoleonic

Featured Hobby News Article


Featured Recent Link


Top-Rated Ruleset

Warmaster


Rating: gold star gold star gold star gold star gold star gold star gold star gold star 


Featured Profile Article

Other Games at Council of Five Nations 2011

Personal logo Editor in Chief Bill The Editor of TMP Fezian snapped some photos of games he didn't get a chance to play in at Council of Five Nations.


Current Poll


Featured Book Review


1,631 hits since 15 Sep 2017
©1994-2024 Bill Armintrout
Comments or corrections?


TMP logo

Membership

Please sign in to your membership account, or, if you are not yet a member, please sign up for your free membership account.
M C MonkeyDew15 Sep 2017 8:01 a.m. PST

picture

What would you advise?

General Gordon (the NPC GOC) is convening a council of war.

Situation:
The South Mordors have retired and nothing more can be expected of them.
The enemy is across the bridge in some strength. Three (-) infantry battalions and two cavalry regiments. Another, and worse yet, Cuirassier regiment is already on the bridge.
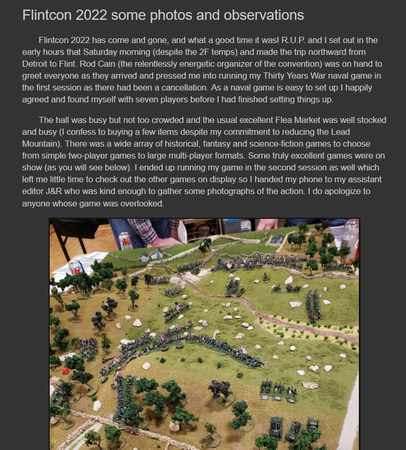
As you will see from the situation map, Gordon's left flank is pretty open and basically hanging on air.

Mission:
Mission: crossing point currently occupied by the Cuirassiers.

Available forces:
The Killmore Highlanders
1/Gobilinado Line
2/Gobilinado Line
The Eyes'n"Gourds Foot (somewhat isolated to the left)
The Joccian Greys Heavy Dragoons

Still en route, but as yet unaccounted for:
The Glasgeegian Regiment of Foot
B/RA Foot Battery

These troops may be arriving from the West, the South, or the East. We really have no idea from whence they may appear.

Enemy forces:

In addition to the three infantry (-) and three cavalry units already noted as being south of the river, a further 1 infantry battalion, 1 grenadier battalion, and 2 foot artillery batteries remain north of the river.

I have come up with thee plans, and am soliciting opinions and options for other courses of actions.

Plan 1: Call it a day. Cover the army's withdrawal with the cavalry, and try to salvage as much as possible.

Analysis: Unpalatable but what I would do. However as I am actually playing the Red side, my judgement may be biased here.

Plan 2: Concede the crossing point for now, counter attack later. In this instance the Eye'sn"Gourds would move eastward in square. The cavalry will move westwards and try to cover the open flank. 2/Gobilinado will form a reserve.

Analysis: Outnumbered 3 to 1 in cavalry I am not sure the efforts of the Joccian Greys, however gallant, will suffice to settle my open flank. This option also allows the enemy to continue crossing in force. The end game might well see Blue's infantry having to attack northwards while under threat of a cavalry attack from west, south, and east.

Plan 3: Move on the bridge right now, before the enemy can reinforce his bridgehead further. The Killmores will advance, pausing only to volley occasionally in order to keep Red at a safe distance, and then form line south of the bridge, facing north. 1 and 2 Goblinado will form first at a right angle to the Killmores, running North-South until the Eyes'n'Gourds come up at which point the four battalions will form and open square. The Joccian Greys are tasked with shepherding the movements of the Eye'n'Gourds towards the main force at which point it will disrupt Red cavalry actions as able.

Analysis: With Red having two batteries of guns north of the river, Gordon's command would be subject to cannonade and unable to reply. This is the most risky option and might well lead to the loss of Blue's entire force. it poses a special risk to the elements not yet arrived as their entry points will be far from the main force and in enemy cavalry country.

"Well there you have it Gentle Rats, Orcs, and Goblins. Your thoughts are most welcome".

I plan to post this in a few places, including my blog, and keep the discussion open until Monday morning-ish, to give everyone who might be interested a chance to speak up.

Thank you all in advance for your help.

The course of the game up until now may be read here:

link
link
link
link

Personal logo Jeff Ewing Supporting Member of TMP15 Sep 2017 3:58 p.m. PST

Like you, my #1 would be to am-scray. However, if it's a dramatic fight you want, #3 is the better option.

emckinney15 Sep 2017 4:37 p.m. PST

#3 Audacity, always audacity!

As it is, Blue has the opportunity to trap part of the Red army on the wrong side of the river, which is an excellent opportunity to sow panic and even wage a battle of annihilation.

Killmores should clearly drive directly for the bridge. I would have 1/Goblinado immediately engage 1/Diberian to pin them and to cause as much congestion for Red as possible.

Crazyivanov17 Sep 2017 12:10 p.m. PST

3. There is one chance to salvage this battle and that is it. Killmores should move for the bridge, possibly form square to ensure no sneaky moves by unseen enemy skirmishers( risky under cannonade, but possibly necassary with so large an enemy force on this side of the river).
1Goblinado must pin 1 Diberian, and 2Goblinado take them in the flank and try to sweep across the line of Red Cavalry.

Eye's'N'Gourd Foot has to try and hold out against the Red Cavalry, if Goblinado can route Diberian and begin to fire on the horse, they can advance and take the bank. They can rake the flanks of advancing enemies with fire until they hit the bridge and force the enemy cannon to make hard decisions.

From then just hold the bridge and bank until night fall.

M C MonkeyDew19 Sep 2017 9:08 a.m. PST

Results here, on the blog, and on various FB sites are pretty evenly split between conceding and taking the aggressive approach of plan 3.

I purposely did not mention that this action is the start of a campaign. As I felt that the enemy conceding was the best course of action, I did not want to prejudice readers against more aggressive solutions. This was mainly to make sure that I was not throwing in the towel on the part of Gordon without good cause.

So Gordon is going to make a fighting withdrawal.

However, the soldiers are all on the table and so, like the end of a game of Tipping Point, we shall see if Gordon would have won had he simply been willing to risk it.

With that in mind, play will continue with the plan submitted by Crazyivanov. Will play it through quickly with few if any photos and report the outcome.

Should Gordon have risked it all on three more tokens our was he right to take the money and run? (Tipping Point reference)

Thank you all for helping out!

Bob

14Bore19 Sep 2017 4:37 p.m. PST

I love your games and figures, excellent battle write up too.

M C MonkeyDew21 Sep 2017 10:23 a.m. PST

Thank you 14Bore. That is very gratifying.

Well it's all over now. Report soon. but let's just say that in the chosen, vice theoretical, outcome, I should have pursued Gordon's retreating troops vigorously.

M C MonkeyDew26 Sep 2017 1:46 p.m. PST

Just closing the thread. I had a go at Crazyivanov's plan here:

TMP link

Sorry - only verified members can post on the forums.