"Help enhancing 1/1200 wooden warships" Topic
11 Posts
All members in good standing are free to post here. Opinions expressed here are solely those of the posters, and have not been cleared with nor are they endorsed by The Miniatures Page.
In order to respect possible copyright issues, when quoting from a book or article, please quote no more than three paragraphs.
For more information, see the TMP FAQ.
Back to the ACW Painting Guides Message Board Back to the 19th Century Painting Guides Message Board Back to the ACW Discussion Message Board Back to the 19th Century Discussion Message Board Back to the Ironclads (1862-1889) Message Board
Areas of InterestAmerican Civil War
19th Century
Featured Hobby News Article
Featured Link
Featured Ruleset
Featured Showcase Article
Featured Workbench Article
Featured Profile Article The Editor heads for Vicksburg...
Featured Book Review
|
Please sign in to your membership account, or, if you are not yet a member, please sign up for your free membership account.
 Yellow Admiral Yellow Admiral  | 21 Dec 2016 3:19 p.m. PST |
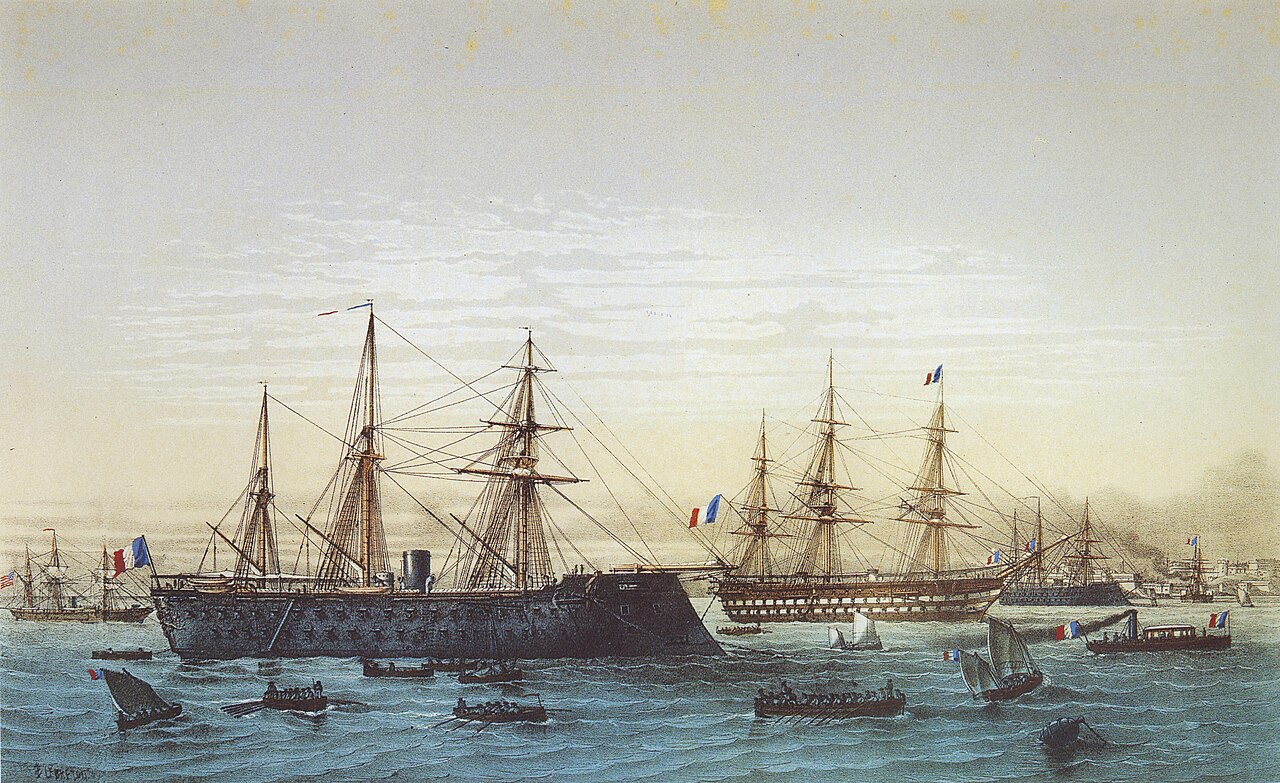
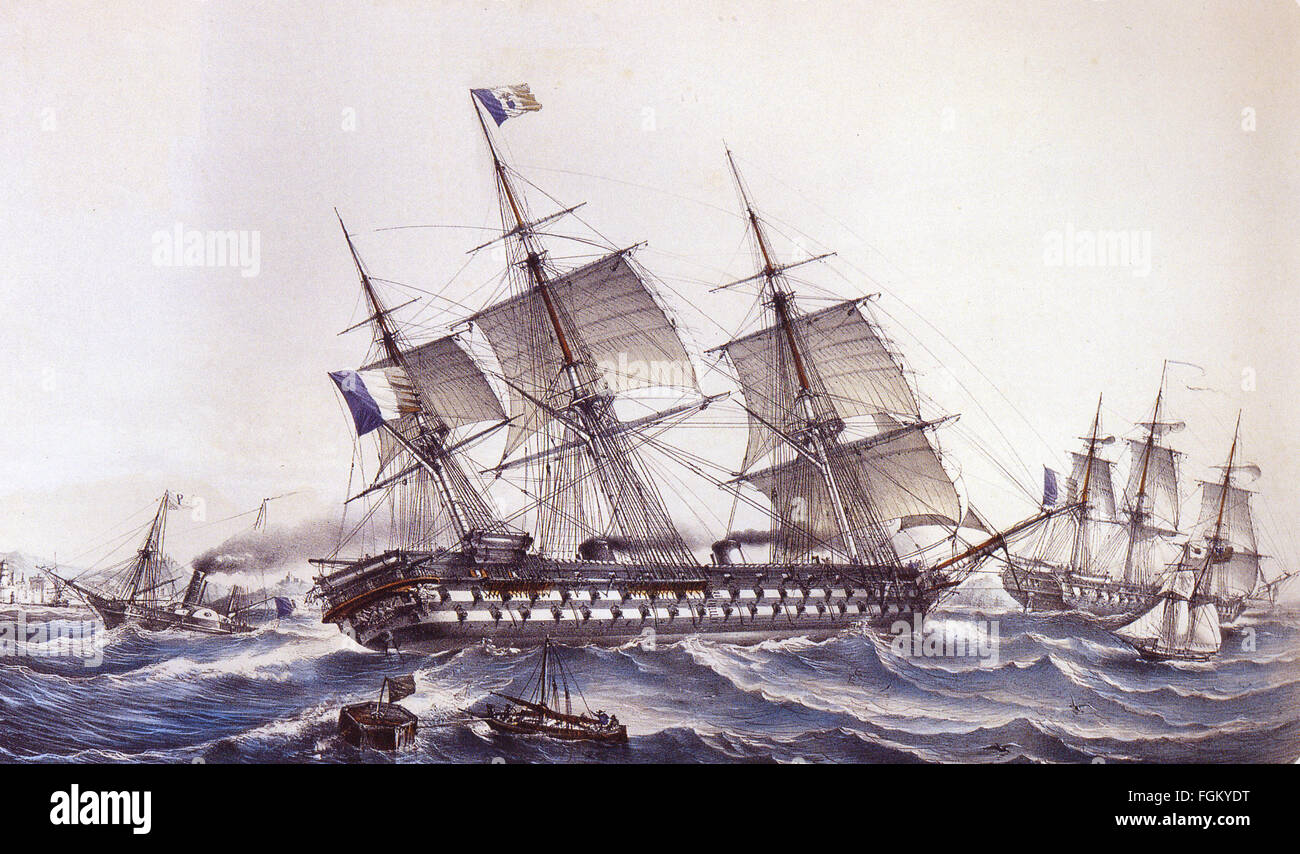
I have a growing collection of 1/1200 broadside ironclads, SOLs and frigates of the 1850-1870 period from the old Skytrex/Triton line now produced by Red Eagle. Red Eagle does pretty good castings, but the original sculpts are a bit plain and low on detail, so I'm dressing them up. I've replaced the masts with Langton ACW masts, added boats and anchors from the GHQ 1/1200 Napoleonic Micronauts line, and crafted cowl vents from plastic rod to add around the stacks based on this posting from Virtualscratchbuilder (thanks VSB!). In the mid-19th C. large wooden sail/screw warships stashed hammocks and sailcloth along the tops of the siderails in long, white rolls. These are clearly visible in a lot of period pictures (e.g. the LeBreton prints below), are nicely reproduced on a lot of period miniatures by Thoroughbred and Langton, and add a lot of character. I'd like to add these to my Red Eagle ships as well, but so far I've failed to find a good way to do this. Suggestions from the peanut gallery much appreciated. - Ix
|
 T Callahan T Callahan | 21 Dec 2016 3:28 p.m. PST |
Did you do the rigging? If not it goes a long way to improving the over all look. I added some to mt Titan Miniatures ACW ships.
Terry
|
| Yellow Admiral | 21 Dec 2016 3:34 p.m. PST |
Rigging is last (after painting), so not yet, but I'll get there. I'm still in the assembly stage, and the giant, puffy railing pillows have to go on first. :-) - Ix |
 Virtualscratchbuilder Virtualscratchbuilder  | 21 Dec 2016 4:20 p.m. PST |
Take some regular tissue paper or TP and wet it in somewhat diluted PVC or Elmer's glue. Then roll it into rolls of appropriate thickness. Let dry, cut to size. |
| TheBeast | 22 Dec 2016 5:25 a.m. PST |
I was thinking it looked like wound wire, like a guitar string, but that would be thicker than your masts. Can you get by with just painting white, and black tic's between? (This is so beyond anything I'd attempt, I'd suggest you weigh any suggestions from me accordingly.) Doug |
| Rev Zoom | 22 Dec 2016 8:44 a.m. PST |
Here is how those of us who build models – especially figures – do it: go get some PSI Kneadatite Epoxy putty. It comes in a ribbon and when properly combined is green. Roll that into a long thin string – like a piece of spaghetti – to the diameter you need. You can get it very thin as would be needed for your scale of 1/1200. I simply roll it out with my hand on a flat surface. Do it on a damp surface so it will not stick. Cut off the length, twist it in your fingers lengthwise so it looks like a large length of screw rod. How many turns is to your own taste. Place it on the model. Let it dry. Paint. This also works well for furled sails. I've used this on all my 600 scale ironclads. Alternatively, instead of twisting it, you can simply place it on the model and, using the back , unsharp edge of your exacto blade, mark little furrows across it down the length. Either way works well. |
| Rev Zoom | 22 Dec 2016 8:48 a.m. PST |
Oh, yeah – the great thing with this method is if you mess it up – before it is dry – simply pull it off and start over. And, being epoxy, once it drys, it is firmly attached to whatever surface you placed it on. And, no, you do not need to press it down hard on your railing or spar. It will stick just by placing it. Should it not, then use a little super glue once dry and you are set. Rarely do I not have such hammocks or furls not stick, though. Good luck. |
| Yellow Admiral | 22 Dec 2016 10:51 a.m. PST |
Can you get by with just painting white, and black tic's between? No, or I would have done that already. :-) I am a lazy bastard crafter… At this scale, details are exaggerated to be visible, but I don't think it will take much of a pillowtop on the rails to fool the eye. I tried using acrylic medium and modeling putty, but neither was easy enough to work with. I'll try Rev Zoom's epoxy suggestion next. That's the kind of specific advice I was hoping to get. Even better, if it works, I've learned how to create furled sails, which is something I've wanted to craft for a long, long time. I agree that the pattern of a wound line like thread, string, wire, etc. might be sufficient to fool the eye, so I'm looking around for one I can glue on. That would be the easiest solution by far. So far, no luck, but I'm only just getting started on this. - Ix |
| TheBeast | 31 Dec 2016 9:01 a.m. PST |
You think YOU'RE lazy??? Notice I didn't suggest, 'white, and black tic's between..' with shading to give the white volume. ;->= Notice, also, that I'm suggesting, not doing. Doug |
| Rev Zoom | 31 Dec 2016 1:40 p.m. PST |
I actually make all my hammock netting ahead of time on a piece of aluminum foil. Let it dry, store it away, and use as needed. Same with purled sails. Good luck and I hope it works out for you. |
| Yellow Admiral | 04 Jan 2017 4:30 p.m. PST |
I received the putty, and hope to try my hand at making rolled nets this week. Wish me luck. :-) - Ix |
|