"Battle of Roberts Farm" Topic
14 Posts
All members in good standing are free to post here. Opinions expressed here are solely those of the posters, and have not been cleared with nor are they endorsed by The Miniatures Page.
Please don't call someone a Nazi unless they really are a Nazi.
For more information, see the TMP FAQ.
Back to the ACW Battle Reports Message Board
Areas of InterestAmerican Civil War
Featured Hobby News Article
Featured Link
Top-Rated Ruleset
Featured Showcase Article
Featured Workbench Article
Featured Profile Article The Editor heads for Vicksburg...
|
| Cleburne1863 | 15 Mar 2016 7:38 p.m. PST |
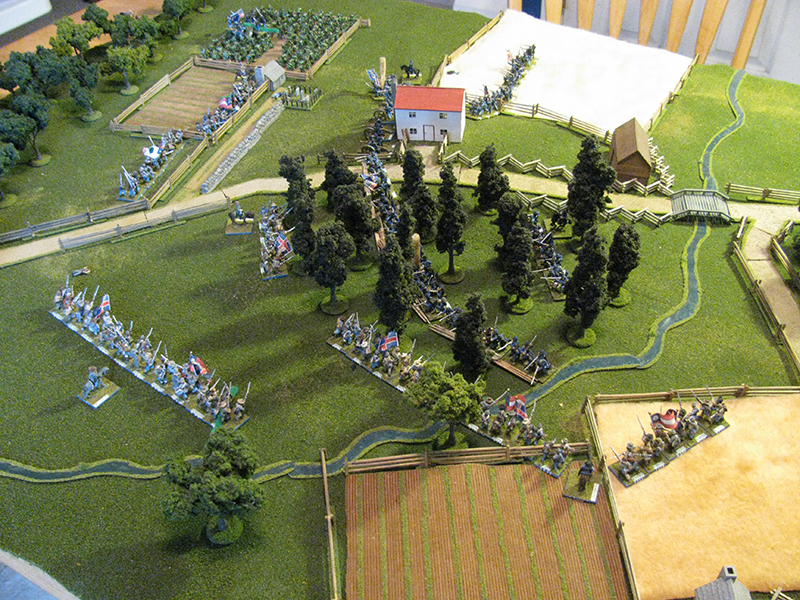
I recently had a chance to play a solo game of Johnny Reb 2. Here is the After Action Report. The board is 3 x 4. On a hill between the lines at Petersburg, out past the Weldon Railroad and Halifax Road, lies the large white Roberts house. On a September morning, a Union division is ordered to take the hill and hold it with a view of expanding the Federal line. With fighting raging north of the Appomattox, for the Union, the only reinforcements available are a battle worn brigade currently being rested and reorganized. The Confederates quickly organized a counterattack with a division-sized force of four understrength brigades, but no artillery. Despite a Virginia scenario, my army is based for Chickamauga. So Polk Corps flags will have to do. Below is the Order of Battle.
Because it was a solo game, I tried to add a little randomness by giving the brigade commanders different personalities: Cautious, Professional, and Aggressive Cautious commanders had a greater chance of hesitating, or being slow to bring the enemy to combat.
Professional leaders would try their best to follow their orders, and weigh the task at hand with a mix of aggression and caution as the situation warranted.
Aggressive commanders would try to advance toward the enemy at any opportunity, even to the small chance of recklessness. Type
Cautious 1
Professional 2-5
Aggressive 6 As you can see from the OOB, I got a good mix of some of each. Each turn, I would roll a d6 to see how they would perform that turn. Cautious
Retreat to Cover 1
Hold 2
Moves Normally 3-4
Moves to Contact 5
Charge! 6
Professional
Hold 1
Moves Normally 2-4
Moves to Contact 5
Charge! 6
Aggressive
Hold 1
Moves Normally 2-3
Moves to Contact 4
Charge! 5-6 Retreat to Cover means they would fall back as far as practical to any linear or are cover.
Hold means they would stay in place, but could react to threats
Moves Normally means they would try to carry out the orders of the division commander to the best of their abilities.
Move to Contact means they would move forward toward the enemy as close as reasonably possible, and maybe closer than reason would dictate if the situation called for it, and engage the enemy.
Charge! Is just that. Barring the inability to do so because of the rules, the commander would order an charge upon the enemy in the most advantageous way. |
| Cleburne1863 | 15 Mar 2016 7:39 p.m. PST |
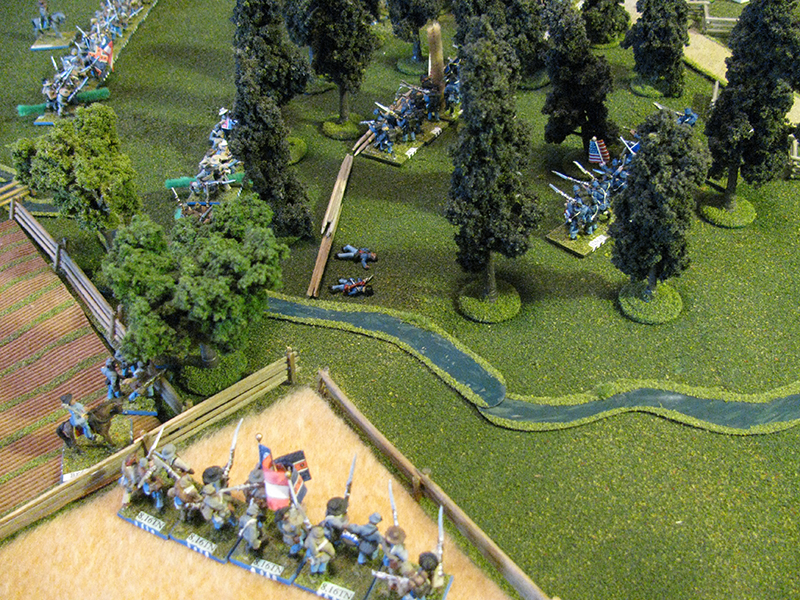
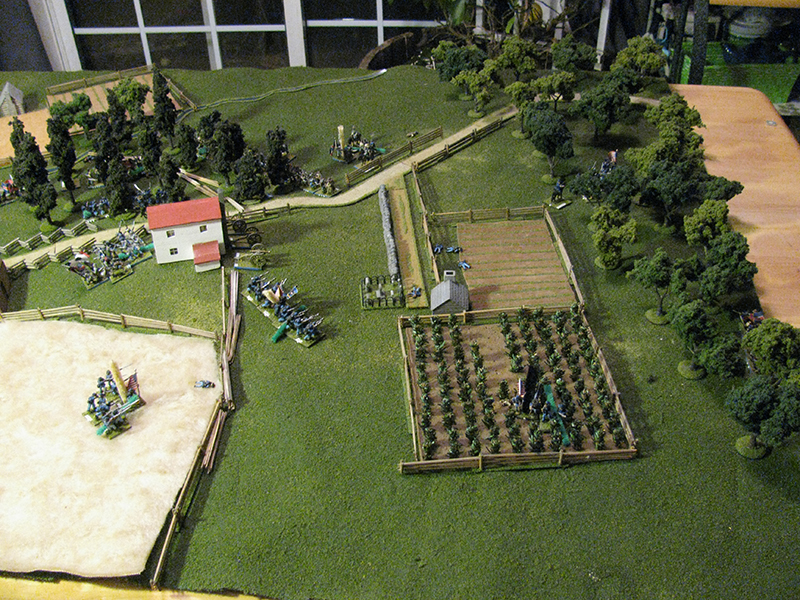
Below are pictures of the map. The Roberts farm is on top of the only hill in the area. The outlying areas have tenant farms with wheat and corn fields. Across the main road from the Roberts house is a pine forest. The Union commander has taken a position on the crest, with the battery covering the open ground. The 1st brigade is in the standard Casey formation of two up and two in support. The 2nd brigade has extended the line by one regiment, expecting an attempt to flank from that direction, with one regiment left in support. With lucky rolls, they all manage to pull together brush and tear down fences to build hasty works.
Turn 1 On the first turn the Confederates emerged from cover. Most got within long range, and taking advantage of cover, the Union troops fired several volleys. The Confederates began to take casualties. However, the fire from the Union battery was ineffectual. The Confederate Second Brigade ran into trouble. The 6th & 9th TN fired a well-aimed volley from the cornfield in return, but ran out of ammo. The 1st & 27th Tennessee got disordered during the move, but took cover behind a fence. Unfortunately, the colonel of the Union 2nd brigade is killed by a shot to the forehead while encouraging the men of the 3rd Kentucky (Union) on the front line. The Bluegrass warriors don't like this very much, and go shaken.
|
| Cleburne1863 | 15 Mar 2016 7:39 p.m. PST |
Turn 2 Things take a turn for the worse for the Union. On the left, without the colonel to give an order, the 125th Ohio in the support line doesn't get the order to wheel to the left to protect the brigade flank. This allows the Confederate Fourth Brigade to get into a position to enfilade the line. While the Union fire causes casualties, the return fire routs the 65th Ohio on the brigade flank. Seeing the Ohioans flee, the already worried 3rd Kentucky takes to their heels as well, collapsing the Union line in the pine forest. All is not rosy for the Confederates though. The Third Brigade fails to advance at all, leaving the Fourth isolated.


On the other side of the hill, things get interesting. Reasoning the best defense is a good offense, the 1st brigade commander orders a counterattack against the disordered and stalled Confederates. While the 58th Indiana and 13th Michigan on the front lines charge, the support regiments move up to occupy the works. Again, the battery's supporting fire is ineffective. The 58th Indiana is repulsed by the quick forming 1st & 27th Tennessee.
The 6th & 9th Tennessee retreat to replenish their ammunition, and the 13th Michigan declines to follow to far, managing to stop at the far fence of the cornfield. Despite several close combats, no officers are injured. Turn 3 Again, the Union 1st brigade commander decides to go on the offensive. The support line charges the 1st & 27th Tennessee, as does the 13th Michigan while the 58th Indiana reforms. The 13th Michigan doesn't quite make it into contact with the Tennesseans, who manage to reform at an oblique angle to face both charges. When the 26th Ohio moves into close range the Tennesseans blast them with a volley. The 26th falls back, but the 13th Michigan routs. However, the 100th Illinois moves through the crowd successfully and pushes routs the Tennesseans in turn. They are too slow to escape, and in the pursuit most are captured and the regiment is dispersed. Leading the charge, the Union brigadier general takes a painful wound that diminishes his capacity to inspire his men, but he is still well enough to give orders.

The Confederate First Brigade gets into the fight, and charges the hill. The 1st & 5th Georgia is repulsed by the 64th Ohio. However, despite a blast of double canister, the 8th Mississippi drives away the cannoneers, taking the 64th Ohio with them. The Mississippians continue forward and gain the crest. There they fire a volley into the fleeing artillerymen, dispersing them. In the pine forest, the Confederate Third and Fourth Brigades advance into the woods. The 38th Tennessee charges, but are stopped short by the fire of the 125th Ohio, inspired by the division commander. The musketry is so great, that the 38th disintegrates. However, the Ohioans run out of ammunition from the expenditure.
|
| Cleburne1863 | 15 Mar 2016 7:40 p.m. PST |
Turn 4 Again the Union 1st Brigade commander attempts to get his units to charge, but they are in no position to do so. Either they have no targets, or they are reforming outside of his ability to give them orders. He then attempts to fall back to reform his brigade. However, while doing so the 13th Michigan continues it rout, and takes the 26th Ohio with them. Half the brigade is now out of combat for the time being. The 125th Ohio attempts to escape from its trap, but the 8th & 16th Tennessee pursues and catches them. They flee the battlefield, but are rallied at the edge of the board by the division commander. The Union reinforcements arrive on the board. The 94th Ohio in the lead forms across the road and fires a volley into the 8th & 16th Tennessee, stopping their advance. Behind them, the remaining Confederate brigades occupy the hill. The Union division commander is wounded by a stray bullet.
Turn 5 The Union attempts to reform. The plan is to reorganize, and in conjunction with the 1st brigade, attack and retake the hill. The Confederates reform in the pine forest in anticipation of a counterattack. The 8th & 16th Tennessee falls back to reform in support. The 8th Mississippi and the Third Brigade reforms to deal with the Union 1st brigade at the bottom of the hill. Turn 6 The Union attempt to rally in the road at the edge of the map, but can't get organized. Several regiments rout again, and only the 64th Ohio manages to advance by itself. The 3rd Brigade move up to the fence at the edge of the woods in readiness to advance. At Robert's Hill, the Union 1st brigade commander again tries to go on the offensive. Not a wild charge, but the 58th Indiana moves to contact while the 100th Illinois reforms. Unfortunately, the 8th Mississippi is waiting, and their firepower causes the 58th to fall back and disintegrate. The 29th, 47th, & 154 Tennessee moves around the Roberts house and confronts the 100th at close range. Both regiments fire, but the Illinoisans get the worst of it. Most surrender at close range while the others flee. With the 1st Brigade gone and the 2nd Brigade unable to rally, the Union has no choice but to call off the attack and retreat back into their works near Globe Tavern.
I always put down casualty figures when removing a stand. You can tell where the hard fighting was during the battle.
|
79thPA  | 15 Mar 2016 7:49 p.m. PST |
That's a great looking game. |
| Bashytubits | 15 Mar 2016 8:14 p.m. PST |
Agreed, that is a really good looking game and I love Johnny Reb II. |
| normsmith | 16 Mar 2016 2:50 a.m. PST |
Lovely to see just how much good game can come from a 'smaller' table. Thanks for sharing and doing all the work for the write up, I really enjoyed the post. |
| general btsherman | 16 Mar 2016 2:58 a.m. PST |
|
| DontTreadOnMe | 16 Mar 2016 2:12 p.m. PST |
Good ground, sir. Very good ground. Thought that I was looking at a hi-res computer game screen at first no offence meant. This is the type of inspiration that makes a non-ACW gamer go ACW. Hat's off. 15/18mm figures I presume? |
| Cleburne1863 | 16 Mar 2016 2:17 p.m. PST |
Yeah, old school 15mm Old Glory. Thank you! |
| John Miller | 17 Mar 2016 6:05 p.m. PST |
Cleburne1863: Loved the birds eye views! Thanks for the photos and play by play. John Miller |
| Cleburne1863 | 18 Mar 2016 4:54 a.m. PST |
I may put this in a 2nd volume of fictional scenarios. |
| GoodOldRebel | 18 Mar 2016 10:19 a.m. PST |
Great write up, marvellous terrain and lovely figures…. |
| Maxshadow | 09 Apr 2016 4:07 p.m. PST |
Very enjoyable report and great looking table and figures. Enjoyed going back and just looking at some of your terrain features. |
|

