Help support TMP


"Downtown - D3 "You keep me hangin' on" USS Ranger" Topic


9 Posts

All members in good standing are free to post here. Opinions expressed here are solely those of the posters, and have not been cleared with nor are they endorsed by The Miniatures Page.

In order to respect possible copyright issues, when quoting from a book or article, please quote no more than three paragraphs.

For more information, see the TMP FAQ.


Back to the Cold War (1946-1989) Message Board

Back to the Wargaming in the United Kingdom Message Board

Back to the Modern Scenarios Message Board

Back to the Modern Battle Reports Message Board


Areas of Interest

General
Modern

Featured Hobby News Article


Featured Link


Featured Ruleset


Featured Workbench Article

Adam Paints the Brigadier

Adam8472 Fezian takes inspiration from Doctor Who.


Featured Profile Article

Editor Gwen: Good News & Bad News

Personal logo Editor in Chief Bill The Editor of TMP Fezian reports on how our senior staff editor is doing.


1,309 hits since 12 May 2015
©1994-2024 Bill Armintrout
Comments or corrections?

CAG 1912 May 2015 5:02 a.m. PST

Next up is the USS Ranger's air wing against a DRV defence set in mid 1966. RWR and Jamming pods are still not in widespread service.

The USN have the following possible targets

1 = Vu Cha Railroad bridge
2 = Bac Giang POL storage
3 = Doung Nham POL storage
4,5 = Haiphong POL storage
6 = Co Trai Railroad bridge

The target roll was a 2, so the target is the Bac Giang POL site, which is close to Kep Airfield.

I had previously decided which complexes the located SAMs would be in and I rolled for the actual placement hex which gives the following:

2315
1122
1129
1138
2626

Onto the raid planning itself. The USS Ranger Air Wing is a lot (in this time frame) different from that on the Oriskany that flew earlier. It is a big deck carrier operating the F-4B and the RA-5C in place of the Crusaders. Its two skyhawk equipped attack squadrons have different models of aircraft with A-4C and A-4E being available. For this mission I selected the following

Pre-Raid Jamming
2 x {1} EA-1F, Jamming

Iron Hand
2 x {2} , A-4E, SEAD
2 x {2} , F-4B, Armed Escort

MiGCAP
2 x {2} F-4B, CAP

Strike Mission
2 x {4} A-4C, Bombing
2 x {4} A-4E, Bombing
2 x {2} , F-4B, Armed Escort

Post Raid Recon
1 x {2} RA-5C

I also chose to site the USN Rescue Helo and because I can I have changed the composition to include
2 x {2} A-1, Rescue Support.

The scenario notes only let the SEAD and the Jammers to have RWR There are still no deceptive jammers available and the Shrike shortage is still in force so the A-4Es carry half loads of ARMs.

This still means that only SEAD aircraft can conduct Anti-RADAR tactics so the remainder are still exposed to the SAM threat. With the change in target and lessons from the Oriskany raid I hope to be able to do a lot better than the last raid.

In terms of defences pretty much the same set up faces me and I am not going to put myself over the area of Haiphong in a rush. That said Entry Point 7 actually puts me in range of more SAMs and with a high BSAN it is going to get ugly early. The Airfields at Kien An and Gia Lam are likely to be where the MiGs come rather than Kien An/Kep in the last game. I am also likely to generate more FIRE CAN as I will be over land a lot quicker. My benefit in the this game is that I have F-4B Armed Escort flights which can at least deal with the SAM threat easier than the Crusaders. CBU might be in order.

Map to follow once I have done some plotting tonight.

The rest of the Downtown information is on the blog as usual
CAG 19 Blog

OldGrenadier at work12 May 2015 8:40 a.m. PST

Fantastic stuff! Please keep it up. I did a review of Downtown several years ago and really enjoyed it. It's good to see it in action.

CAG 1912 May 2015 12:36 p.m. PST

The defensive layout doesn't help at all. Bac Giang is ringed with SAMs from Hanoi and the Medium AAA from Kep and Vu Chua don't help either. That tempting open piece in the South East is just a SAM trap waiting to happen so I might have to bite the bullet and come at this in the same way that I did for the Oriskany. This time keeping a bit further East of Haiphong, then let the Iron Hand drop down Westwards roughly in line with Thud Ridge. I might also lead in with the SEAD as well and use the RWR to help. This means they might be the bait for a while to let the F-4B Armed Escorts in. I only have four Shrike shots to protect the whole force and at least 10 SAMs to deal with. Egress needs to come back up behind Phantom Ridge and then back out to the Gulf.

Without RWR and defensive jamming the US cannot react to the SAMSs, even the jamming aircraft need some separation but at least I know I can get a bit closer with them. From an odds perspective DRV are going to probably shoot about 20 missiles off. That will probably equate to one shoot down and one damaged/crippled and the all too real possibly of a jettison while avoiding. Hopefully the point of D3 is to demonstrate the ECM elements of the game. RWR and jamming pods will be available for the next scenario.

So Haiphong it is

sgt Dutch Supporting Member of TMP13 May 2015 6:24 a.m. PST

Your blog is great. Now I'm search for the rules ( Downtown). Also I added your blog to my blog site of blogs I follow. That way I won't miss any of your posts.

CAG 1913 May 2015 7:04 a.m. PST

here you go

link

CAG 1915 May 2015 4:31 a.m. PST

The raid planning is complete and I have now rolled up the crew quality and finalised my flight log sheet. The F-4B crews don't seem to be overkeen to be going up north. I have started to record the number of "real" aircraft involved in the mission. This is to show the gradual increase in the amount of support aircraft needed to get the same amount of bombs onto a target. Here you can see that I have 36 aircraft assigned to the raid, of which, only 16 are actual bombers, with a total bomb strength available of 40 points so an efficiency of 1.1. The Oriskany raid had the same numbers of aircraft but could have dropped 48 points for 1.3. Not a number crunching exercise as it only looks at bomb weight and not accuracy or effect but it is something that I want to track as the air effort changes in later years. The USAF mission by the way of comparison had 32 aircraft assigned with 16 bombers but only a bomb strength of 32. An efficiency of 1.0

The F-4B are going with CBU units rather than pure bombs as I am still limited on the number of ARMs due to the Shrike shortage.

Format changes to the previous version are minor. I have now added in the target profile next to the target so I don't have to write it down anywhere else. In terms of information displayed (as mine is editable) I have put the jamming information on the front sheet. I have left some redundant information on the log sheet from the Oriskany but shaded it out (left over Gun Info from the F-8E entries for example).

The Shrike information is displayed as the total number of shots available to the flight and not per aircraft. DT has a different mechanism than that used for bombs for Ordnance such as LGB, EOGB and ARMs.

The EA-1F come from VAW-13 and weren't part of the normal establishment of the Air Wing, which is why they don't appear in the cruise books or many of the websites which deal with Carrier Air Wings. They were based at Subic Bay and were assigned to each carrier as it arrived at Yankee Station. Callsign were ROBBIE and the MODEX were in the 700 series.

CAG 19 Blog

CAG 1925 May 2015 4:37 a.m. PST

Despite it being mid morning the Soviet trawler shadowing TG77.7 was no where to be seen. As a result the Alpha strike formed up to hit the Bac Giang had a head start on the defenders. It wouldn't be until the air wing was insight of the coast would the defenders begin to react. That is my reasoning for the poor DRV early warning roll of a 4 on 2d10 with a -2 modifier for it being a USN raid.

(Summary of turns until the main raid force enters)
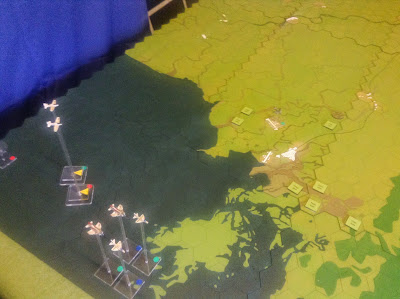
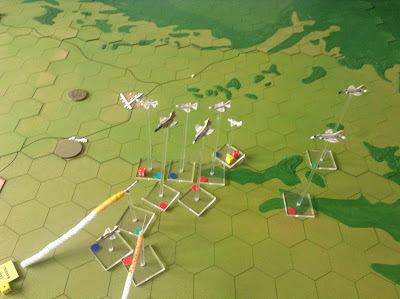
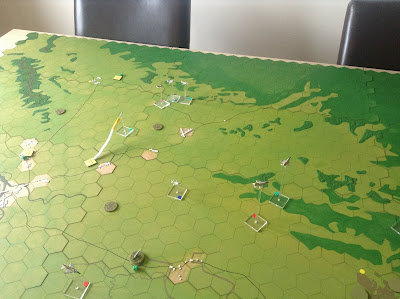
Jamming and Iron Hand enter and move to counter the closest threats to the bombers

Jamming support from ROBBIE 705 & 708 is directed towards Haiphong. No FAN SONG or FIRE CAN emissions have been detected, but that can't last.

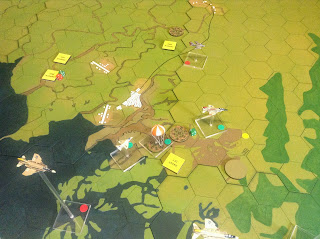
The Iron Hand flights (GARFISH 401 & 402 with DAKOTA 203 & 204 as one pair, with GARFISH 403 & 404 with DAKOTA 201 & 202 as the other) had just reached the coastline when AAA from Hon Gai caused the first hiccup. AAA brackets DAKOTA 201 causing minor damage. The crew elect to carry on escorting the A-4Es.

(hopefully I will remember to take photos at the correct time for the remainder of the game as the main raid forces enter)

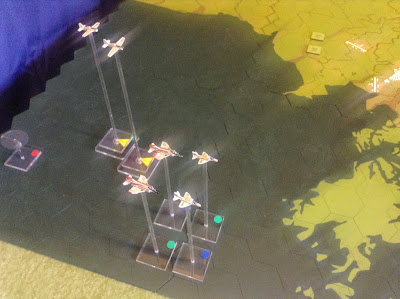
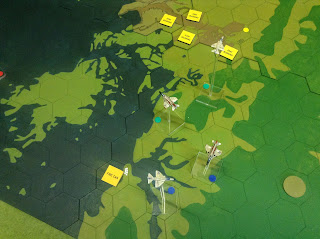
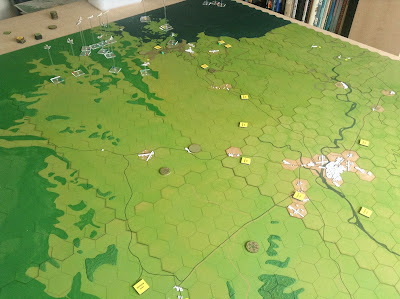
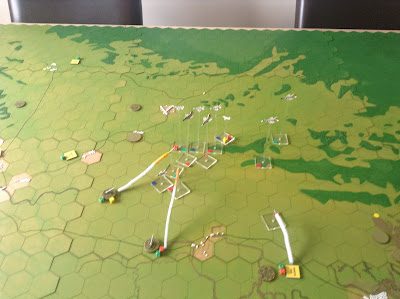
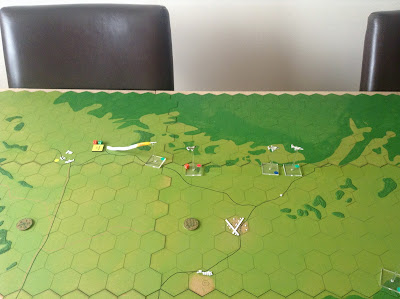
The Skyhawks (remainder of GARFISH and BUSY BEE) enter with their attendant DAKOTA escorts.

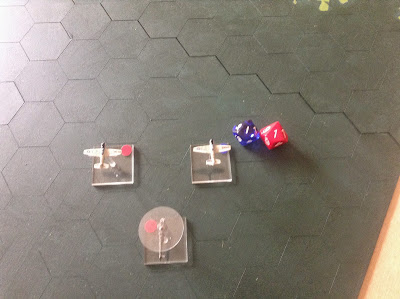
MIGCAP provided by TAP ROOM come on station as two MiG flights are reported by RED CROWN lifting from Kien An, according to Intelligence they only type on that airfield are MiG-17Fs.

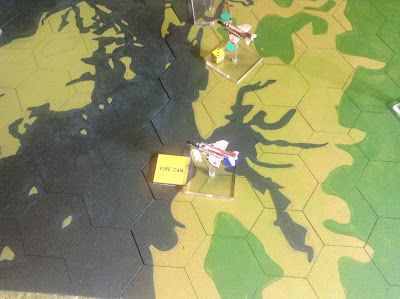
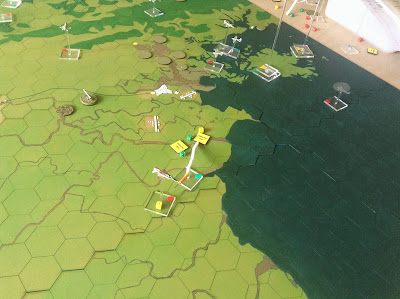
Finally, the defences come active. FIRE CAN at Hon Gai and four FAN SONG come up around Haiphong. The Iron Hand are inside the range of the FIRE CAN as a result of keeping out the way of the SAMs and will have to take their lumps. Jamming support will help though as it will be directed against Hon Gai before the Iron Hand have to move.

As the SAMs have illuminated it automatically means that the MiGs should disappear. I am going to keep them running otherwise the CAP doesn't have to commit itself it means that they have to behave themselves.

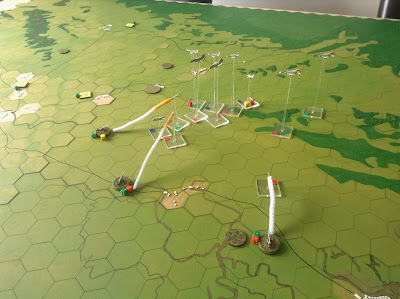
The with the jamming aligned GARFISH 401 gets away from the tracking guns. AAA continues To darken the sky over Hon Gai. GARFISH 403 launches one shrike into Haiphong. Both SAMs in range continue to track for targets and luckily while the shrike comes close it doesn't do any damage.

PRF rapidly increases and a number of US aircraft are now illuminated but the value of jamming shows and only one SAM site has a full return.


GARFISH 403 holds his nerve as a SAM arcs towards him and puts a shrike down the throat of the launch site. RADAR emissions abruptly cease and a plume of dark smoke indicates a hit.


DAKOTA conducts anti radar tactics diving to the deck. One SAM losses acquisition. The other launches a missile and the fuzzy image on their screen which doesn't track and goes ballistic.

ROBBIE is far enough out for the site not to waste a launch, it isn't a bomber or an iron hand flight. In which case I think the Acquisition table needs a drop and re acquire option.

DAKOTA 201 & 202 reach their IP and release their CBU onto the fire control radar knocking it out.

The SAM sites that the solo system generate around Haiphong are now all on the air. Anything that gets generated from now on will be around the target area.

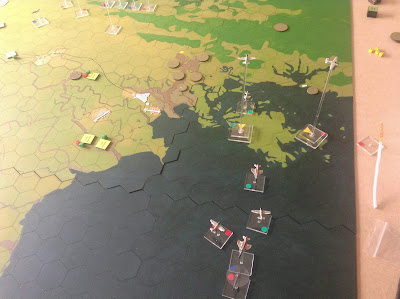
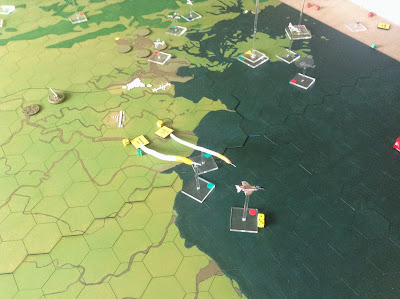
More launches occur but miss the US flights. DAKOTA 203 & 204 come around and line up on the detected sites while GARFISH 403 & 404 duck under the plume and head back out over the bay and will line up next turn

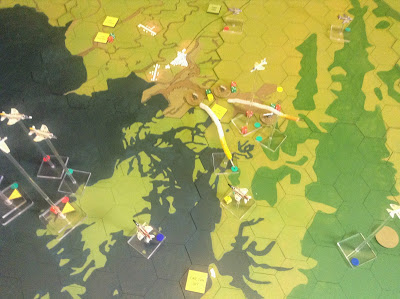
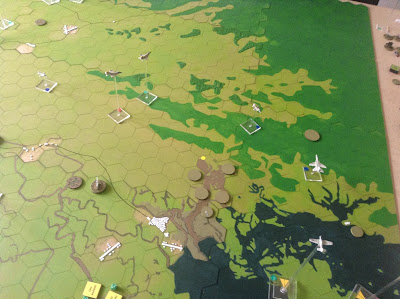
The sky is pretty crowded at this point.

DAKOTA 203/204 reach their IP and dive onto the located SAM site. DAKOTA 204 calls an emergency. Unfortunately only one 'chute is seen. DAKOTA 203 calls that a number of secondary explosions are seen and the site is off the air.

GARFISH 401/402 expend their last shot. One SAM site is taken down and one other shuts down its RADAR. The main raid continue to move on. BUSY BEE 602/602 at the rear of the strike will split off as RESCAP for the pick up. As this is solo I can make the call whether the USN CSAR is tasked or not. Here I think it is a valid mission and will send it in.

Just Off Map, a ring a SAM sites close the target have just come on air. I don't have any shrikes left (remember I only get 4 due to the missile shortage).

I will post up the next couple of turns when I get time this evening

CAG 1926 May 2015 7:16 a.m. PST

Final Part of the USS RANGER AAR

This is the view of the raid from the North West. Hanoi is centre right and the target is almost dead in the middle of the picture. The ring of waiting SAMs is quite clear.

After successfully navigating past Haiphong the raid swings down behind Phantom Ridge. It would be easy to drop to deck level at this point and use the ridge to break any lock from any SAMs remaining around Haiphong. But the Iron Hand have done a good job albeit at the cost of one aircraft. The MiGCAP is forward providing cover for the SEAD flight which still has a full bomb load.


I don't seem to be having a lot of luck with my CSAR rolls. Double 1 and the RIO goes into captivity. I played it out that as the mission was tasked they wouldn't know until they arrived and had to make pass over the target hex.

Clearing the ridge, the raid is subjected to SAM Fire

The Armed Escorts and the SEAD head out to deal with the closest threats to the bomber package. The shrike shortage really is a nightmare in these early scenarios.

Winchester calls from the DAKOTA 201/202 and as one aircraft is already damaged it heads for home. DAKOTA 203 is in the same boat and with no ordnance or a gun to protect DAKOTA 204 Bravo has to head home as well. GARFISH 403/404 is also heading back to the carrier.

Meanwhile things are hotting up for the strike package. GARFISH 401/402 is on the deck heading for the SAMs while the Armed Escorts DAKOTA 205/206 and DAKOTA 207/208 attract their attention. That's the thing about being the bait.GARFISH 409/410/411/412 have to dump their bomb load in order to evade a well aimed missile shot which heads for their formation. A soft kill effectively as without bombs the four skyhawks in the flight will abort home to the carrier. BUSY BEE 603/604/605/606 don't have any RWR so doesn't know that a SAM site has a good return.

Every SAM that had a target gets a shot off this turn,

Having RWR and Deceptive Jamming GARFISH 403/404 get eyes on the launch sites, which is going to make suppressing them easier.

Despite the attention of the incoming US aircraft the SAM sites hold their nerve and sufficiently disrupt the pilots aim. GARFISH 403/404 bombs go wide and the site remains active. SAMs continue to chase the bombers. A FIRE CAN at the POL site is taken out by a division of skyhawks GARFISH 405/406/407/408. The remaining eight bombers roll in on the target but only report moderate success (BDA is only completed once the Recon flight brings back the photos so at the moment success is based on pilots claims and not hard evidence)

HOOTER 903 is on table and hauling ass. More Winchester aircraft are heading back to the carrier.

A solitary SAM chases the raid off target. The package is now spread over several hundred miles of airspace which contrasts with the situation as they went feet dry earlier.

Nothing is ever safe over North Vietnam. BUSY BEE 601/602/603/604 are acquired by a SAM site and have to keep their wits about them as they turn for the penultimate waypoint.

South of Haiphong DAKOTA 205/206 are heady for the coast but find themselves too close for comfort to a pair of SAM sites which weren't taken out on ingress.

Another pair of missiles chase the flight as it goes feet wet. At the top, CANASTA 510/511 are over the reported location of the downed RIO from DAKOTA 204 but are met with a hail of small arms fire. With the pilots reporting locals holding up a flight helmet as the flight passes over head the rescue is called off.

Coming in behind the strike package there will always be upset locals. HOOTER 903 is at full speed and on the the deck coming over the POL site. A couple of minor fires but no major damage.

I called the game here.

Poor bombing accuracy on the target means that the US can only claim:
2 VPs for the BDA and 6 VPs for damaged SAM sites for a total of 8 Points.
The DRV score 2 VPs for the F-4B and 1 VPs for the crewman who didn't eject and 2 VPs for the capture.

Overall this gives +3 to the US which is still a defeat, the POL site will need to be re-struck. Things went better and having a plan which I read every turn to make sure I didn't get carrier away helped. Still a very close game, the rescue on the RIO would have only made it +4 so still a defeat. Bombing accuracy rolls weren't great and a flight dumping its bombs to evade a missile didn't help.

Next mission will be early 1967, and both the USN and USAF have a lot more RWR and ECM gear fitted.

More on the CAG 19 blog as usual :)

47Ronin03 Jun 2015 4:47 p.m. PST

Great AAR, CAG 19.

Many of us enjoy the planning (and the detail) that goes into such games. In the past, I've played Harpoon with some active and retired USN members. Talking about weapons packages on various aircraft brings back fond memories.

Keep up the good work.

Sorry - only verified members can post on the forums.