Last week we played our first Biblical / Chariot Wars game with Sword & Spear rules. For more information about these rules see
link
It was a four player game, Assyrians vs. New Kingdom Egyptians. The Assyrians had four-horse heavy chariots so it was probably not a strict historical match-up (I believe they started using heavy chariots a couple of hundred years after the period of the New Kingdom Egyptians).
As well as heavy chariots, the Assyrians had cavalry, light foot archers and mixed units of spear and bow armed foot.
The Egyptians had light chariots, close fighters and bow armed foot.
The terrain was a few areas of rough ground and a hill in the Assyrian deployment area. As the Assyrians, we didn't want to play defensively and sit on the hill so we deployed forward in a long mixed battle line, ready to take the battle to the Egyptians.
The Egyptians adopted a more cautious deployment, with a line of foot deployed near their base edge in the centre left, chariots in column on our left, and most of the right command foot in column ready to advance into the rough terrain.
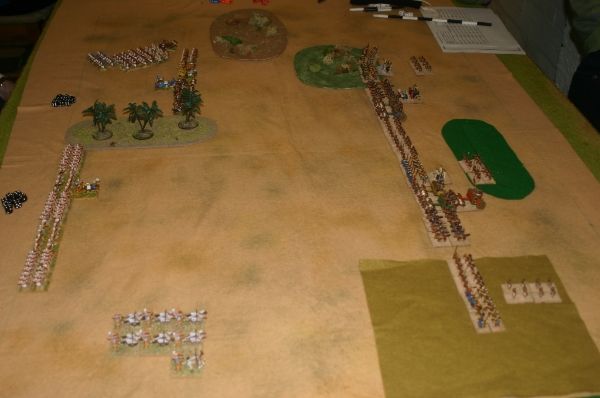
The positions at deployment:

In the first turn our aim was to push forward with as much of our army as possible. The Egyptians advanced and spread out their chariots with the intention of shooting and dropping back, avoiding combat until the odds turned in their favour.
End of turn 1:
Turn two sees some shooting from both sides, but little movement due to poor command dice.
End of turn 2:
In turn three some excellent shooting by an Assyrian foot unit on the right leads to an Egyptian Chariot unit routing (the Assyrians used an action dice showing a 6 to get a bonus shooting dice, and rolled 666 on the three dice, wiping out the chariots who rolled poorly).
There were three chariot units, now there are two:
The Assyrian left presses forward to put pressure on the Egyptian chariots, who pull back.
End of turn 3:
On the left the Egyptians threaten the Assyrian flank. The Assyrians turn to face the threat, but the advancing line becomes fragmented.
On the right the Assyrian cavalry charges into chariots, but the combat is inconclusive. The Assyrian heavy chariots turn to threaten the other unit of chariots.
The Egyptians get revenge for the loss of their chariots to shooting last turn by shooting and routing an Assyrian foot unit.
End of turn 4:
Action on the right. The Assyrian cavalry have a slight advantage in combat against the chariots, but fail to take advantage. Poor Egyptian command dice mean the other Egyptian chariots cannot pull back, but they manage to stay out of charge range of the heavy chariots. Their predicament does not look good though.
On the left the Assyrian cavalry charge into enemy chariots and lose. One unit of Assyrian foot is routed by shooting and the other pulls back, leaving the cavalry isolated.
End of turn 5:
Turn six, action on the Assyrian right. Heavy chariots charge the Egyptians in the flank, and they are lucky to survive. The Assyrian cavalry finally have success against the chariots they are facing, but don't quite do enough damage to rout them.
On the left the Assyrian heavy chariots get stuck in. These can be lethal when they charge, but they don't quite rout the Egyptian archers. The Egyptian chariots on the far left then move into position to flank the Assyrian cavalry.
End of turn 6:
On the left the Assyrian heavy chariots rout the Egyptian archers, but are then charged in the flank by another Egyptian foot unit. The Assyrian cavalry are hit in the flank by enemy chariots.
On the right both Egyptian chariot units rally some of their losses and fight on against the odds.
End of turn 7:
On the right the Assyrians finally finish off the chariots by charging them in the flank with the infantry. However, the infantry unit is then shot and routed. The heavy chariots pull back to prepare to charge the Egyptian foot. The Assyrian cavalry now start to lose the long running combat with the Egyptian chariots.
.
On the Assyrian left the outnumbered cavalry are wiped out and the two units of victorious chariots pursue to threaten the Assyrian foot and heavy chariots. The Assyrian infantry in the centre advance but it looks like they will not be in time to save the day.
End of turn 8:
On the left the Egyptian chariots charge the Assyrian heavy chariots in the rear, and the Assyrian foot in the flank. Incredibly they lose both combats, and one chariot unit routs.
The Assyrian foot in the centre charge the Egyptian foot in the flank and rout them.
On the right the Assyrian heavy chariots charge the Egyptian foot, fail to rout them on the charge, and are flank charged themselves. All four commands have suffered casualties, and any command could break with one or two more units lost.
End of turn 9:
On the left the Assyrian chariots rout, and that is enough to break the command.
Melee combat continues on the left.
End of turn 10:
The game could still go either way, but combat on the Assyrian right goes in favour of the Egyptians. The outnumbered Assyrian chariots rout, and the Assyrian cavalry finally succumbs in the long running battle against Egyptian chariots. With these losses the right Assyrian command breaks.
After an excellent, hard fought and close game it is a victory to the Egyptians.

