"Modular boards....needing some assistance" Topic
16 Posts
All members in good standing are free to post here. Opinions expressed here are solely those of the posters, and have not been cleared with nor are they endorsed by The Miniatures Page.
Please use the Complaint button (!) to report problems on the forums.
For more information, see the TMP FAQ.
Back to the Terrain and Scenics Message Board
Areas of InterestGeneral
Featured Hobby News Article
Featured Recent Link
Featured Profile Article How is a China-based wargaming company getting by in the time of coronavirus?
Featured Book Review
|
| acctingman1869 | 06 Sep 2013 7:38 p.m. PST |
Hello fellow terrain makers! Here is my idea. Getting a LARGE 8 x 4 mdf board as my "platform" and using those "foamboard" pieces you can get at Michael's for a modular terrain setup. My questions is, for example, desert terrain. How or what material would I put on the foamboard that WONT warp it and have it look like desert surface? I guess the same can be said for a western european countryside terrain. Anyone want to share what they've done or know a site that has a nice tutorial or pictures of what they've done? Is there something out there, relatively cheap like foamboard, that is a better more durable modular piece? Thank you for your time and any input! |
| Mako11 | 06 Sep 2013 8:04 p.m. PST |
I've thought about these long, and hard. Even bought some blueboard of varying thicknesses to make some dedicated terrain. Then, considered all the storage and transport issues, and decided to go with fabric terrain instead, overlaid (and, or underlaid – not sure the latter is a real word yet, but you heard it here first) with hills, fields, trees, etc. Easy to transport, store, and permits infinite setup possibilities, for far less cost, headache, and trouble. You can use canvas, cotton, pool table baize, teddy bear fur, and felt, amongst other materials. So that is definitely worth considering, since some of the nicest terrain I've ever seen has been created using the above. |
| WeeSparky | 06 Sep 2013 8:18 p.m. PST |
My desert board is covered with sticky backed cork rolls.
[URL=http://s96.photobucket.com/user/weesparky/media/IMG_20110619_151448.jpg.html]
[/URL] It was "Contact Paper" brand and came in rolls 18 inches wide and long enough to stretch across the short dimension of my table. This is my second desert board, the first was covered with putty, glue, and sand. Worst gaming surface ever, it was like playing on a giant emery board that constantly left sand dander everywhere. |
| Tony58 | 07 Sep 2013 6:22 a.m. PST |
Mako11 Sounds like a good idea. Have you got any pics. for reference? |
| elsyrsyn | 07 Sep 2013 8:09 a.m. PST |
I'm going the way Mako11 is going, with fabric over top of my terrain shapes (which happen to be made from foam hexes, since I happen to have some I had cut years ago. The main reason I chose this approach is that I can drop a grassland sheet over the hills, or a desert one, or a snowscape, or whatever, which makes it unnecessary to have multiple sets of terrain. Further, I'm drawing road and rivers and such onto the sheet with chalk pastels, which wash out between games. Doug |
| Ewan Hoosami | 07 Sep 2013 8:35 a.m. PST |
I agree with Mako.
I've done the modular board thing several different ways over decades. They work really well and they will do everything you want them to do. But they are a pain to store when not in use. All that fine work making them look nice quickly gets undone when they get damaged because of storage issues. If they are made of foam they will chip, break, tear, whatever. If they are made of wood the will be heavy and will still get chipped and knocked. Cork tends to warp even when sealed and the corners get snapped off easily.
For the last ten years I have used two large felt cloths ( old Geohex) that I flocked using woodland scenics scatter. One is green and one is sandy coloured for desert. When not in use they get rolled up and put in a P C tube that stands in a corner. I have a large set of rubber roads of different types and some sets of creeks and rivers also in rubber (sadly no longer produced) and some home made Mdf hills. I have a couple of stackable hobbyboxes that contain all of my trees clustered on small bases, bags of foliage clusters for the understory plants, buildings, defences, craters and other odds and bods and it all stores away in a 1/4 the space needed for modular boards. This system has superior variation of set up, its quicker (remarkably) to set up and has greater portability. In the long run its less time consuming to expand on as well. Rather than having to make extra boards up which require more storage space. I can make up smaller add on vignettes that can be stored in stackable hobbyboxes.
Also modular terrain boards means your roads and watercourses will always have to match up in the middle of the board. This tends to lock your roads into a grid system. Whereas a tiled road system can be laid at any angle on the mat.
As the guy says, "dont do it" |
| acctingman1869 | 07 Sep 2013 11:17 a.m. PST |
Hey eldyrsyn and Ewan Can you guys, when you have time, post some pics of your terrain? Where did you get your fabric/felt material? This sounds better than what I was thinking! Thanks gents! |
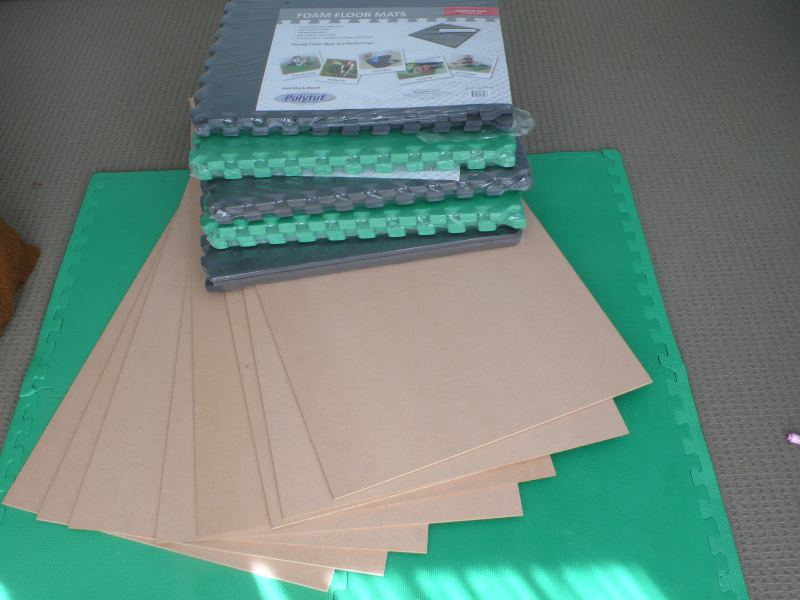
| kmahony111 | 07 Sep 2013 9:50 p.m. PST |
I used rubber play mats but I'd recommend cutting of the teeth as mine are starting to get damaged and perish but not warp. I mounted them on 5mm thick MDF wood with No more Nails adhesive. Some pictures
Finished boards
Full construction article here
6mm.wargaming.info/page3.shtml Cheers
Kieran |
| Ewan Hoosami | 07 Sep 2013 10:51 p.m. PST |
I am away from home for a couple months so I can't show pics. The material is the back of Geohex felt hex mats. I bought two and they are slightly bigger than 6 x 4 and one side is printed with a hexgrid pronted over ocean colours, used for Napoleonic naval gaming. I have third which is a space hexgrid, I flipped over and painted a hex less starfield. So I flocked the other side of the blue sheets with Woodland Scenics flocking material in appropriate colours and glued it down using gallons of spray adhesives. The flock is a coloured sponge rubber material so its nice and soft if it is laid on a table face down. I didn't have precolour the material paint as the scatter goes on nice and thick.
Geohex is a company thats long gone, but if you go to a big material store you can buy felt off the roll.
The roads and rivers I use are by a guy in my town in Australia and they are made from polyurathane rubber. They are/were called Flexitrax because they are thin and can follow hill contours and are nicely detailed. He stopped producing about five years back because of rubber supply issues, but was talking about starting up again when he found a new rubber supplier. Fingers crossed because they better than anything produced even now.
You could make your own roads etc in sections out of anything, card, mdf, vinyl strips etc and painted and flocked at the sides to match the cloth. They're a bit of a no brainer as are hills, I use mdf for hills because I have a sanding belt attached to my bench grinder, it makes lots of dust so I mount it outside on a windy day and make up a few hills at a time and let the neighbours cough it up for a few days. But hills can be made from rigid urethane foam glued to a 3mm mdf base and sanded to shape, the base stops the foam from breaking at the thin tappered edge. Its your choice foam is light but brittle, mdf is heavy but strong and better wearing. Trade off!
I mount my trees on shaped and tappered mdf bases. I am making some 28mm Normandy buildings for Bolt Action, I'm thinking about making up an entire farm house cluster as one vingette with all the outbuildings, vegi garden and details all attached to an mdf base. The size will be determined by the base of the box it will be stored in.
When I make a terrain piece, the storage size/space is my first consideration. I actually have plenty of space but it will eventually all add up. Folks that see my stuff think, neat you found a box that perfectly fits the model, when in fact its the other way around. |
Mad Guru  | 07 Sep 2013 11:54 p.m. PST |
Hey acctingman, It sounds like Mako, Ewan, and the other fine contributors above have convinced you of the error of your ways re: your original idea of creating a set of foam-on-MDF terrain boards. That is probably for the best, as all of their points, re: storage, transport, versatility for scenarios, and durability -- not to mention expense in time and money -- come down firmly on the "terrain cloth" side of this debate. Nonetheless, and with the utmost respect to all the prevoious commentators above, I can't help but weigh in on the other side! Not just to be a "Devil's Advocate", but because I've gotten so much enjoyment out of my own set of desert terrain boards over the past 3+ years since I built them. For arid, desert type ground cover, terrain boards can provide fantastic-looking results without requiring great artistic talent, but they do require a lot of elbow grease. They are not complicated to make, but they are not easy to make either. Here's some pics of my desert boards in action:
…and here's a link to the best online tutorial I know of on building desert terrain boards, put together by the incredibly-talented Clarence Harrison of Quindia Studios: quindia.com/studioart11.htm The foam you refer to from Michael's is I believe at most a 1/2" thick, which, if you want to make your entire layout flat -- other than hills going higher -- will work fine, but if you want to be able to go lower down, in order to carve out gulleys, sunken roads, "wadis", "nullahs", ravines, etc., then you will need foam of the 1", 1.5", or 2" (best choice in my book) thick variety. The question of what material to use to glue to the surface of the foam to give it "desert" texture, after you've mounted it to your MDF baseboard(s) is a good one. When used for projects of this size, Hobby material such as model railway ballast, becomes prohibitively expensive, but the solution is easily found at large hardware or garden stores, like Home Depot or Lowe's, which carry "builders" sand and "play" sand in various gauges. I just checked on Google and a 50lb. bag of "Play Sand" at Lowe's lists for a little under $5.00 USD. I used something called "soil erosion" for my boards, which worked great because it includes a rough mixture of various gaudes of very tiny gravel, from specks of sand to pebbles, but as far as I know it's only available by that "name" here in Southern California during mudslide season. Still, I'm sure similar stuff can be found anywhere, if you can take the time to look for it. If you do decide to proceed on the terrain board front, you will have to look around for what you think is the best version of "sand" for the look you want to achieve. Do you want a super-fine and smooth sand look, like the Sahara Desert, or something rougher and a bit more rocky, like most of the American South-West, or my own Afghan/North-West Fronter boards? Or something more Martian red? There's no wrong answer, but only you can decide the right one. When I built my boards, I spent as much time doing R&D on the exact nature of the ground-cover -- both the material to make it from and also the exact color scheme to paint it with -- as I did building the first set of five 6'x2' boards! (I wound up adding a sixth board about a month later, in order to expand the layout to cover 12'x6'.) Again, I don't disagree with anything the intelligent and experienced folks who left a series of very wise comments above have to say. I just feel compelled to give voice to the other side of this equation. It's very true that terrain boards come with a ton and a half of trouble… but it's also true they usually look exceptionally good. If that weren't the case, no one would go through all the time and effort required to build, store, and maintain them. |
| Mad Guru | 08 Sep 2013 1:56 a.m. PST |
Here's one more pic with a wider expanse of the tabletop, that I didn't manage to put in before time ran out and the site went dark for nightly maintenance…
…but on the other side of the coin, here's a link to a tutorial on creating one of the best looking desert terrain cloths I've seen: link |
| acctingman1869 | 08 Sep 2013 7:15 a.m. PST |
Seriously, thank you all! I have some thinking to do now. For me, there is no issue of moving it (well, on and off my table) and storage isn't an issue either. |
| elsyrsyn | 10 Sep 2013 9:24 a.m. PST |
Can you guys, when you have time, post some pics of your terrain? I think I have some pics of the test sheet we did (which came out ok, but only just, although it did prove the method) with some (also test) pastel doodles on it. If I can find them I'll post them up on this thread. I used to have the website from which I stole the idea (I think they used it for Warzone games), but I cannot find it now. It looked damned good there. I've purchased some more materials for the grand experiment and hope to have some better shots soon. Doug |
| acctingman1869 | 10 Sep 2013 10:46 a.m. PST |
After visiting my local "Fabric Land" I'm left with another question to those that use fabric/felt approach. What type of material are you using? I saw stuff that looked like felt, others that looked like a vinyl. Not sure what kind of fabric to use. Also, how do flock them and what are you using? Thanks |
| Ewan Hoosami | 11 Sep 2013 3:11 a.m. PST |
My mats are just made from a natural felt. I used Woodland Scenics flock which comes in various grades from course to fine in several colours. I glued the flock down with a good quality spray on glue from an artist supply and not from a discount store. I sprayed the glue on to the mat in small sections at a time. Applied the flock and moved to another section. I them sprayed glue over the first flock layer giving it a decent soak and added another layer. This second layer you could add some slight colour variation. When dry I shook the matt to loosen any unglued loose flock. I did this over a plastic drop sheet to collect the flock to reuse on other pieces. I checked over the matt to ensure complete coverage and make additions of flovk where neeeded. You will find some shedding will occur but after a few uses this will settle down. |
| elsyrsyn | 11 Sep 2013 9:40 a.m. PST |
For our sheets, we're using plain old flat bed sheets – the cheap ones from WalMart. They come in a variety of colors, and are $4 USD for a twin size (which is adequate for our tables). No flock. I may eventually try the same technique with some felt, though. Doug |
|