| forwardmarchstudios | 14 Nov 2012 10:15 p.m. PST |
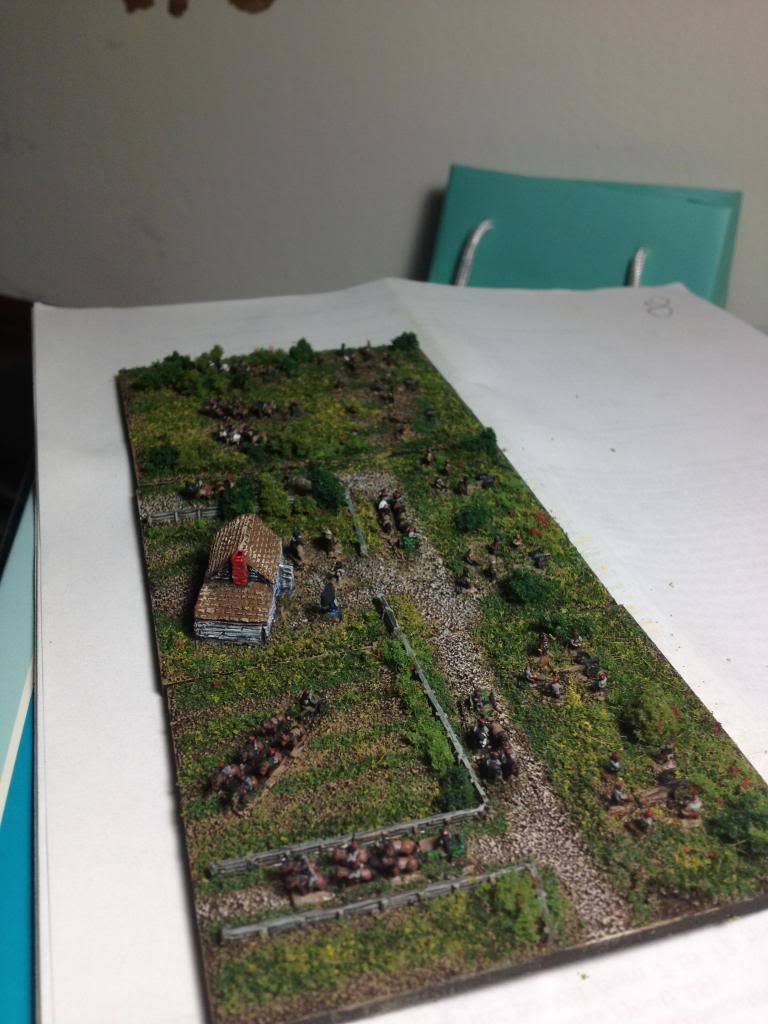
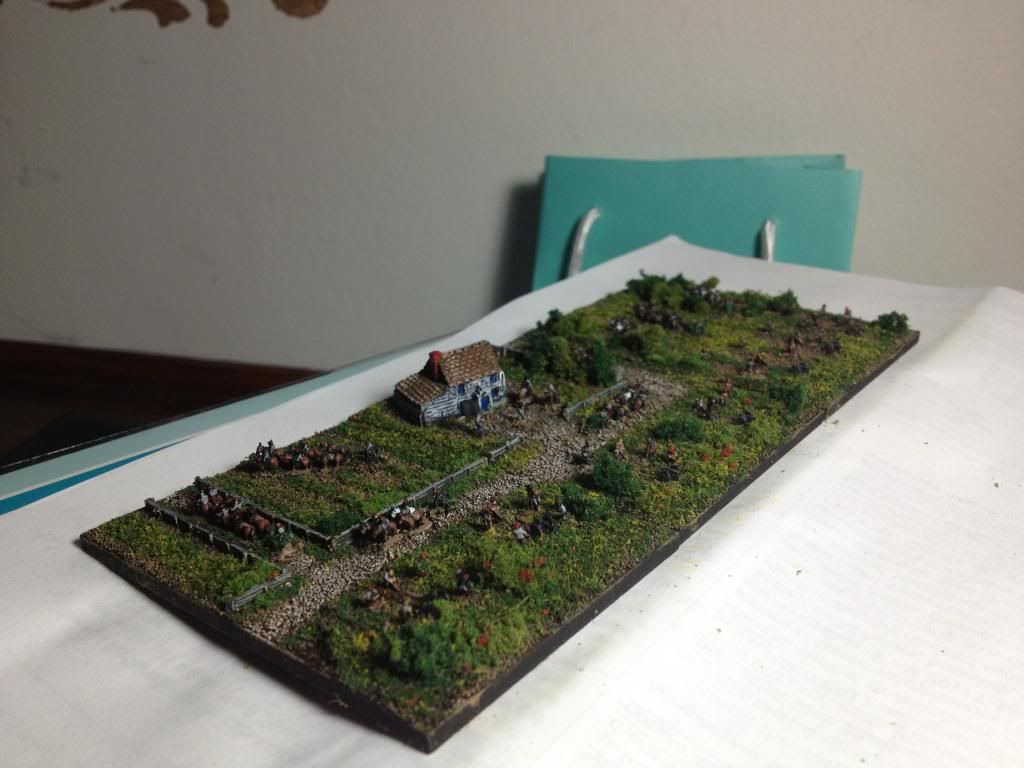
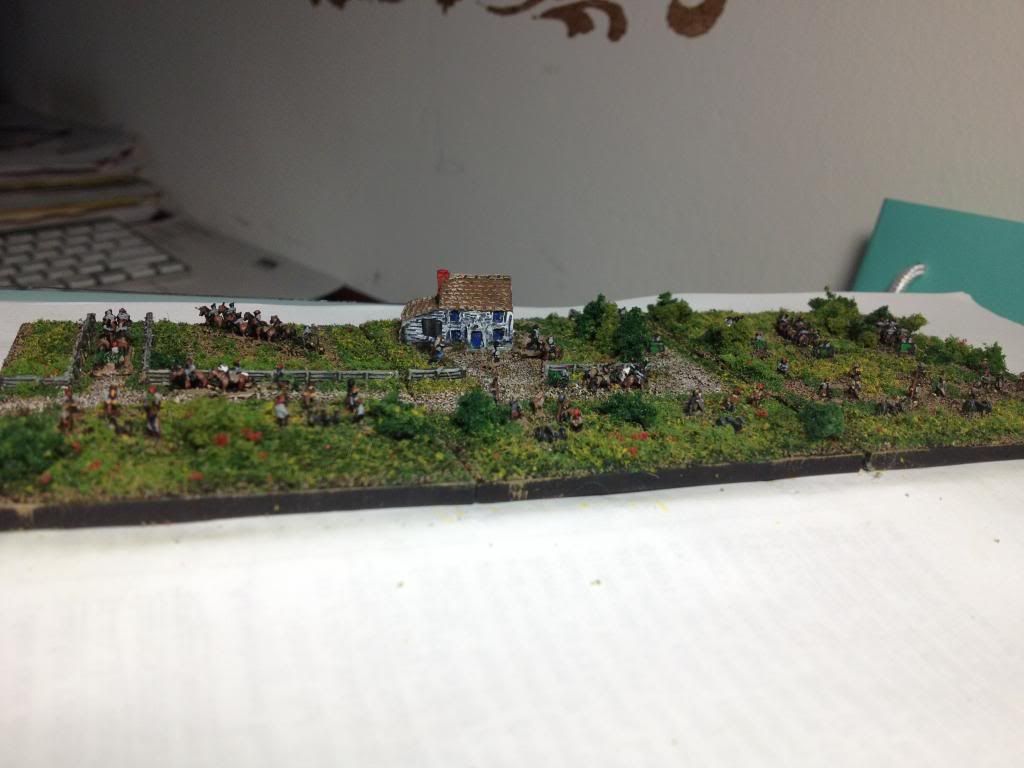
Hi there, As promised I have my finished artillery batteries. These guys are mostly done, but I'm not entirely, completely satisfied, so any critiques are welcomed. These are also a sort of statement of purpose as far as what I want the finished armies to be. Here are a few angles… only the darkest green flock is glued down, so I can still work with it….
And an overhead….
Or two…
Ok, so those are 1:1 artillery batteries. A 6 gun battery was about 90m wide, so having two guns per base works out well for me. Each of these bases is 60mm wide and 80mm deep, so three lined up are the same width as a 300 man brigade of infantry. The reason I did the three gun base was because they often did place the guns at closer intervals, and I was hoping for a way to show that on the table. I may just do two guns per base though. The biggest advantage of having two guns per base is that you can then have 1:1 gun sections split off without much problem. And I definitely want my Confederate arty to be able to split into two gun sections! I'd like to add a little more volume to the base and some more color, especially some warmer colors. If anyone has any advice I'd appreciate it. Maybe a tree or two near the house once I get my hands on some woodland scenic armatures, plus some clump foliage bushes. Right now I have some GF9 foliage in there (its slightly lighter green with the red dots). But yeah, any input is appreciated. I may also paint the dirt road gray, or a warmish brown-yellow. Anyways, I hope you guys like it. The fence and house are both from Pico Armor, btw. |
| Rapier Miniatures | 15 Nov 2012 1:54 a.m. PST |
My advice with 3mm on this would be to lighten up the base colours. With small scale figures you need lighter and brighter to help them look right. |
 Extra Crispy Extra Crispy  | 15 Nov 2012 5:22 a.m. PST |
Agreed. Do more of the light green with just spots of the dark. And maybe one more drybrush over the sand in a bone color to lighten them. The bases are brilliant but the figures do get lost… |
| moonhippie3 | 15 Nov 2012 6:12 a.m. PST |
Your roads seem to dominate the landscape. I would suggest you make them about half as wide. It wouldn't change anything as far as movement is concerned, but it would look a little better. |
| boy wundyr x | 15 Nov 2012 7:11 a.m. PST |
Damn those are beautiful little scenes though. The house is awesome. |
Frederick  | 15 Nov 2012 7:26 a.m. PST |
While I accept the above comments I also agree that those are beautiful mini-dioramas |
| William Warner | 15 Nov 2012 8:03 a.m. PST |
Really beautiful. Only one technical comment: the gun teams should be facing the guns, not turned away. |
| boy wundyr x | 15 Nov 2012 8:59 a.m. PST |
I came by to look at the pretty pictures again and just noticed the horses – those would be great at any bigger scale, how did you get the layering done? With a wash? |
| forwardmarchstudios | 15 Nov 2012 9:06 a.m. PST |
Hi!
Thanks for the compliments and suggestions. I have some lighter green flock left over from my latex battle mat project so I can try out some of that tonight. A few shades light might be better. As long as the figs don't look too dark against it and its not too yellow-y. The road should definately be white-ish or clay-colored. That less light-tan/dirt color the better, and it'll make the fields stand out more. BTW- are the furrows too broad? Should they be smaller? I may line them with small pieces of clump foliage to make some small sprouts of some kind. About the roads- I can probably make them narrower. How broad was a road at that time though? Glad you guys like them though. For the record there are about 70 figs on the three bases, not counting the horses. It looks like my hunch to go bigger was the right one. I'm going to try to make as many of my bases as possible busy like these guys, at least where possible! First I need to order up some more bases… PS: Someone mentioned to me the other day that the horses are pointed the wrong way. I got impatient though, so that's why they weren't fixed. I'll go back and fix them eventually… erg…. |
| forwardmarchstudios | 15 Nov 2012 9:14 a.m. PST |
boy wunder x- I haven't used any washes on these guys. I want to try them out though because I think it'd be easier than how I currently do it. I layered some of the horses, just by spraying them black, then giving them a quick undershade followed by an equally quick main color. No highlights though. That'd be madness. I paint all of these guys assembly line style on popsicle sticks. The trick I have though it to take one color, say gray or light brown, and I go down the row painting different things on each model with that color. Then I go back with a second color and do other articles randomly in that color. In this manner I achieve a nice patchwork effect with my Confederates at least. No two figs on the stick are exactly the same. I keep the pallete limited though to avoid them looking entirely unmilitary. And in the case of arty I give all the rebs a red cap, whether or not this is entirely accurate, because it looks too good to pass up! The next batch I do though I'ma try out a white spray with a wash and then paint them. The figs in the pics above are a bit too dark, and some of the "layering" effect is just where I tried to touch them up with lighter and lighter highlights well after I originally painted them. |
| boy wundyr x | 15 Nov 2012 11:05 a.m. PST |
Thanks Forwardmarch, that's interesting and has been saved for my future attempts. Your horses really do have a superb depth to them. The three teams that are on the top left in the first picture are what I'm looking at, and given the distance perspective from the scale of the figs, that's what real horses look like from a couple hundred feet away. Not just a "painted brown" look. I have a ton of ACW and Naps to do, so I'm envious but also with a goal now too. |
| forwardmarchstudios | 15 Nov 2012 11:50 a.m. PST |
I'm trying to get these ACW guys done so I can justufy buying several thousand Napoleonics to start with. I may make a smallish order so I can do a single brigade and some cavalry. I haven't done the math yet but what I'm really excited to try out is a properly sized division of heavy cavalry, preferably one of the more exotic ones from 1812. Just imagine that on the table top! Also, a grand battery done at 1:1 like in the pics above would be a spectacle for a convention game. The ACW figs have sort of been my experiment in what I could with the 08 figs before the naps came out. They'll be much more colorful, that's for sure! |
| wolfgangbrooks | 15 Nov 2012 3:40 p.m. PST |
Thanks for showing these, this is exactly the kind of thing I want to do with my Pico Armor stuff. |
| William Warner | 15 Nov 2012 5:25 p.m. PST |
Now that I think about it, the horses are only pointing the wrong way if they are halted and in position for the guns to open fire. They could actually in the process of turning around after unlimbering the guns. Most of them are at an angle to the firing line so they could be preparing to begin their 180 degree turn to come up behind the guns. Rationalization can be a wonderful labor saver! |
| Toshach | 15 Nov 2012 8:21 p.m. PST |
Very nice. I'd like to see pics of your battlefield too. |
| forwardmarchstudios | 15 Nov 2012 9:38 p.m. PST |
Hi again, Well, here's an update to this project. I took some pieces of advice mentioned above and added some medium-green flock which really helped improve the over-all look of the bases. I also added some small trees and bushes, which I think makes the bases a bit more dynamic. I haven't highlighted the road, which I really want to do…
What do you think of that? I haven't glued anything down yet, so I can still change stuff around.. Toshach- Here's some of the terrain I did in Arizona…
I was made for a slightly different scale… then again, the regiments you see in there are also 60mm in frontage, so I could probably have used it for these new ones… unfortunately I got rid of it in the move! I need to make another one of those….
As you can see, my new way of basing in a big improvement. That's what I meant by "put all my effort into the terrain." |
| Rapier Miniatures | 16 Nov 2012 4:38 a.m. PST |
Like that battlefield, like that a lot. |
| SteelonSand | 16 Nov 2012 5:53 a.m. PST |
Stunning work, simply stunning…the 'vignette' artillery bases are little masterpieces – get the bushes stuck down immediately – they look perfect as they are to me! :-) |
| forwardmarchstudios | 17 Nov 2012 1:04 p.m. PST |
Ok- I think these guys are finished up. I added a lot more light colored flock, a lot more yellow, touched up the caissons with a brighter green (the olive green just won't cut it at this scale…) and narrowed/highlighted the road to make it brighter and separate it color-wise from the actual dirt patches. Lighting and picture taking remains an issue with these guys. If you see them in person they look a lot better…


Anyways, I'm pretty happy with this one at this point. Now that I've figured out how to do terrain at 1:1 it's sort of changed the way I want to go about making the larger terrain boards in general. I think I can make them even more detailed that I had previously. Using GF9 fine clump foliage in conjunction with the Woodland Scenics stuff also helps a lot, and I want to check out what other products they have. There stuff is a lot more vibrant that WS stuff, although its also quite a lot more expensive, especially if you're talking about making, say, four 6x4 foot mats to take to conventions… Here's a few more shots with better lighting I think….
|

