"1/300 painting techniques" Topic
9 Posts
All members in good standing are free to post here. Opinions expressed here are solely those of the posters, and have not been cleared with nor are they endorsed by The Miniatures Page.
Please don't make fun of others' membernames.
For more information, see the TMP FAQ.
Back to the WWII Aviation Painting Guides Message Board
Action Log
02 Feb 2012 4:48 p.m. PST
by Editor in Chief Bill
- Changed title from "1/300 paiting techniques" to "1/300 painting techniques"
Areas of InterestWorld War Two in the Air
Featured Link
Featured Showcase Article You can pick up a toy blimp in the local toy department for less than a dollar.
Featured Profile Article Paul Glasser reports on the debut of Axis and Allies: Guadalcanal and the North African expansion.
|
| Acctingman69 | 02 Feb 2012 2:13 p.m. PST |
Whoops…anyways Can you pros share your painting techniques? From start to finish, please? Thanks |
| Toaster | 02 Feb 2012 2:20 p.m. PST |
Don't know that I count as a pro but I find that a very light white drybrush after painting really helps to blend the colours which otherwise look very harsh on such a small model. Robert |
| Mako11 | 02 Feb 2012 2:36 p.m. PST |
Clean, and prime as usual, and then paint desired colors, using paint that has been lightened a bit with white (not too much lightening, but a bit). This is done, due to scale effect, since smaller models don't reflect as much light. Some choose to instead apply the base color as is, and then drybrush a lighter shade of the same color on top. Both work well. For panel lines, you can either use pencil, pen, or an ink wash. I prefer pencil, or a gray pen to black, since the latter is a bit too stark on most planes – depends upon the final color of the aircraft. For canopies, choose your color, e.g. light blue, or a dark gray. I usually prefer the latter, but both can look good – consider matching to your final overall camo. scheme. For natural metal planes, I just polish the metal minis with fine steel wool, and then seal with either a gloss, or a satin finish to protect it, after applying the decals, and paint to canopies, etc. The sealer will protect the finish to keep it from tarnishing over time. |
| MacSparty | 02 Feb 2012 2:50 p.m. PST |
Like any mini painting, there are pretty much countless ways to do it. Here's my method ( I usually drill a hole in the bottom and glue a toothpick in for handling):
1. Prime gray
2. Scribe panel lines with detail pen as "preshade" – I use black. This step is especially effective on light-color aircraft, I think.
3. Here's where I differ somewhat. I actually airbrush my planes. I start with the bottom, then use Tamiya tape to mask, then do the top. I'm still experimenting how to do multi-color upper surfaces. Honestly, for now, I've brushed on a second color.
4. Go over detail areas – e.g., cowlings, wheels, etc. For black, eg Zero cowlings, I use Grimy Black. It's just light enough it looks good in scale.
5. Canopies: Dark sky blue, dry brush light sky blue, highlight each pane with a dot of white.
6. Brush an acrylic gloss clear over areas where decals will be placed.
7. Decal. I use Micro Sol and Micro Set as well.
8. Spray the while darn thing with Testors Dullcote.
9. Add magnet.
10. Get shot down. :) |
| MacSparty | 02 Feb 2012 2:54 p.m. PST |
One of my Zeroes:
P-40s:
And Dauntlesses:
|
| Pajaro Muerto | 02 Feb 2012 10:19 p.m. PST |
And here's a bit about my methods: I paint by brush. (Been seeing into getting an airbrush also.) For the overall colors, I paint in 2, sometimes 3 watered-down coats. One thick coat shows the brush strokes and covers 3D detail. Canopies go in a blue-gray, with sky blue higlights. That is unless it's a gray (early IJN), blue-gray (early USN), etc. plane, when the contrast would be poor, in which case I use a lighter sky blue or darker blue-gray. My recent planes also have a very glossy clear just on the window panels or bubble canopies, after the matte finish spray. It really adds to the realism with hard lighting:
I highlight the thickest most raised part of the wings and the top centerline or the fuselage with the base color mixed with a bit of white or light gray. I apply it a wet brush (I mean, not drybrush) with slight thin lines, a bit randomized. The color shouldn't be that much lighter than the base color, or it looks stupid and obvious. The idea is to imitate a dull shine. For panel lines I use the base color with a bit of black, or a suitable darker version if I have it. Very thinned with water, and using a 3/0 brush. I go off the lines a A LOT, so I keep a brush with water handy to erase and start again :) I lately line the elevators, ailerons, and rudder with black, 'cause the gaps really look kinda black in photos. Here's a Soviet Kobra; this canopy is in my normal blue-gray:
With camouflaged planes, it's more of a hassle. I go OCD and highlight and paint the panel lines in light and dark shades of all colors. Italians are scary. Here are 4 D.520s (3 colors!):
Lately, I've been experimenting with painting a few "panels" on the wings and fuselage in slightly off shades of the basic color. The idea is for the planes to look beat up and weathered. Usually I just mix in varying degrees with gray (or tan for Olive Drab). Here are 4 A-36A's with that technique; you may just notice it in a few places, athough the pic is small (which kinda begs the question: why do it then?!):
BTW, nice canopy lines on that Reisen, MacSparty! Very exact :) Good gaming and painting!
Rolando |
| MacSparty | 03 Feb 2012 6:43 a.m. PST |
Holy cow, Rolando, I'd have guessed 1/144 if not 1/72! I really like your canopy color especially on that P-39. I've felt mine are a little "bright", but as you said there is concern with contrast on a blue-grey USN scheme. |
| Pajaro Muerto | 03 Feb 2012 8:26 a.m. PST |
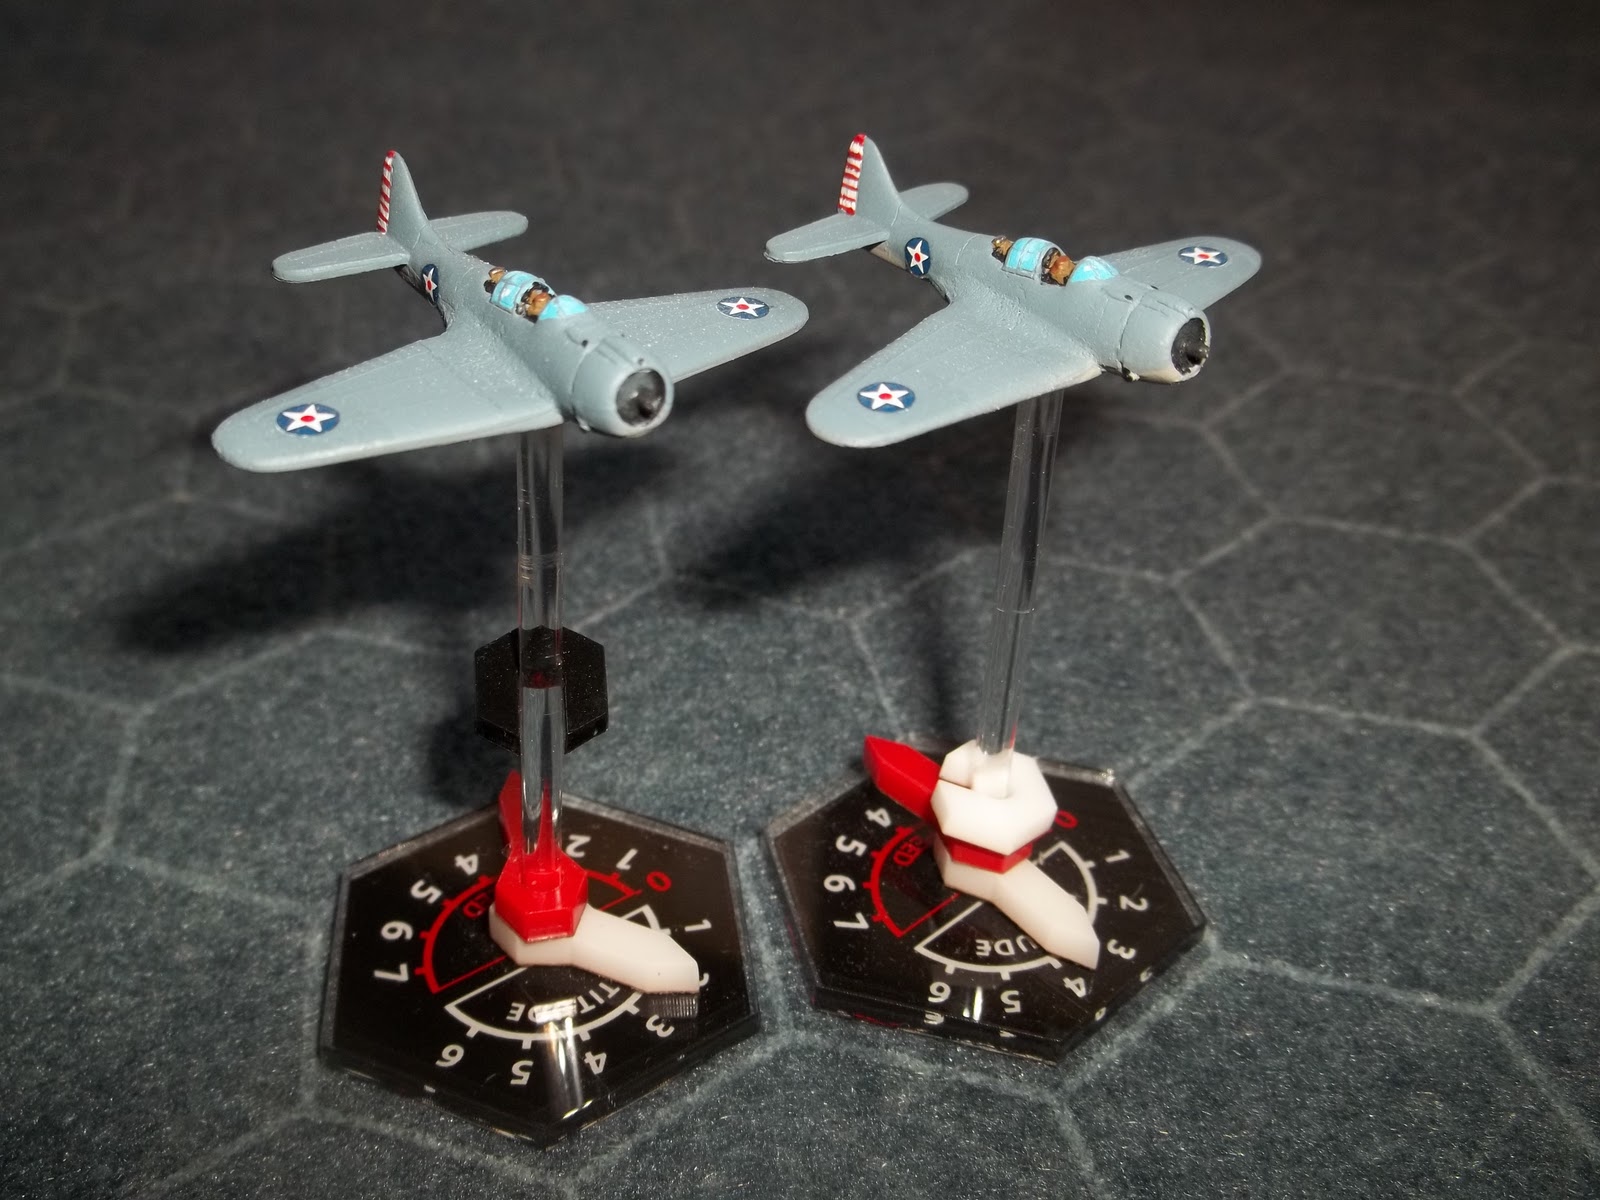
Thanks Mac! Now that I remember, the French D.520's canopies were also painted in a lighter mix, as the normal blue-gray I use was very similar to the Blue-Gris Foncé camo color. I was once concerned about being uniform with my canopy color on all my planes, but practicality took over as soon as I painted my first F4F's. The USN early Blue-Gray turned out to be EXACTLY the shade I was already using for canopy glass, so I had to mix in some black and gray. The results I think were nice:
If you wanna know, I use cheap craft paints, and the color is Colonial Blue Light from the Decoart Crafter's Acrylics line. One dolla :) Rolando |
| NihonKaigun | 03 Feb 2013 3:34 p.m. PST |
Rolando, Beautiful minis! I'm curious, who makes the minis in your pictures (especially the B-25)? I'm finally getting back into 1/285-1/300 and I'm having trouble finding minis of consistent quality (tends to vary a lot by sculptor, age of mold, etc.). Most of mine are Raiden or MSD (Luftwaffe 1946). I too am somewhat OCD and I like to try to find minis with recessed panel lines and the like. I used to stick consistently with gunmetal gray cockpits, but after seeing yours, I want to give blue a shot! |
|