


One of the differences between Ancients and fantasy 15mm mass-battle wargaming is the terrain. Historical armies often fought on flat, featureless terrain. Fantasy armies can fight on varied terrain, providing interesting tactical challenges.

For example, this 2' x 2' map generated for a fantasy scenario provides a battlefield with a waterway, scattered forest, and a large linear barrier. Problem is, I don't have an 11"-long linear barrier for 15mm gaming. Time to get to work!

First, I extracted the image for the barrier. There was no need to be exact, but hey, it was easy.

I printed out the template, although I couldn't print it large enough as the barrier was 11" and the paper was 11" long. I then traced the outline onto foamboard, leaving a margin to give me the larger size.

I prefer to use wood for terrain bases, but I didn't have anything suitable. Above is a foamboard cutter. The blade slides down to cut at variable depths, and a snap-on attachment allows you to cut a beveled edge.

I found the cutter to be less than optimal. It was hard to cut along the line, and the blade (when cutting at an angle) was not long enough to cut all the way through the foamboard. Once the piece was cut out, I kept carving on it until it was close to what I wanted.

I then painted the top and side of the foamboard with dark gray paint.

I used thick white glue to attach Decorative Filler Skulls to the foamboard. I picked these up last year at Dollar Tree, and I see they are in stores already this year.

I allowed the skulls to dry in place for a day. I then brushed slightly thinned white glue onto the base, and flocked the base with black sand.
I then took a risk, and sealed everything with a coat of matte clear spray. The danger is that the spray can melt the styrofoam if it comes into direct contact, and I didn't want the foamboard foam (on the sloped edges) or the skulls to melt. Fortunately, the skulls were apparently entirely covered by glue and sparkles. Some stray bits of foamboard usefully dissolved.

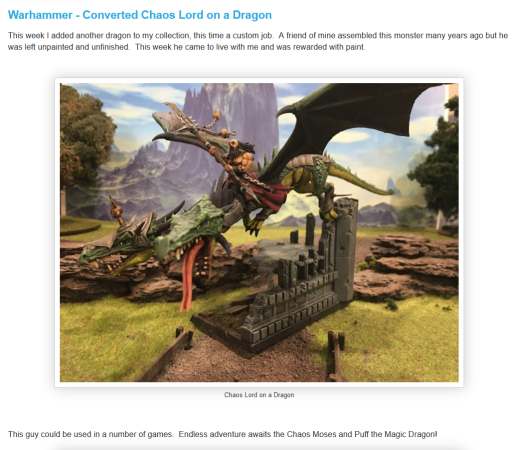
Above, you can see the finished Skull Barrier on the wargaming table. It did suffer a little bending as everything dried and doesn't lie completely flat, so I'll gently clamp it to a yardstick to cure that.

Now I have more terrain for my knights and Beastmen to fight over and around! ![]()