![]()
|
|||||||||||||
| Hexon II Box Set (21 boards) | |
| Product # | hexon1 |
| Manufacturer | |
| Suggested Retail Price | £44.95 |
Back to A HEXON BOARD FOR OGRE
Back to Workbench
| Revision Log | |
| 16 April 2004 | page first published |

Rating: ![]()
![]()
![]()
![]()
![]()
![]()

The last four villagers from Blue Moon's Romanian set, as painted by PhilGreg Painters.

DemosLaserCutDesigns ![]() takes inspiration from Masters of the Universe when painting these mutant cats.
takes inspiration from Masters of the Universe when painting these mutant cats.
9,038 hits since 16 Apr 2004
©1994-2026 Bill Armintrout
Comments or corrections?
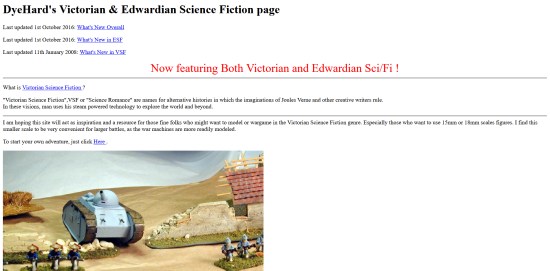
I decided to work on the Clear Zone first, since it looked like the easiest part, and a good chance to get my hands "dirty" with using the Hexon II boards.

So I opened my first box of Hexon boards (after moving the dog, of course). Upon examining the Ogre map, I saw that I would only need a dozen clear boards - so I counted to 12.

Next step was to wash the boards off, to remove any oily residue that might be left from the molding process.
Then I gathered my tools. I knew that I wanted this part of the map to be "featureless dirt" - so my idea was to apply paint, then shake sand into the paint to create texture. Some people like to paint first, then later glue the sand on - I don't do that because
I've heard of buying sand at hardware stores, but have never been able to find it there, myself. Craft stores sell sand, but usually that comes in all kinds of unearthly colors. So I go to Dollar Tree, where for $1.00 USD I can get a small bag of sand and some seashells (my wife takes the shells for her projects...). There are two varieties - clean and dirty sand, basically - and I choose "clean" for now.
As for paint - when I first started using natural sand, I thought it didn't look right, so I would end up painting it to look more like sand! Then one day, I discovered that the problem was choosing the right color of paint as the base. For my eye and this brand of sand, the "magic" color is Americana Mink Tan.
, Mink Tan (new style bottle), and Blending Gel")
However, my experience with Mink Tan is that it is a very fast-drying paint - and I want to be able to paint an entire board, and still have wet-enough paint to pour the sand onto. To keep paint "wet," I usually use an extender - a paint additive designed to make the paint stay wet longer. However, extender also thins the paint down, which would make it harder to get the sand to stick in it.
So I went wandering through the craft store, and found a product called Blending Gel - it's designed to keep paint wet longer (for blending colors together), but it's a gel so doesn't make the paint so watery.
One hobby trick that it took me a long time to learn is to use the right brush for the right task. Obviously, since we're painting large hexes here, the solution is a larger brush... but then it occurred to me that a smarter solution would be one of those disposable foam brushes. The foam brush is good at laying a coat of paint on a flat surface, without any tricky bristles to put paint over the edges. This is useful, since I've decided for this project to paint only the hexes, but leave the sides and grid the original black color.

My other tools are a plastic bucket (ex-ice cream container) to hold the sand, a plastic lid (ex-cottage cheese container lid) for mixing paint, a wooden stick for mixing, and a cup (ex-yogurt container - making the dairy industry proud today, I am!) for paint water.