![]()
|
|||||||
| combatpainter |
I guess the gravel has to be big and heavy enough to sink. If not, what you get is gravel that comes off once the compound is dry. I guess it doesn't work as well with Durhams because it is thicker. I tried pushing the ballast in but to no avail. I had to glue the sand in place afterward. I must try the compound to see if it works better. I think it would since it is softer. |
| Revision Log | |
| 16 May 2005 | page first published |

Everyone has a pile of shame - miniatures that you were all hot to get, had big plans for, and then never did anything with...
13,393 hits since 16 May 2005
©1994-2026 Bill Armintrout
Comments or corrections?
Monkey Hanger ![]() writes:
writes:
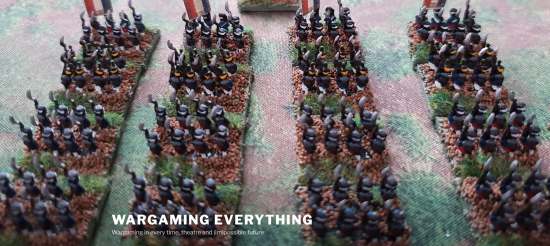
This technique was taught to me by Mr Rudd (thank you). It is a simple technique that gives a good finish to your based models. Here is how it is done...
1 x tub of manilla-coloured pre-mixed tile grout
1 x bag of railway ballast/small stones
1 x bag of static grass
1 x static grass applicator (available from the Signalman)
1 x bottle of earth-brown paint (miniature paints #82)
1 x bottle of sand-coloured paint (miniature paints #62 or Foundry palette 5)
1 x bottle of PVA glue

Glue figures onto base using whatever glue that you normally use.

Apply tile grout to base, and sprinkle ballast onto the base where you want it. Add as little or as much ballast as you want.

Paint the whole base in your base earth-colour, as shown.

Once the basecoat is dry then, using your sand colour, drybrush the whole base until you get the effect you are looking for.

Once the drybrushing stage is dry, then apply a small amount of PVA glue to the areas of the base where you want to apply the static grass. Using the applicator, apply the static grass to the areas where the glue is (shake off excess grass), and then allow to dry.

Once dry, then your troops are ready to go into action!
Of course, this system is open to experimentation with different base and drybrush colours to achieve different terrain textures.