![]()
|
|||||||||||||
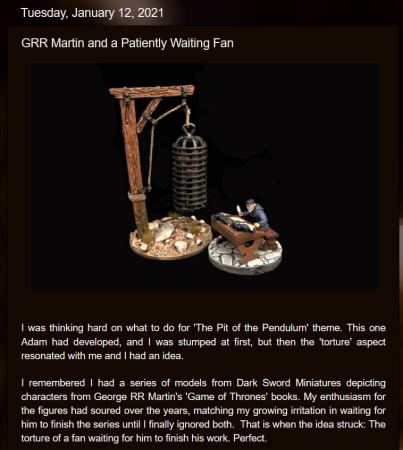
| Giant Gor | |
| Product # | 2367 |
| Manufacturer | |
| Suggested Retail Price | $18.00 USD |
Back to ASSEMBLING AND PAINTING A GIANT GOR
Back to Workbench
| Revision Log | |
| 15 September 2003 | page first published |

Rating: ![]()
![]()
![]()
![]()
![]()
![]()
![]()
![]()
![]()
7,131 hits since 15 Sep 2003
©1994-2026 Bill Armintrout
Comments or corrections?


Please sign in to your membership account, or, if you are not yet a member, please sign up for your free membership account.
Joe Wiedeman of Mini-Dragon writes:
For this first installment in the actual painting stage of the Giant Gor (GG hereafter) I'm going to concentrate on the fur.
The first thing I did was to look at the picture of the GG on the 100 Kingdoms website:

Now, this looks pretty good - I especially like the grassy stuff on the base. He looks like he's got a bit of brown on the top of his head, nice touch there to liven the fig up a bit. The back is left to our imagination. The facial expression is well developed, though the eyes are kinda muted and the mouth pulls the attention away from everything else. The mouth grabs our eyes because the contrast is so stark there! Im going to try to correct that - I'll try to have the eyes as the point of highest contrast.
Next I scoped out the web for pictures of real gorillas to see what the critters actually look like. Now, I've seen real gorillas a ton of times at the zoo in my town...I don't like to trust my memory, though. I like to get some pictures to look at while I work.
You can search for "gorilla pictures" in any search engine, and you'll get a ton of good results. A couple things I noticed about the gorillas I looked at: their fur is pretty glossy, they do indeed sometimes have brown heads, their skin is very shiny (often appearing more gray than black because of the reflections), and the fur on the older males' backs turns gray (thus the term silverback).
So I've decided a few things already at this point:
It's a good idea to have a plan before you start slinging paint, though not a necessity. I tend to plan out a larger figure like this because they end up being centerpieces, and you want to make sure they look as good as possible.

First we've got some photos that show the amount of work that went into gap-filling on this guy.

As you can see, a lot of filling was needed and it took a good while.

Enough jabbering, let's get down to the painting!!
Some painters out there will try to tell you that drybrushing is not a technique that can be used if you want to end up with an outstanding paint job. Hogwash, I say!! I'll be using drybrushing extensively on this figure. In fact, I'm going to paint the fur entirely by drybrushing!! I can't imagine how long it would take to paint a furry behemoth like this guy without drybrushing...I'll leave that particular bit of self-inflicted misery to the people out there that like to spend 100+ hours on a single figure.
The key to drybrushing is in the name: DRY. When you are doing it properly, you will have almost no paint on your brush (the bristles should not be clumped together). Another important point to remember is that you shouldn't thin your paint when you drybrush.

The first thing I've done is to put on a "primer" coat. I didn't use primer; I just used IWM Black paint. You can see from the picture that the first layer didn't cover all that well - this is because I thinned it a good deal. Thinning your paints is very important! In general, I work with a mix that is about 3-parts paint to 2-parts water. An added bonus of thinning the paint for this figure is that the fur will be filled-in easier by thinner paint.

The next picture shows the GG after a second coat of the same black paint. This is the base coat, and it is important that it is smooth and consistent. I made sure I waited long enough for the first coat to dry before applying this one. Again, remember to keep your paints thinned. (For these first two steps, I've been using a standard #5 brush. This is big enough to make things go quickly.)

Our next picture shows the GG after the whole thing was drybrushed with a dark gray. (This gray is about 3-parts black to 1-part white) Again, I made sure to let the paint from the previous step dry completely before proceeding. I hit every bit of him with this drybrushing - later, if I need to, I can go back and darken areas that seem too light.

Next we see the GG after some more carefully applied drybrushing. This color is about half black and half white. I was careful to apply this layer as though the light was coming from directly above the mini...I only applied paint to the portions of the muscle that would be lit (think of a sphere, there is a definite line where the light doesn't illuminate the bottom portion of the sphere...that's what we are going for). For this stage I used an old #2 Filbert brush (this type of brush has a flattened shape with a rounded tip it's also called a cat's tongue) - this brush is great for drybrushing highlight layers, you can really control where the paint goes.

The final picture shows our GG with his final highlight drybrush. I used the #2 Filbert again for this layer. The paint was Partha Paints League White - this is a slightly off-white color, practically white. As you can see, this gives our gorilla his shine! He looks quite glossy at this point (someone's been brushing him!!) and has great contrast. His muscles are well defined and you can begin to see what an impressive brute this guy is.
That's all for this time! In my next visit we'll take a look at cleaning up the drybrushing and finishing the figure.