"Battle of Sari Bair" Topic
7 Posts
All members in good standing are free to post here. Opinions expressed here are solely those of the posters, and have not been cleared with nor are they endorsed by The Miniatures Page.
For more information, see the TMP FAQ.
Back to the Early 20th Century Discussion Message Board
Areas of InterestWorld War One
Featured Hobby News Article
Featured Link
Top-Rated Ruleset
Featured Workbench Article What happens when AI generates Women Warriors?
Featured Profile Article
|
Please sign in to your membership account, or, if you are not yet a member, please sign up for your free membership account.
| monk2002uk | 26 Jun 2019 9:53 a.m. PST |
Work continues on the Gallipoli supplement. The Battle of Sari Bair involved an audacious attack towards the high ground near Anzac Cove. I have managed to set up the terrain. There are a couple of photos here: link The table includes Lone Pine (not visible in the photo, which is taken from Hill 60 north of Sari Bair ridge), so will be able to fit this action in as well as the attacks on The Nek and Chunuk Bair. More photos to come soon. Robert |
| monk2002uk | 27 Jun 2019 2:33 p.m. PST |
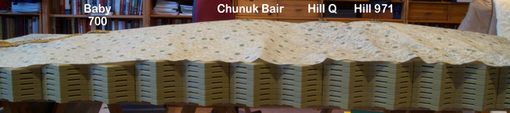
Here are some photos of the Sari Bair ridge, which has been created with Hexon terrain. The first photo is taken from the south. Anzac Cove is to the left. Suvla Bay would be across the other side of this view, where the book shelves are:
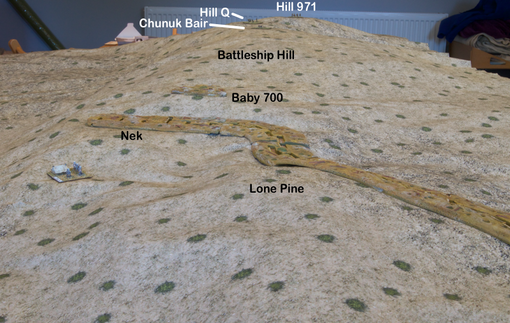
Each Hexon layer represents a 20m contour. There are 13 levels of Hexon terrain, peaking with Hill 971 to the right. The next photo is taken from the direction of Anzac Cove:
The Ottoman frontline trench can be seen in the foreground, running from the Nek down and across Lone Pine. The other major features have been labelled as well, with Hill 971 furthest back. The Hexon terrain pieces give a reasonable approximation to the actual contours good enough for an overview of the terrain, which was even more rugged in actuality. |
| monk2002uk | 12 Jul 2019 4:49 a.m. PST |
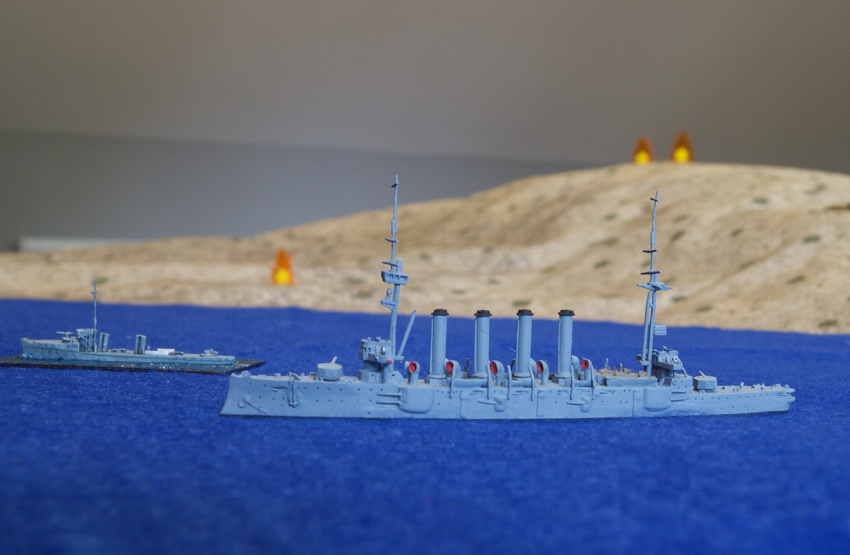
The Royal Navy provided gunfire support throughout the Gallipoli campaign. This photo shows HMS Bacchante (light cruiser on right) and HMS Colne (E-Class destroyer on left) supporting the August 6-9 1915 operation to capture Sair Bair ridge, north of Anzac Cove. HMS Colne is pounding Old No. 3 outpost, centre left. HMS Bacchante has just landed a broadside on Chunuk Bair, top right.
HMS Bacchante is a Navis Neptun model. I sourced HMS Colne from Waterline Ships. It is actually a model of HMS Swale; the same class but built by the different manufacturer at the time. Swale had the dual sets of funnels. Colne actually had two single funnels but, hey, who's looking… Robert |
| Vimy Ridge | 17 Jul 2019 7:25 p.m. PST |
|
| monk2002uk | 19 Jul 2019 3:50 a.m. PST |
Thanks Shawn. Thought you might like the nautical theme :-) Here are three Gurkha companies, based on Baccus 6mm Anzac figures:
Robert |
| monk2002uk | 28 Jul 2019 7:54 a.m. PST |
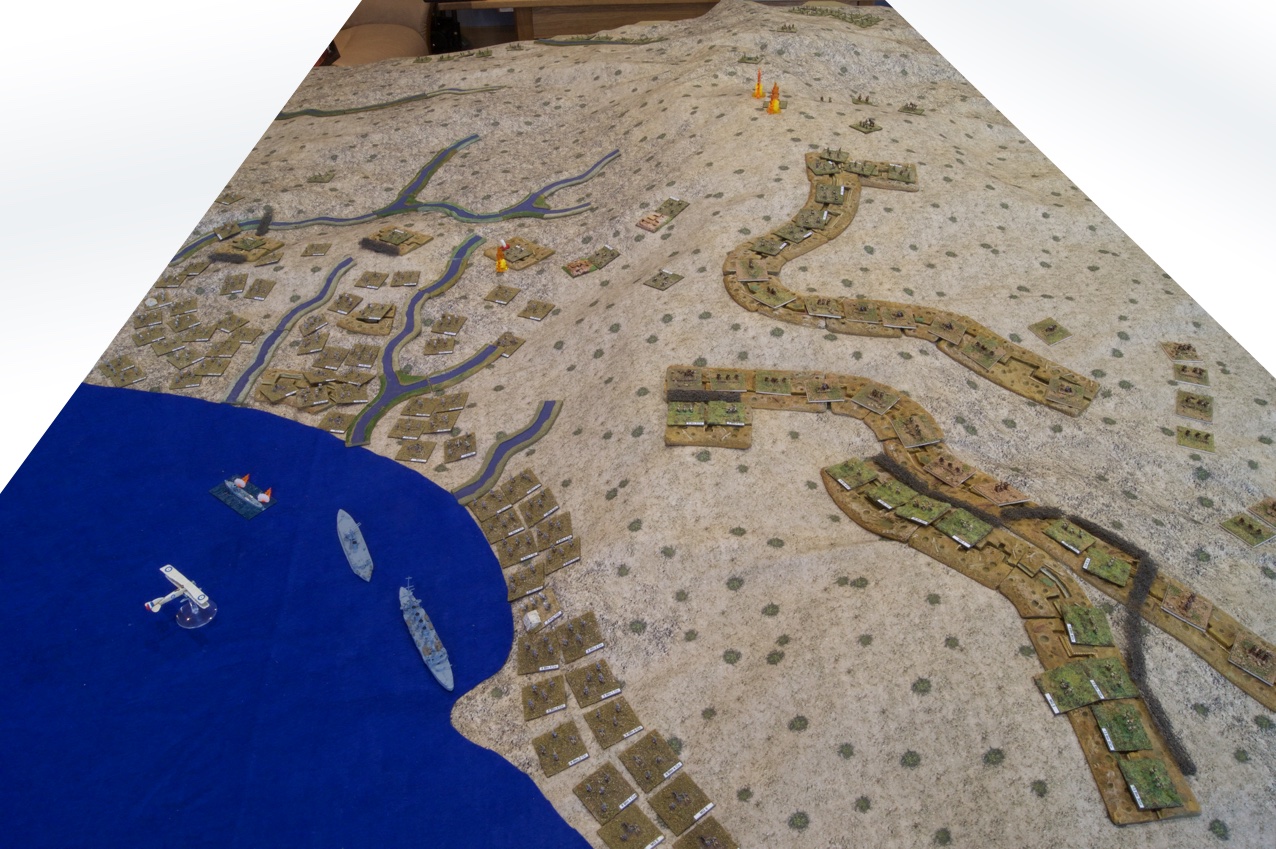
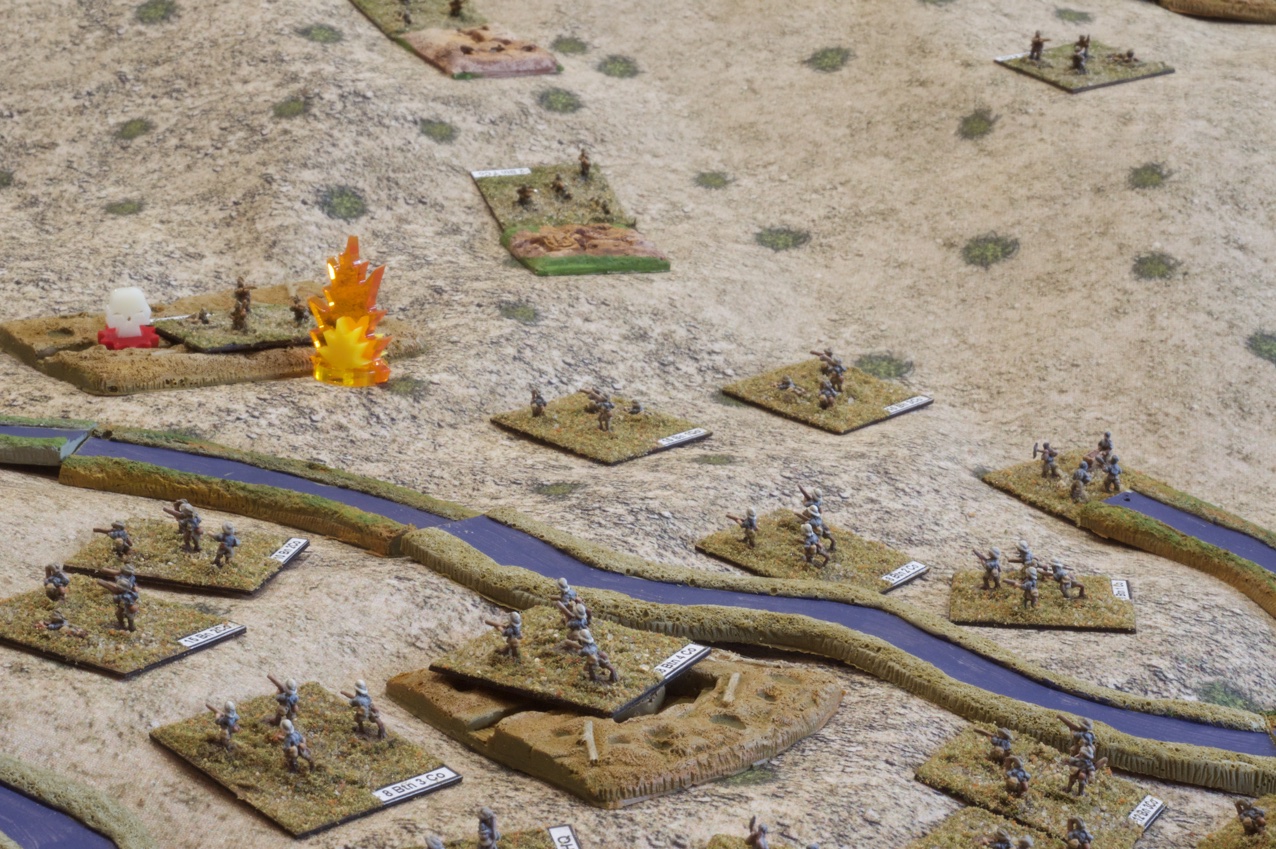
There is a description of the first phase of play-testing the August 6/7 1915 night attack on Sari Bair here: link Some photos from the day:
Robert |
| monk2002uk | 29 Jul 2019 9:55 a.m. PST |
Here is a photo from my work-in-progress table. It is HMS Manica, a kite balloon carrier that was operating at this time:
Robert |
|


")