"6mm WW2 AAR's" Topic
19 Posts
All members in good standing are free to post here. Opinions expressed here are solely those of the posters, and have not been cleared with nor are they endorsed by The Miniatures Page.
Please use the Complaint button (!) to report problems on the forums.
For more information, see the TMP FAQ.
Back to the WWII Battle Reports Message Board
Areas of InterestWorld War Two on the Land
World War Two at Sea
Featured Hobby News Article
Featured Link
Featured Ruleset
Featured Profile Article What's in the Grenadier Company set, revised as part of the D-Day releases from Battlefront?
Featured Book Review
Featured Movie Review
|
Please sign in to your membership account, or, if you are not yet a member, please sign up for your free membership account.
| captaincold69 | 07 Jul 2016 8:34 a.m. PST |
Can someone direct me to some good ww2 6mm AAR's? I'm wanting to get into this scale and I'd like to see some screenies of a large table with this scale. Danke!! |
| joeltks | 07 Jul 2016 9:36 a.m. PST |
link Everything on Mark's page is worth seeing even in not particularly WWII. Looks like you need to go to pg 4 to start seeing any land micro stuff. But there is a bunch in there. |
Ben Lacy  | 07 Jul 2016 10:36 a.m. PST |
brittonpublishers.com/DWC.html This is from the Dulles Wargaming Club's page. Some of the earlier AARs are Squad level in 20mm. But those near the bottom of the page are in 6mm. |
| captaincold69 | 07 Jul 2016 10:47 a.m. PST |
wow bed sheets….who would have thought that with those, some pastels and homemade trees….terrain could look so magical!!?? Anyone have any success with the bed sheet approach? |
| Microbiggie | 07 Jul 2016 1:57 p.m. PST |
The same terrain idea works in any scale actually. I use the same sheets for 20 and 15mm games. Get cheap chalk pastels, the softer the better.
Link to album is probably better to look for 6mm: link Mark |
| ItinerantHobbyist | 07 Jul 2016 9:31 p.m. PST |
Mark Luther's insane tables are awesome – Makes me ashamed to show what my 6mm aars look like –
link |
Mark 1  | 08 Jul 2016 11:37 p.m. PST |
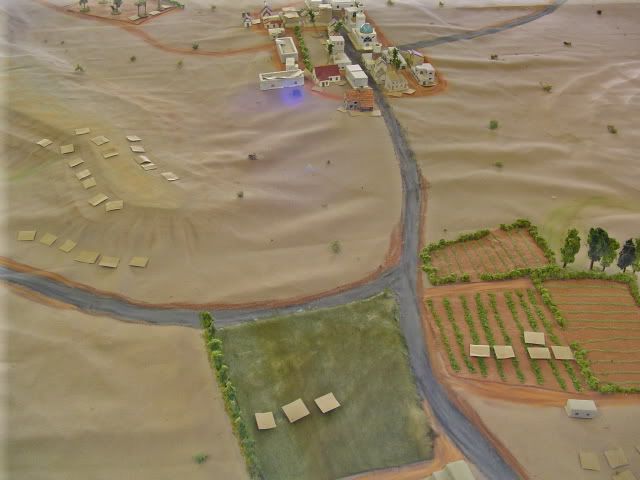
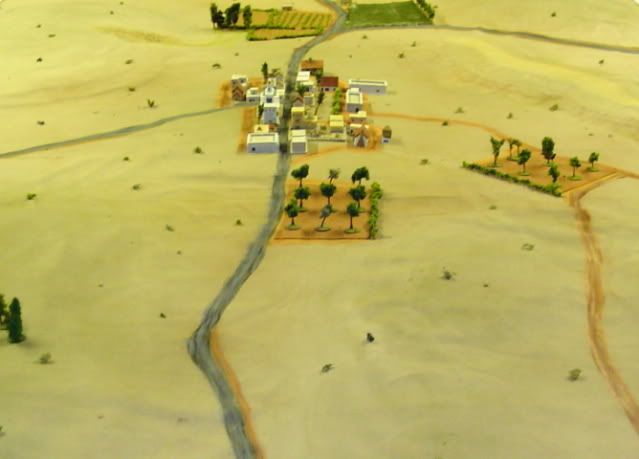
Here is another link you might like. Perhaps more variety … lots of games from different gamers: link As to Mark Luther's approach … well yeah wow he is an absolute artist when it comes to micro armor gaming! When he started sharing his games I studied his approach and adopted as many of the techniques as I could figure out. My games look much better now. My dessert terrain before:
My dessert terrain after:
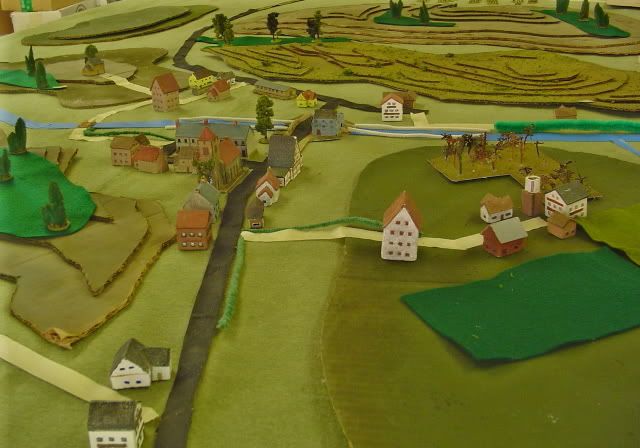
My European terrain before:
My European terrain after:
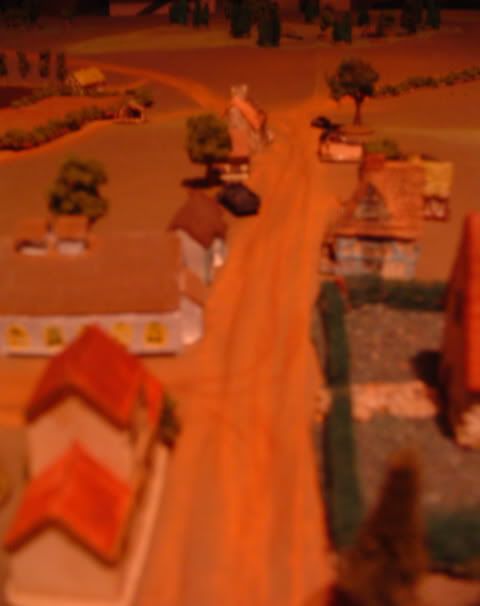
Even the close-ups look so good!
I admit I am still only a novice at his approach. But the improvement has been substantial, and each game gets better.
And one of the best parts is how flexible Luther's system is. I've played on some impressive gameboards before, but they were permanent boards, and the only variation from one game to the next was the order in which you put them together. With Luther's approach I can build my board any way I like. For example the "after" image European board shown above was constructed using Google Earth images of the actual town where the fight took place (using some artistic license, of course, to return it to my imagining of it's 1941 state). It's inexpensive, flexible, and it looks great. What's not to like?!?
-Mark
(aka: Mk 1)
|
| captaincold69 | 09 Jul 2016 7:24 a.m. PST |
Mark Awesome job…..very inspirational!!! |
| captaincold69 | 09 Jul 2016 7:07 p.m. PST |
Mark (aka: Mk 1) What do you use to make your fields? What types of cloth are you using for those fields? I went to a Home Depot and I looked at those carpet samples they have but even though they are the perfect size, they are just too tall for fields. I suppose I could shave them down. I'd love to hear how and what you used to make your fields and trees. The chalk is what it is….I know what colors I'd need and I can trial and error with that (and start over….the beauty of this sort of terrain) but I'm going to stumble with the removable terrain (trees, bushes, fields) Again, thanks for sharing |
| Mark 1 | 09 Jul 2016 11:39 p.m. PST |
All of the enhancements to my terrain techniques shown in the "after" pics above came from the ideas of Mark Luther. He was really quite helpful to me in developing my approach, and yet I am still a novice compared to my master when it comes to making beautiful game boards. What do you use to make your fields? What types of cloth are you using for those fields? I have not found any carpet samples what worked for me at 6mm scale. I go to the local fabric store and look mostly at faux fur and corduroys. I also look at terry cloth fabrics, but they very rarely seem to work. The faux fur looks best in tan or green colors. The corduroys look best in tan or brown colors. After getting a square yard or so of a given fabric I cut it down to various shapes and sizes. Some of them I spray-paint lightly using a sweeping motion to get some shading on the raised ends of the fabric (always looks good if the ends are a different color from the depth of the faux fur or if the raised portions of the corduroy is a different shade from the base). I have also sprayed some of the faux fur with watered-down "Elmer's" white glue (using a generic spray bottle bought for $.49 USD) and then sprinkled yellow flocking on top. My idea was to simulate fields of sunflowers, but I don't think it quite got to that level, looking more like ripened wheat. Some of the furrowed row crop fields you see in my pics were my prior more deliberate approach to making agricultural fields. I used brown felt, put thick lines of white glue, and put model RR shrubs down. Like the look, but they were more laborious than the "mass production" corduroy furrowed rows or the faux fur grain fields. One of Mark Luther's hints is to use fabric spray-adhesive on the backs of your cloth fields. Then they lay on the cloth and stick to the contours. You can see the effect when you compare the felt cloth fields in my before vs. my after pics above. The chalk is what it is… Again per Mark Luther's technique the coloring is done with pastels, not chalk. I bought a box of about 20 pastels at the local craft store for about $4 USD or $5 USD, and I figure I will about 8 or 10 games out of it. Some of the things to do when your marking your cloth … use two or three colors of pastel for the road, including different colors for the wheel ruts (if a dirt road) and the edges (paved or dirt). Put big bare dirt areas around farm houses and/or industrial / agricultural buildings. Also put dirt tracks around any agricultural fields that don't have hedges. The bordering really gives a nice appearance. And shade the slopes of elevations … a couple subtle shades of un-even vertical striping gives a very good appearance of rutted erosion. The real key, as I have learned, it simply this: LOTS of terrain! Many fields of different crops, dirt fields, lots of small dirt roads / tracks, many hedges, tree lines, walls, little creaks … I'm still not getting the terrain as fully packed as I'd like, but my collection of pieces has grown and the games look better and better. Hope that helps. -Mark
(aka: Mk 1) |
| captaincold69 | 10 Jul 2016 8:33 a.m. PST |
pastels….not chalks…got it Thanks so very much Mark Off to Jo-Ann Fabrics for me!!! :) |
| captaincold69 | 10 Jul 2016 6:01 p.m. PST |
Well, I went to my local Jo-Ann Fabrics and I found so many different materials to use (well, when I'm ready….today was a fact finding mission) Found a nice material for desert setting, a nice material to model eastern russian/winter setting, and a nice green material for more temperate settings. The store I went to didn't have much in the way of corduroy as she said it wasn't the season for it. Jo-Ann's had some pastels there, but they seem pretty basic and I think I'd like to go to an art store where I can buy just the colors I need. I did buy some green craft acrylic paint for .69c and then went to my local Home Depot and scooped up a huge bag of sawdust to make my own flock. It was a good day. Thanks again Mark |
| Microbiggie | 11 Jul 2016 7:18 a.m. PST |
Sounds like you are well on your way to making some pretty versatile ground sheets. I haven't been able to find any decent pastels outside of art shops.
Thanks for helping Mk 1. What you said is pretty much what I would. Mark |
| captaincold69 | 11 Jul 2016 7:40 a.m. PST |
Thanks Mark for your flickr blog….some awesome visual aids to help out. I'm less than 10 minutes away from a Blick art store so I'll see what they have there. I'm sure my first several go arounds are going to look like crapola, but practice makes perfect :) |
| captaincold69 | 12 Jul 2016 4:20 p.m. PST |
How do you both (both Marks….if you come back to this thread) handle desert terrain? I've found the cloth material I'd want, but not sure what to add to it (based of your ideas) Not sure if pastels would work here since it's all desert/sand color. Any ideas or suggestions? Tumbleweed? :) Maybe a couple large rock clusters? Small adobe villages? Thanks |
| Mark 1 | 13 Jul 2016 11:01 p.m. PST |
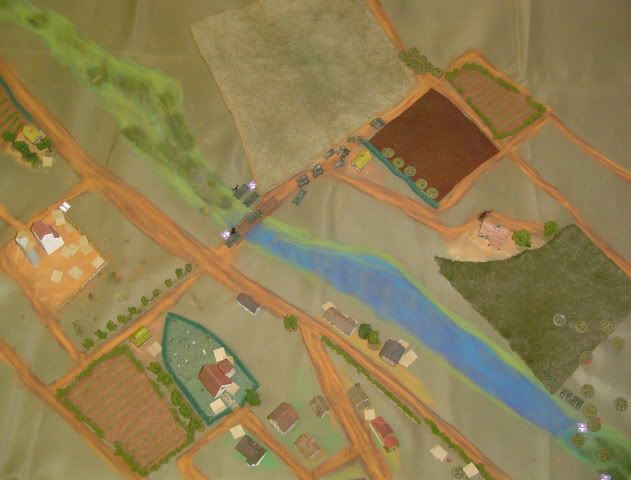
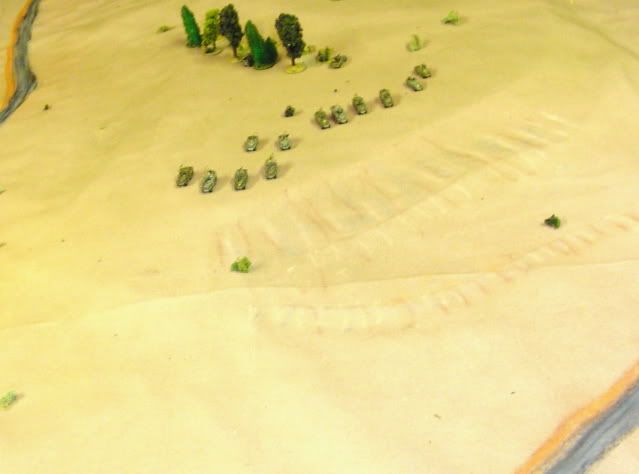
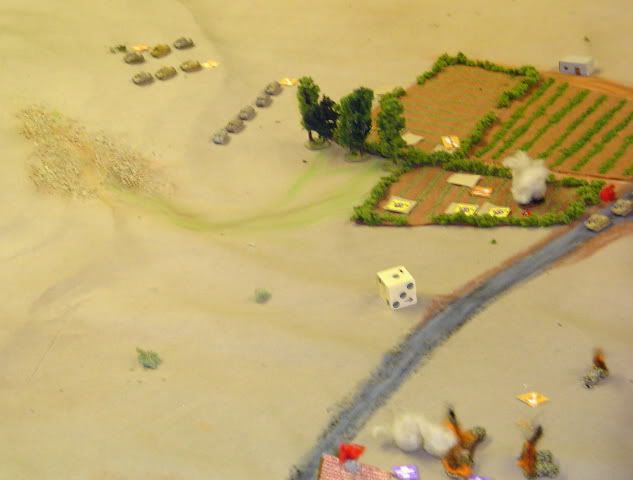
How do you both … handle desert terrain?I've found the cloth material I'd want, but not sure what to add to it … Different deserts have different looks. So you might try different techniques. My games (as shown above) focus on Tunisia, where the desert is more of a scrub-filled valley, crossed by well-built paved roads and RR tracks, with well developed villages and agriculture. I use corrugated cardboard for my elevations. You can see this in my "before" pics above. This is a technique I've been using for years … you can collect lots of corrugated cardboard for no money just by cutting up boxes you get over time. Following Mark Luther's approach, these elevations now go beneath the game cloth, with some ticky-tack to hold the cloth down to follow the contours. The pastels are then applied to highlight some of the elevations. Slopes get some vertical striping. Raised flat tops get some broadside strokes to give a subtly different shading. Fields are tacked down to the cloth using spray adhesive. Borders are edges with hedges, treelines, walls, or pastel-drawn dirt tracks. Hedges and treelines are built up on used Starbuck's stirring sticks or craft store Popsicle sticks. Orchards were done with brown felt rectangles and individually based trees. I think those could be done better. Ravines get some green shades, to indicate the likely paths of water. I tried spraying adhesive and sprinkling some model RR talus (small stones) and sand in one of the ravines to indicate rocky rough going. I'm not too happy with the result and probably won't try that again. Probably do better to mount some small stones (a mix of gravel sized pebbles, maybe) in some acrylic, and painting it up, to provide some pre-made rocky terrain. After I had most everything else done I sprinkled some old bits of lichen over the whole board for the random scrub, tumbleweeds, cacti, etc. I have significant amounts of lichen, collected and used for more than 40 years of gaming, and all I did in this case was empty out the wasted bits at the bottom of the bag. I think it looks pretty good, and will do that again for any desert board I set up.
Hope that helps. -Mark
(aka: Mk 1) |
| acctingman1869 | 14 Jul 2016 6:50 a.m. PST |
Make MK 1 That looks amazing. Thank you! Are you using a bed sheet there? I was thinking of using a painters drop cloth for my desert terrain. Love your smoke counters….how'd you make those? Looks like they're based on a washer. Is that just cotton or that pillow material? Great table! Thanks for taking time to show me all this!!! |
| Mark 1 | 15 Jul 2016 9:39 p.m. PST |
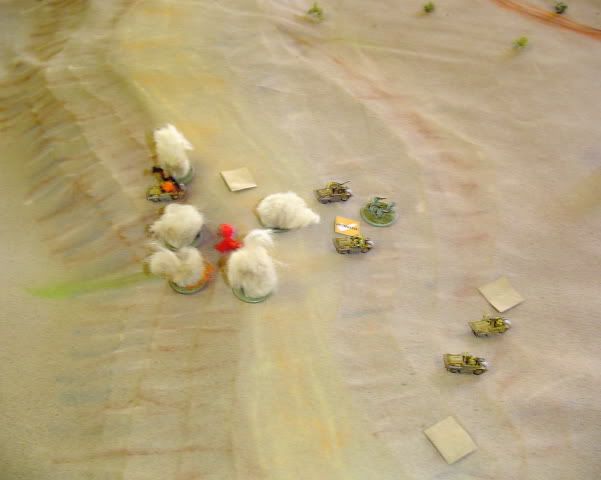
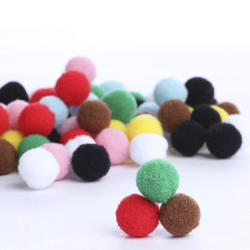
For my dessert I use a light weight canvas. I would think a drop cloth would be too heavy. I confess I have not yet gotten all the way to bed sheets, as Mark Luther recommends. I have managed to abandon my old felt game cloths (as appeared in the "before" pics above), but the new cloths I've bought … well I just could not jump all the way to bed sheets. The problem with heavier cloths (like a drop cloth) is that it will hold its own shape. You don't want that. You want it to fall on to, and conform to, the shapes you have put under it. I do see how and why the bed sheets would probably work so well. As for my "smoke counters" … well, they are supposed to be artillery splashes. So big clouds of dirt in the air, not smoke. Oh well. Maybe I should re-consider. So to make them I used tan pom poms that I bought at the craft store.
They are kind of like synthetic cotton balls, except you can get them in a variety of colors. You can sew them on to stuff as a form of decoration. I bought mostly tan pom poms in a variety of sizes. The larger ones I pull apart in random shapes, and glue the to painted pennies, to mark artillery splashes. I put the very small ones on to the infantry stands (I use pennies as stands) to mark suppression -- trying to make it looks like small puffs of dirt being kicked up by incoming fire. In the rules I use, there are two levels of suppression. The first level (one puff) is automatically removed at the end of the turn. The second level (two puffs) can only be raised up to the first level (removing one puff) with a successful morale throw. If and when I actually use smoke (as in smoke screens), I use regular old white cotton balls. These too, though, are generally glued to a painted penny to keep the in place on the battlefield. … Probably more than you wanted to know about puffs. And then there is the question of burn markers. You can see some burning vehicles in the last two pics above. I use cheap (the cheaper the better) orange and black synthetic yarn for my smoke and fire markers. Snip both orange and black yarn into short bits (about half an inch in length). Unravel it a bit. Mix up the orange with the black. Apply to burning tanks and trucks. Gotta love it … the look feels VERY rewarding (when I actually manage to get the dice to let me kill something, I wanna see that thing BURN!). Hope that helps. -Mark
(aka: Mk 1) |
| captaincold69 | 15 Jul 2016 10:01 p.m. PST |
Where do you get light weight canvas? The pom poms are an awesome idea! Again, thank you so very much. |
|