| Mark68 | 27 Feb 2016 3:03 a.m. PST |
Does anyone have a link to a ww2 6mm painting guide? I've not done much model painting, and what I did do was years ago, and I've never attempted anything as small as 6mm. Apart from undercoating and painting the flesh first, I'm not even sure in what order I should paint a model. Thanks |
GildasFacit  | 27 Feb 2016 3:56 a.m. PST |
I actually paint the flesh very late in the painting progress, so even that isn't a fixed point to work from. Personally I tend to roughly cover the main uniform with appropriate colours as the first steps, then any webbing, then weapons, equipment & boots/gaiters and flesh and last the helmet. After that has dried I'll give the whole figure a thin dark brown wash and a final touch up with a lighter shade of the uniform colour over the highpoints. Lastly a matt varnish. Don't feel that any fixed order works best for all figures or all painters. Try out what feels right and develop a method that you are comfortable with. Yes, you will make a few bad choices early on but, as you learn from the odd glitch you will look at a figure and see, from experience, the best way to go about it. |
| Mark68 | 27 Feb 2016 4:15 a.m. PST |
|
| Martin Rapier | 27 Feb 2016 4:17 a.m. PST |
I do pretty much what GF does. Spray them all black, heavy drybrush of basic uniform colour. Pick out boots, webbing, weapons. Flesh, hat and maybe a dark brown wash. It is much easier to paint the hands and faces after you've done the rest. Just blob it on and let the inkwash do the hard work. It takes me longer to base 6mm WW2 figures than paint them. |
| Mark68 | 27 Feb 2016 4:54 a.m. PST |
Thanks Martin One other thing I'm not sure about, is the inkwash. Is it better to buy an inkwash paint because I've no idea how much water to add? |
| GildasFacit | 27 Feb 2016 5:18 a.m. PST |
Sparky – making washes is difficult to describe as there are so many materials they can be made from. Personally I use FW acrylic ink, a mix of Burt Sienna or Burnt Umber and Black. Usual dilution with distilled (or de-ionised) water is 1:25 – 1:30. Fully cover the figure in the wash and flick or shake off the excess. You can use a stronger wash and carefully spread it with a brush to where you want it (works better on larger figures) but the overall method works for me on 6mm & 10mm and is very quick. Many people swear by the commercially made washes so they must work – I have never tried them so can't comment. |
| Dynaman8789 | 27 Feb 2016 6:01 a.m. PST |
My system is base color, uniform (if different from base color in some spots), boots, weapons, flesh, then helmet. The helmet is last since it is almost always the easiest thing to reach and if I got paint of another color over the helmet it is easy to 'fix' while getting things in more out of the way places is harder without overpainting again. After all this is the wash consisting of a mixture of black paint and future floor polish in a 20 to 1 ratio of future/paint. A couple shots of how they come out, most likely I should redo the face and hands after the dip but on the game table the face detail is un-noticable anyway. link link |
| LeonAdler | 27 Feb 2016 6:16 a.m. PST |
All the above good systems, personally I find the black primer method a bit heavy and a lot slower for me.
Basic system I use here:
link
WW2 is a doddle really as there is so much webbing etc that it breaks up the figure nicely. Base coats and washes work really well.
L
link |
| Mark68 | 27 Feb 2016 8:08 a.m. PST |
Thanks all for the advice |
 Extra Crispy Extra Crispy | 27 Feb 2016 8:20 a.m. PST |
I don't bother with the wash and highlighting. So my method for WW2 is prime white with spray paint. Paint the entire figure in the uniform color. Then webbing, faces, weapons, boots and helmets. Done. Base and varnish. I fins the wash technique does help the figure look better, but only at ranges under 12". At anything over 12" you can't tell. Heck at over 24" you could get away with uniform, flesh, helmet and weapon and even skip the webbing. |
| mwindsorfw | 27 Feb 2016 9:50 a.m. PST |
I've been doing a lot of 6mm painting lately. The #1 lesson I've learned is that when you set those little men on the table, all that detail and work just disappeared. Here's my recipe now:
Do the main uniform color in a way you will be able to recognize, even if it is a little ahistorical. You want to be able to tell them apart from 3 feet. That may mean putting Germans in gray, or giving them all dark helmets. Too much camo, and they look like Americans. Use different shades for Africa uniforms.
Use a nice contrast for packs and gear, but don't overdo it.
Add a color for the boots, but be mindful of how you will base them. If you use a lot of flock on the base, the boots may disappear.
Do weapons in an appropriate color.
Do the flesh.
Do the helmets after the flesh, it's easier.
Add any color you want for officer's insignia. I've found its OK to be a bit too large or bright, because you want to see those red patches from a distance. Hope this helps. |
| Martin Rapier | 27 Feb 2016 11:52 a.m. PST |
wrt washes, to be honest, sometimes I do it, sometimes I don't and sometimes I only do it on flesh and rifles to warm them up a bit. With a drybrush over black base you've got a lot of shading going on already. I do very occasionally do a very light overall drybrush of very light tan. If I'm going to do a wash I just use my standard Windsor & Newton Peat Brown ink mixed with a bit of water. I find a wash works best on desert uniforms, as otherwise they are pretty boring. As noted above, it is a good idea to exaggerate the colour differences or with WW2 uniforms they all vanish into the bases. Less of a problem for Horse & Musket types. |
Mark 1  | 27 Feb 2016 12:30 p.m. PST |
Much good advice in what has been said so far. A link you might find helpful: ritterkrieg.blogspot.com
Troy Ritter is a master at painting miniatures. He does larger scales now, but use to do a lot of 6mm (1/285) stuff. Check out his archives for his smaller scale work. One key point, mentioned above but worth repeating: paint the helmet last. This has a very positive affect on the appearance of the figure, by covering over any flesh from the face that has overflowed the rim of the helmet. With figures at this size it is common to get a bit too much paint on the figure when you are painting the details. They are very small, and it is hard to get the paint in just the right places. The lighter colors stand out, and the darker colors blend in. So better to have too little of the lighter colors (not all the way to their appropriate edges), and too much of the darker colors (beyond their appropriate edges) than vice-versa. The face will stand out and be seen under the helmet even if there is less flesh paint on the figure. Another idea that produces good results is to use a darker color for the helmet than the uniform, and use a more glossy color. Not a gloss, but just a paint that is a bit less matte. Makes them stand out a bit, look more like metal than cloth. I find Tamiya Acrylics often have a bit more shine than other brands. So they are among my favorites for doing helmets. One technique I learned from Troy Ritter is to paint your helmets, then mix your helmet paint color with a slightly lighter shade, and put just a drop on the crown of the helmet. It highlights the rounded shape of the helmet. As to undercoating -- others here suggested starting with a black priming coat. I disagree. In 6mm I prime in white. It helps with the "scale effect". Items this small will always appear darker to the eye than they should. A white undercoat will lighten up the figures just a bit. Also anyplace that does not get a thick enough coat of paint will appear lighter in color. This usually happens on raised surfaces and edges, and has much the effect that you want to achieve through drybrushing.
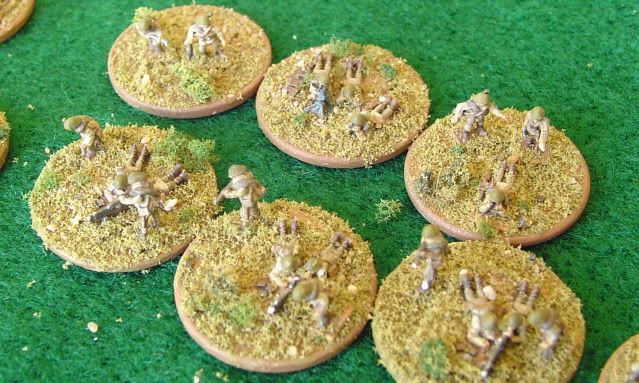
A company of Romanian infantry (GHQ figures).
Closer look at some of the stands. Sorry, but my camera phone does not do close ups very well…
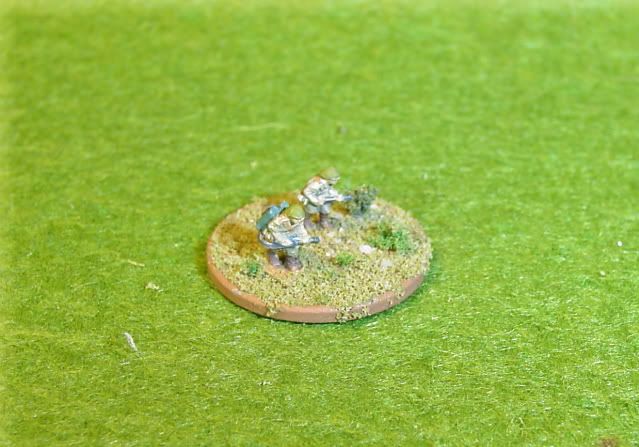
Here is a decent close-up. In this case it is a flame-thrower team (flame thrower kit-bashed from an SMG figure). If you look at the escorting rifleman, you will see some flesh paint on the rim of the helmet. This is exactly what I try to AVOID by painting the helmet last.
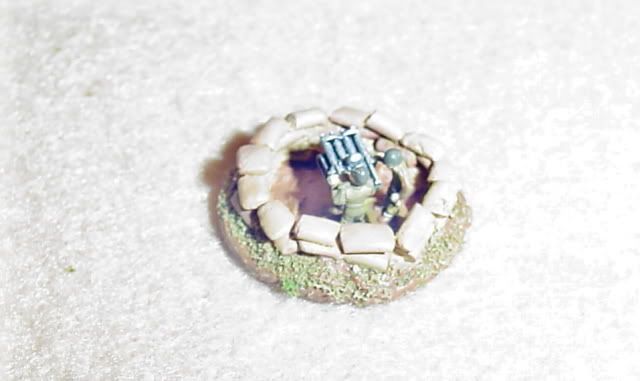
This is a Soviet AAMG emplacement. Kit-bashed by clipping the guns off of a GHQ Russian ZIS AAMG truck, and mounting it on a penny with 2 GHQ artillery crew figures and some home-made sandbags. I chose this picture because it shows how nice it appears when there is a bit of a sheen on the helmets.
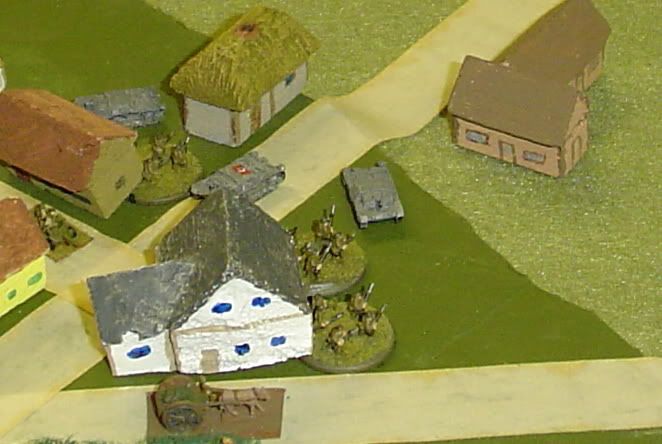
Russian infantry mixing it up with early StuGs that have gotten too deep into a built-up area. Here the figures are H&R. My Russian infantry has not been painted up to the same level as my Romanians (I have so much more Russian infantry!). But even if you just paint the base-coat, rifles, boots, hands and face, a wash or dry-brush, and then the helmets you get very usable and eye-catching infantry.
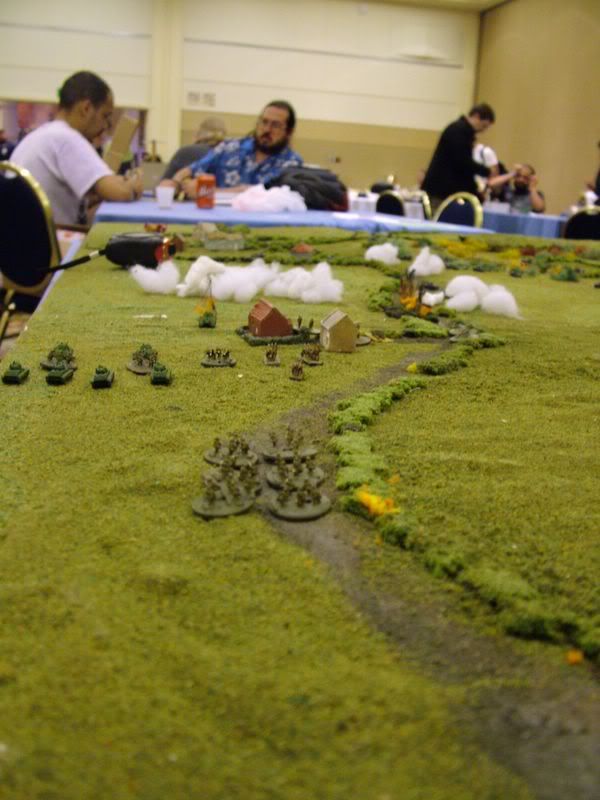
I get lots of positive comments at gaming cons, even with my Russians, who have the most basic/simple paint job of any of my current active infantry.
-Mark
(aka: Mk 1)
|
| Sudwind | 27 Feb 2016 1:00 p.m. PST |
Definitely white primer. Also, use lighter shades of the colors you ordinarily use…it makes a difference with tiny models. I usually get a good effect with a fairly light shade for dry brushing. |
| Mark68 | 27 Feb 2016 3:14 p.m. PST |
Thanks all for the advice Great pics Mark 1 |
| Mark68 | 03 Mar 2016 4:50 a.m. PST |
Where do you dispose of your metal figure off cuts? As I'm cleaning up some 6mm figures I'm throwing the shavings and bits of metal into our bin/trash. Is there a correct way of disposing of them? |
| Mark68 | 03 Mar 2016 2:22 p.m. PST |
No probs, I've sorted the disposal issue ------------------------- What size brushes should I buy to paint 6mm ww2 figures? |