"Gunners terrain project" Topic
13 Posts
All members in good standing are free to post here. Opinions expressed here are solely those of the posters, and have not been cleared with nor are they endorsed by The Miniatures Page.
Please don't make fun of others' membernames.
For more information, see the TMP FAQ.
Back to the WWII Land Gallery Message Board Back to the Napoleonic Gallery Message Board Back to the Terrain and Scenics Message Board Back to the Blogs of War Message Board Back to the Wargaming in Australia Message Board
Areas of InterestGeneral
Napoleonic
World War Two on the Land
Featured Hobby News Article
Featured Link
Top-Rated Ruleset
Featured Showcase Article pmglasser takes a first look at the new Axis & Allies.
Current Poll
|
| Gunner Dunbar | 16 Oct 2015 10:08 p.m. PST |
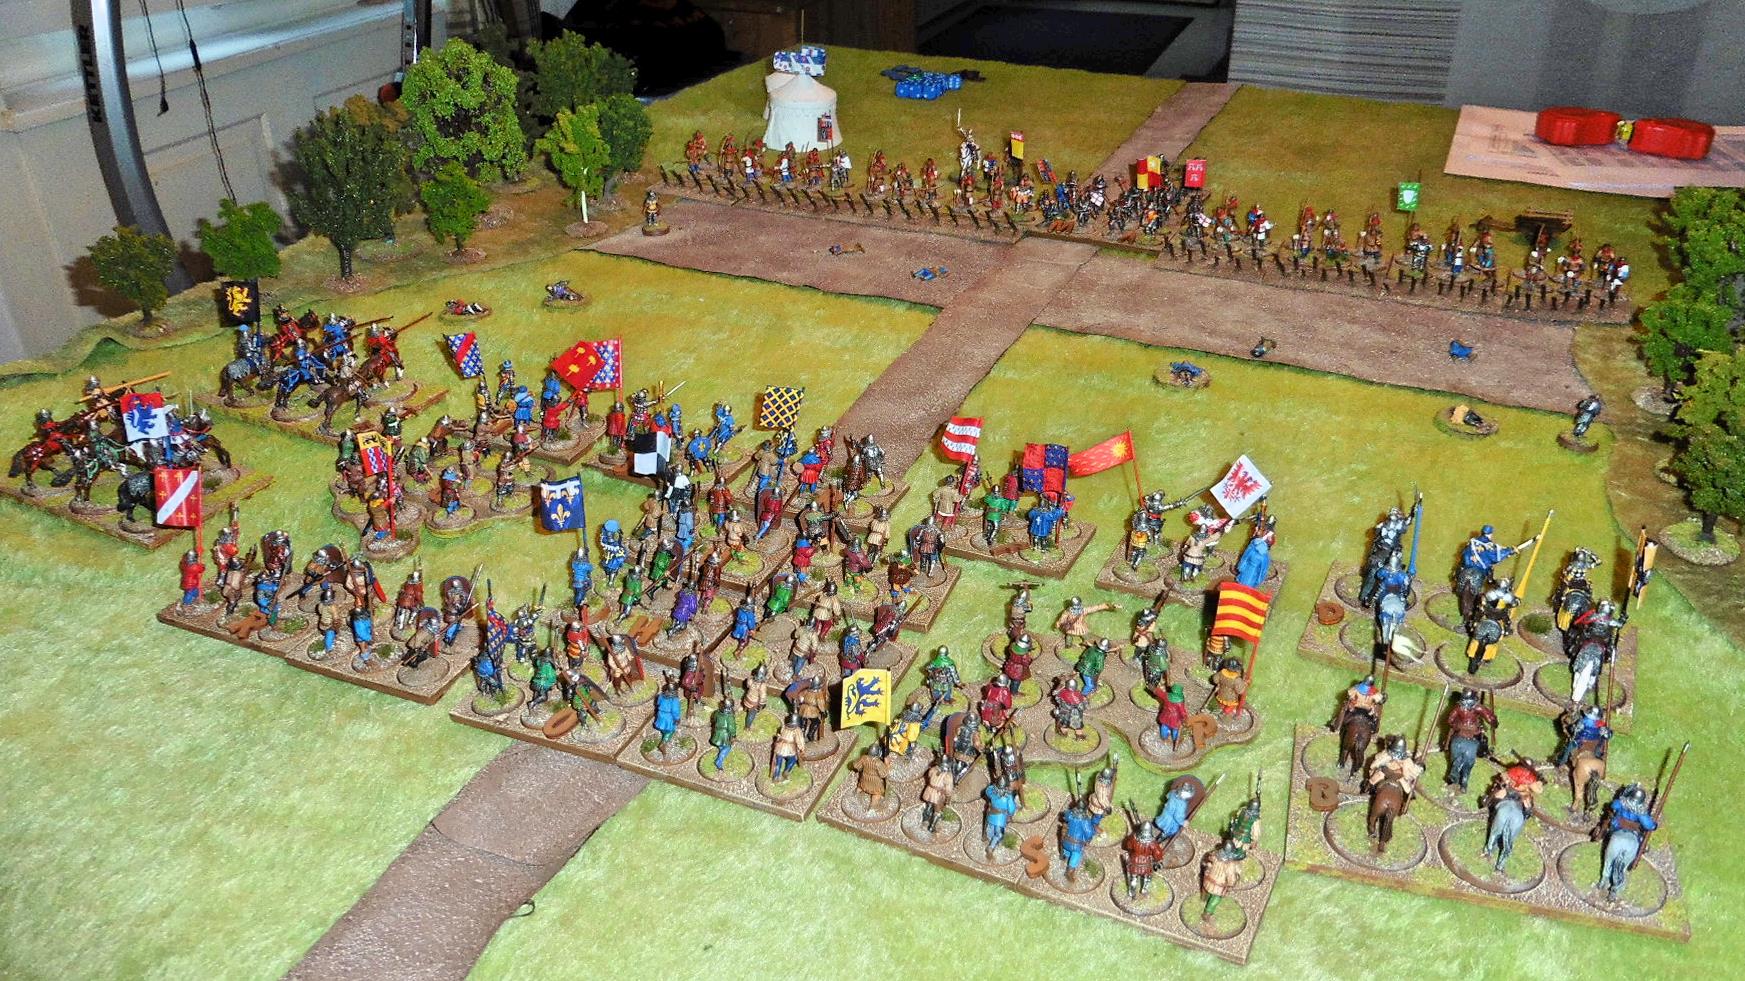
Hi Guys I have always been a figures/vehicles guy, but have been thinking about terrain for a little while now, I have started my terrain project off by purchasing this green teddy bear fur and a door mat, I had been looking on line for a suitable fur for a couple of weeks, but had not found anything suitable in my price range, I stumbled across this at my local spotlight not long ago, but it was $70 USD a meter, and I wanted 2m, and couldn't afford it then, luckily spotlight was having a 40% off sales this week, there was only 1.3m left, it ended up costing me $60. USD
I also bought this $5 USD door mat to turn into crops.
Now to decide how to proceed, my options are
1) leave as is, and build some roads/rivers to place over it (this would give the most flexibility)
2) leave as one piece and cut roads etc into it, less flexible, but I have seen some stunning examples done like this.
3) cut it into 1 foot squares, glue to rubber backing and cut roads/rivers into it, this will give it flexibility and the same look as option 2, but it will end up heavier and harder to store.
Thoughts? If I leave it in 1 piece, should I add colour? should I shave it down with hair clippers? there is about 1,1/2 feet overhang on one side, I could cut that off, glue to rubber backing and cut roads/rivers into that? lots of ideas.
I plan to make buildings out of printed paper, which I will add extra detail to.

|
| Mako11 | 16 Oct 2015 10:27 p.m. PST |
I'd be inclined to leave it as is, and add roads and other stuff on top. Perhaps foam, or other hills, underneath. That way, you have the most flexibility. Color looks great to me as is. Perhaps leave the width for when you can play on a wider table. |
| Mick in Switzerland | 17 Oct 2015 4:47 a.m. PST |
I have something similar and I use it as a mat with roads etc put on top. I decided not to cut in roads as it makes the mat specific to one layout.
More pictures here.
link |
| Gunner Dunbar | 17 Oct 2015 5:24 a.m. PST |
Thanks guys, tending to agree about leaving it whole and building roads separately. |
| Gunner Dunbar | 17 Oct 2015 3:46 p.m. PST |
Don't want to procrastinate to long, so have decided to leave it whole, I may do a light sand coloured spray over some areas for variation, I will cut the excess off and glue them to thin rubber backing, then cut roads/rivers into that, and do a couple of T X and Y intersections, and that should do it, then start on buildings. |
| Gunner Dunbar | 18 Oct 2015 5:29 a.m. PST |
Hi guys Did some work on my terrain project this arvo, I made some lengths of road, I did 2 types, a dirt main road and a dirt track, I may do a sealed road at a later date.
This is ending up a pretty cheap project, apart from the $60 USD teddy bear skin, I haven't had to pay for anything else yet, I used some old carpet squares as the base of the road, glued some fine sand paper down as the road surface, edged it with teddy bear fur, then glued some sand for texture.
I still need to paint them, I have some largish bottles of artist water colours for this, I have added some pics with a 1/72 scale tank and Romanian and a 28mm Aussie Digger, up next will be some X, T and Y intersections, some 90 degree turns and some rivers sections.
more pics
link
|
VicCina  | 18 Oct 2015 12:04 p.m. PST |
I would go with the terrain on top of your mat. More flexibility that way. Like the look of your roads too. |
| trailape | 18 Oct 2015 8:16 p.m. PST |
|
| themodelwarrior | 21 Oct 2015 5:04 a.m. PST |
Looking really good. I have used this stuff before and you can either spray it to paint it or dry brush it. Sometimes the colour is perfect like yours and it won't need any messing with. |
| Gunner Dunbar | 21 Oct 2015 3:23 p.m. PST |
yeah, its a good colour, but I want some colour variation in it, thinking of doing a light sand coloured spray, just on the tips in some areas. |
| Mad Guru | 21 Oct 2015 4:08 p.m. PST |
Beautiful job on the road sections! Seems like they will blend in perfectly and not look like "scatter" terrain laid over your ground-cloth, which as many of us know is not easy to accomplish. Well done, and look forward to watching as this project advances! |
| Early morning writer | 21 Oct 2015 10:25 p.m. PST |
I, for one, give strong encouragement to adding the sand color – but understand that it takes a VERY long time to dry and a much longer time to lose the paint smell. But it is worth the effort. Keep going with terrain – it really makes the gaming experience better. |
| Gunner Dunbar | 25 Oct 2015 1:56 a.m. PST |
Hi guys I have finished all my roads and intersections (except the sealed roads I plan to do in the future) and I'm pretty chuffed with the results, this has taken me 2 Sunday arvos so far, about 8-10 hours, next will be the river sections, plan on using something resin for this, any ideas?
More pics
gunnerswargamming.blogspot.com.au/2015/10/roads-complete.html
|
|