Help support TMP


"Flexible rough terrain - tutorial" Topic


8 Posts

All members in good standing are free to post here. Opinions expressed here are solely those of the posters, and have not been cleared with nor are they endorsed by The Miniatures Page.

Please remember not to make new product announcements on the forum. Our advertisers pay for the privilege of making such announcements.

For more information, see the TMP FAQ.


Back to the Terrain and Scenics Message Board


Areas of Interest

General

Featured Hobby News Article


Featured Workbench Article

Painting Pintos

A guide to how Stronty Girl Fezian paints piebald and skewbald horses.


Featured Profile Article

Cobblestone Corners Christmas Trees

Christmas trees for your gaming table.


Current Poll


1,218 hits since 21 Jun 2015
©1994-2024 Bill Armintrout
Comments or corrections?

Peithetairos21 Jun 2015 2:16 a.m. PST

You will be all familiar with the famous caulking method to make beautiful flexible wargaming mats. However, this technique does not only come in handy to cover an entire gaming table, but can also be used for scatter terrain, such as rough terrain, roads, villages and even hills. It can also be used to create a very versatile photography mat.

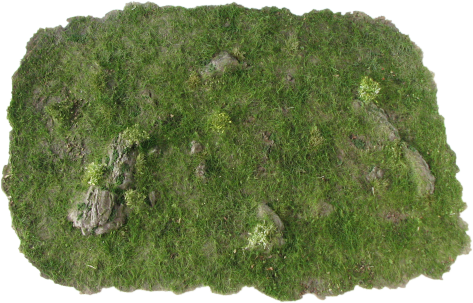
In this first installment I focus on making some flexible rough terrain featuring some rocky outcrops, brush and small bushes. I took my inspiration for this piece from ekimdj, who not only has a very nice blog, but also wrote a tutorial for flexible desert terrain on the Sweetwater-forum, so if you are able to read German check it out (it is pretty picture heavy, so you can follow it easily in any case).

ekimdj's Tutorial for flexibel desert terrain

This tutorial will also come in handy if you want to learn how to create basic groundwork, flexible or not. This technique can be applied to a small base or an entire terrain board.

Per usual I will give an overview of the materials you need, followed by detailed step-by-step instructions and finally some ‘action' shots showing off the piece's flexibility.

Read more

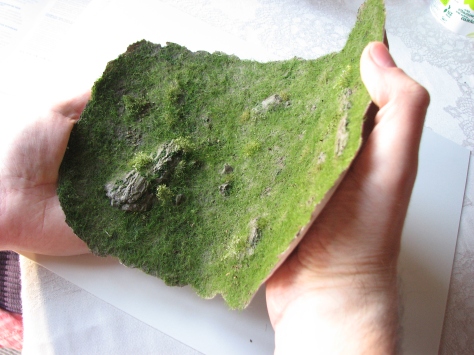
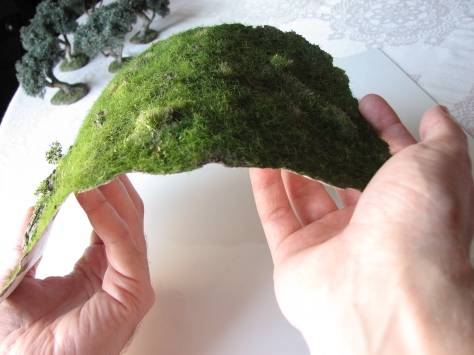
Some pictures of the final piece that showcase its flexibility:

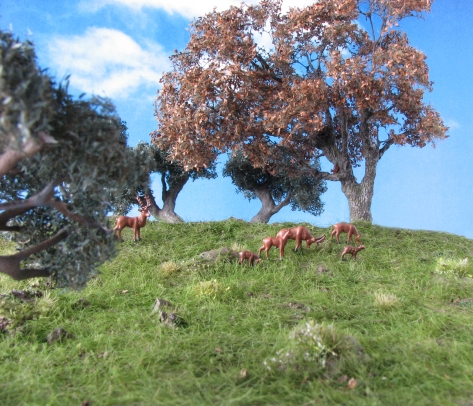
Naturally a scenic shot is in order, too:

I need to thank ekimdj again for the inspiration. I will surely make more pieces and will experiment how far this technique can go.

normsmith21 Jun 2015 4:54 a.m. PST

great idea and I like the feathered edge

morrigan21 Jun 2015 4:57 a.m. PST

Very useful. Thanks.

trenchfoot21 Jun 2015 11:43 a.m. PST

They are beautifully made. I will have to try them myself. Is the caulk acrylic or silicone? Also I have just made a game made as you first mention, however the mat has not remained flat, would you have any idea why?

nevinsrip21 Jun 2015 12:42 p.m. PST

Very nice. I've been working on something similar using tacky glues. My pieces are a bit smaller, but the same general idea.

TiberiusAugustus21 Jun 2015 2:05 p.m. PST

Use acrylic caulk so you can paint on it. Silicone is hard/impossible to paint on.

CeruLucifus21 Jun 2015 5:56 p.m. PST

Very interesting post. Thank you.

When you have more pieces please do an article on laying out a battlefield, with the flexible pieces on top of hills etc. And show more of how the magnetic tree attachments work out.

Peithetairos22 Jun 2015 3:43 p.m. PST

Thank you for your comments. It is indeed acrylic caulk. As Tiberius says Silicone cannot be painted effectively with acrylic paints.

Nevinsrip: can you elabroate on your use of tacky glue? do you use the glue instead of acrylic caulking?

I will show soem pictures of the terrain on my flexibel mat, but I fear the groundwokr won't match as the mat is an early work. For the next piece I'll try some wider magnets to allow placement of more top heavy trees. With hills I might jsut use this technique for the rim, so that the hill can conform to the mat, assuming the mat itself has pieces of styrofoam underneath to give the impression of rolling hills.

Sorry - only verified members can post on the forums.