Planning over
As I want to play out options from the publish scenarios. I split the D3 into 3 packages, one with the USAF, and two with the USN to enable using both the carrier air wings. So I end up with the USN having the following possible targets on a D6
1 = Vu Cha Railroad bridge
2 = Bac Giang POL storage
3 = Doung Nham POL storage
4,5 = Haiphong POL storage
6 = Co Trai Railroad bridge
The target roll was a 1, so the target is the Vu Cha railroad bridge..
I had previously decided which complexes the located SAMs would be in and I rolled for the actual placement hex which gives the following:
2315
1122
1129
1138
2626
The AAA roll gives me two unplaced concentrations.
Onto the raid planning itself. The Oriskany Air Wing for the mission comprises the following
Pre-Raid Jamming
2 x {1} EA-1F, Jamming
Iron Hand
2 x {2} , A-4E, SEAD
2 x {2} , F-8E, Armed Escort
MiGCAP
2 x {2} F-8E, CAP
Strike Mission
4 x {4} A-4E, Bombing
2 x {2} , F-8E, CAP
Post Raid Recon
1 x {2} RF-8G
I also chose to site the USN Rescue Helo and nominated a Rally Point in 1607.
The EA-1Fs will be kept over the Gulf of Tonkin, The RF-8G has a simple job of following up the strike so just needs to be timed remembering that I need to leave at least five turns from the last bomb to the photo bird arriving. The CAP normally need to cover Phuc Yen, Kien An, Kep and Gia Lam but as this is a solo game the MiGs are only going to come from Kien An and Kep.
As there are SAMs in the game I am going to take the strike mission to the East of Haiphong, down behind Phantom ridge and a similar route going back. This should limit my exposure to SAMs to the target complexes CHARLIE and BRAVO. The SEAD will need to close off DELTA on the ingress and TANGO during the run in as well as possible FIRE CAN units on the target and at Kep Airfield.
With the planning completed it was time to fly the raid against Vu Chua RR Bridge. This run demonstrates how different the games can be even though you are flying the same" scenario as the one which generated the USAF mission. There is a lot of replayability in nearly all the scenarios. Why different? Because this is a US Navy mission and as such has to ingress in the area around Haiphong which is normally a hot bed of defensive activity. No simple way past all those possible SAM sites.
So, there are a lot more SAMs for the US to worry about this far East, but for some reason it was the MiGs which got my attention in the first couple of turns. With some raid warning they had a flight over Kien An at the start of the game. This was joined on consecutive turns by two more flights so by the end of turn 3 I had 3 flights of MiGs that could ruin my day and the Bomber force hadn't even entered.
I started off with the pre-raid forces already on map and turn 1 was the entry of the Iron Hand mission with 4 flights of aircraft, 2 each of Armed Escort F-8E Crusaders and SEAD A-4E Skyhawks
The aim remains as per the plan to get a one SEAD division around Thud Ridge and clear the target area while another section clears the area around Haiphong. Could be interesting as I only have one Shrike Shot per A-4E due to a Shrike shortage.
Strike mission on table. Airspace is pretty crowded and one division of bombers is still waiting to come on (skyhawk fully laden speed 3 :( ).
This is going to be a SAM day. As soon as the bombers enter and a BSAN of 13 this was going to be hard. Haiphong is a heavily defended target and two SAMs come on the air for a quick acquisition in the Acquisition phase (strange that).
And another THREE turn their RADAR on in the Admin phase. Luckily these last 3 won't be able to shoot next turn just attempt to gain an acquisition. So my two SEAD flights are now faced with at least 3 SAMs which can interfere with the strikers.
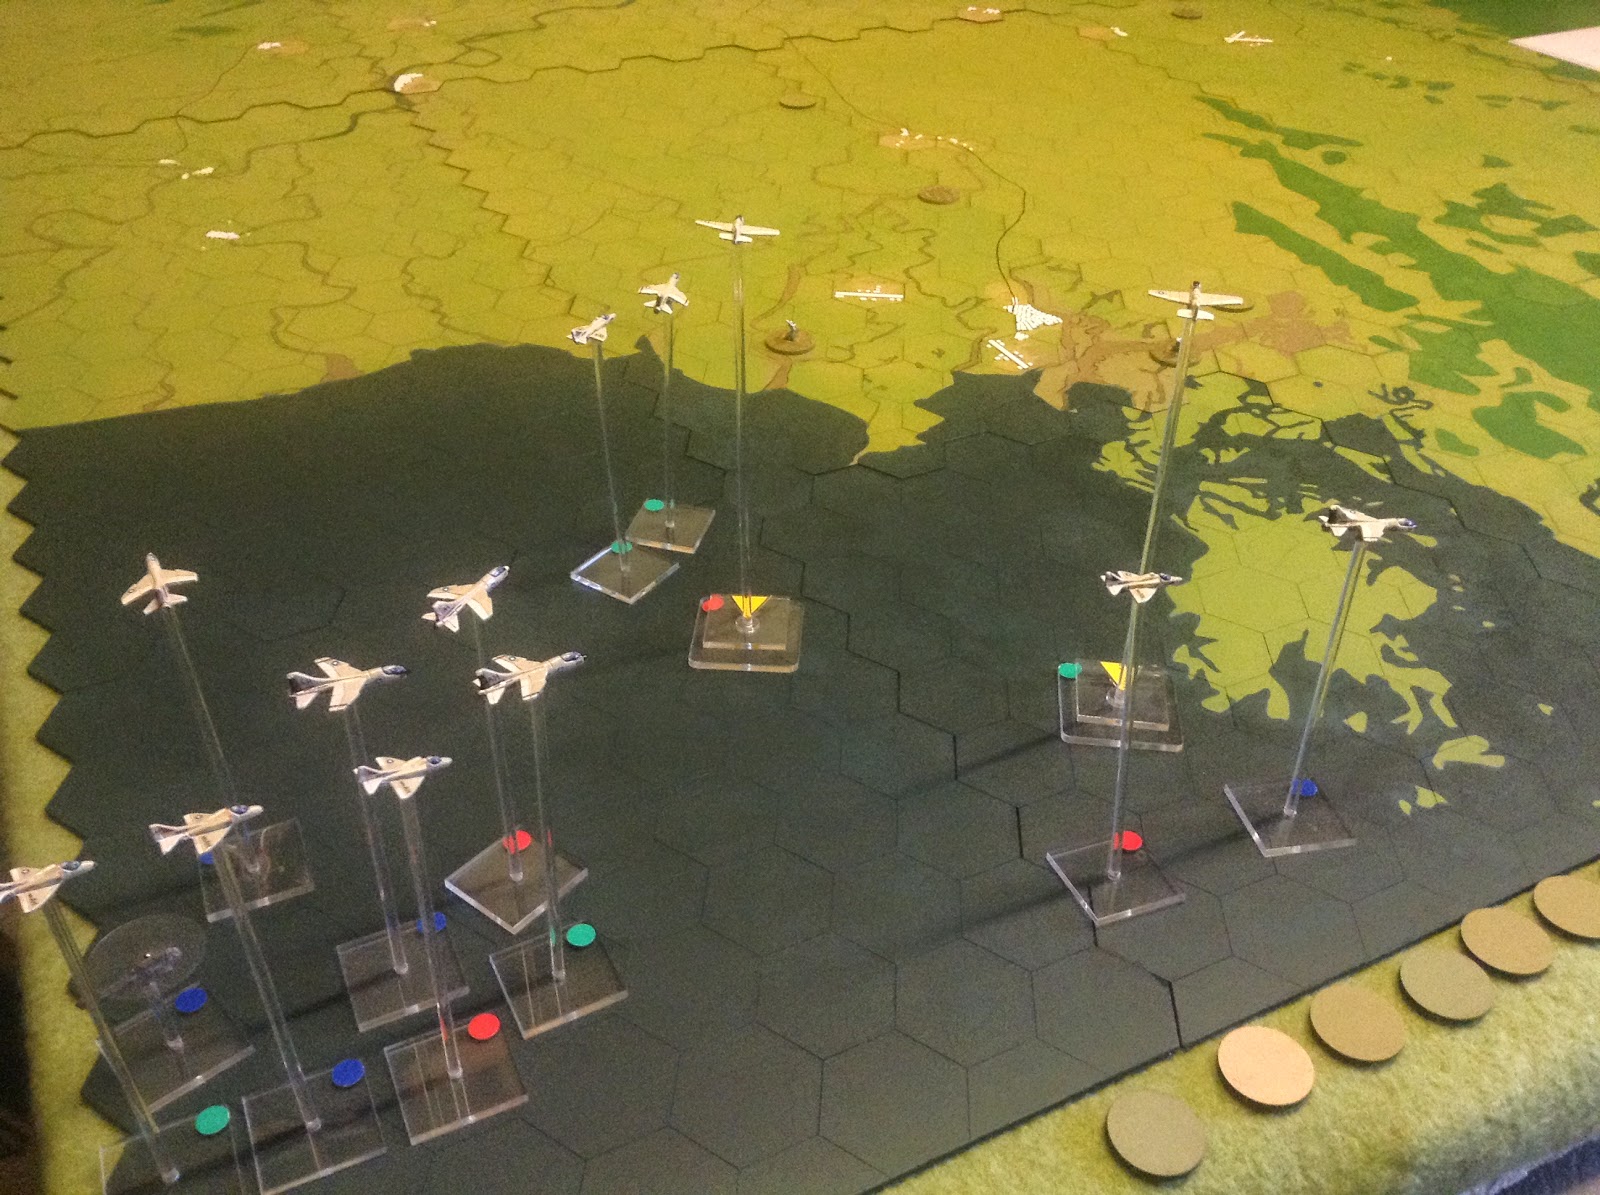
The models were only there as the markers hadn't dried. They only go on table when a site is detected. This is what the US player is actually facing at the moment
From a solo perspective I have also made up some "Poss SAM" markers just to remind me where the SAM locations are on the playing surface.
The DRV have a partial acquisition on the closest SEAD A-4E and the Northern most EA-1F so will get to shoot next turn. I can get close with a Armed Escort flight by going to 'burner but not close enough.
What I forgot about is that Haiphong can have double SAM coverage under the solo rules. This means there will probably be 8 SAM batteries up and radiating.
I finished off playing this at Pete's last night. I forgot to take the SAM launch markers down and I must admit the game looks quite bare without them. Iron Hand is almost swamped by the number of threats. The Iron Hand F-8E is making a attack run with rockets while the rest of the defence suppression effort head for the cluster of SAM sites North of Haiphong. The SEAD A-4E reacts to a well guided SAM by having to do a SAM avoidance roll but at the expense of dumping his Bomb ordnance. I need to go and re-read the SAM shooting rules though (solo) as I couldn't get it take a shot at the Jammer. We decided to drop acquisition and try a different target. The rest of the strike package continues towards the next way point.

The crusaders lead the way in the south the first section comes off its run and watches the secondary explosions from his run as the first SAM site is taken out. Frustration sets in as another site comes up to take its place. In the North the other Iron Hand group haven't got visual on the sites but continue in on their runs. The F-8E is acquired by two SAM sites.
The SEAD team get eyes on the SAMs and a shrike from the A-4 causes one RADAR to be switched off. Two others ignore the launch and fire salvos at the F-8E which results in a hit on one aircraft.
One benefit of the Salvo shooting on the last turn is that this turn after they fire again they are out of missiles.
While a good chute is seen the rest of the force continue on.
With no MiGs to contend with it would be too easy to elect to abort the fighters. In reality they don't know there aren't any more MiGs out there so establish a barrier to let the strike through.
Back over the Gulf, US Navy aircraft head back to the carrier in dries and drabs as they expend all their ordnance.
The last SEAD flight is head for the target area, he has already fired off his shrikes and has bombs remaining to either suppress the target hex or the new SAM threat.
Another SAM avoidance roll and the SEAD is Winchester and heads home. The strike mission has no protection going onto the target.
Mid 1966 and with no RWR another A-4E is hit by a SAM. The rest of the strikers are off target and reform for home.
When a FIRE CAN comes on air at Vu Chua and a second one at Kep Airfield. With no defence suppression left it means the photo recon is going to be met with a hail of RADAR guided AAA as it comes in.
It is a bad day for VFP-63. The DRV AAA fire over the Target hit and shoot down both aircraft in the Photo recon flight. FIRE CAN units were responsible for both shoot downs.
We played out the CSAR. And, again had the frustration of watching the DRV capture a downed pilot while Chink-69 was in the same hex. Only one of the four pilots was rescued.
With no BDA report, the target will have to be struck again. In VP terms the US get a pasting scoring 2 for damaged SAM sites. The DRV score 14 points -12 Significant Defeat. Even if I hadn't lost the recon aircraft I would have scored 7 v 5 so +2 and even that is a defeat.
A couple of lessons to be learned, mainly on SEAD tactics and route planning around Haiphong. The loss of both Recon birds was a fluke Don't underestimate FIRE CAN as it caused a number of problems and lastly get the RWR and Densive Jamming units fitted to the entire carrier air wing.


")