I thought I might offer a short show-and-tell of a technique I have used for making sandbags.
A few vendors offer pre-made sandbag emplacements, but I wanted to make my own bags to allow me to set them up in whatever patters I wanted. So here is what I did…
The material I chose to work with is called Mexican Clay. It can be found at many crafts shops -- I got mine at a retail chain store called Michael's. It is available from several suppliers/brands. I have no reason to suggest any one brand over another.
Mexican Clay has two key characteristics that caused me to choose it. First, it is a self-hardening clay. It's not plasticene or any chemical product … it is actual earthen clay. But it hardens as it dries, with no baking or firing required. Very convenient! The second characteristic is that it shrinks as it dries. That makes it a poor choice for many applications (I tried using it to make trenchworks. Poor choice! They curled up as they dried.) But I knew that I'd be challenged to make my sand bags small enough, and having them get even smaller as they dried seemed like a positive characteristic to me. I was right.
The clay comes in a brick. I sliced off strips from the brick, and rolled them out into long thin tubes. I don't think I rolled them quite thin enough, but I got close. My target, next time, will be to roll the tubes to be about the thickness of a man's chest at my scale.
I then sliced the tubes into small pieces. So far, total invested time (not including going to the store to buy the clay) is about 10 minutes.
I then mashed the pieces down with my finger-tip, rocking back and forth a bit to get the ends more mashed than the centers. Total invested time at this point is about 20 minutes (there were many to mash, and I had to mash them one-at-a-time).
That's it! Just let them dry. They'll get a bit smaller as they do. Next day they were ready for gluing and painting!
Here is an AA gun pit made with my sandbags. The Soviet Quad Maxim AAMG mount was removed from a GHQ Quad-AAMG truck, and mounted onto a penny covered with some acrylic gel medium mixed with some earth-tone paint. The gunners are GHQ Soviet Artillery Crew figures. I painted the sandbags with a desert tan color before setting them in place. The first row of sandbags was set into the acrylic gel. The second row was added with white glue. Then they were given a dark wash and a light dry-brushing.
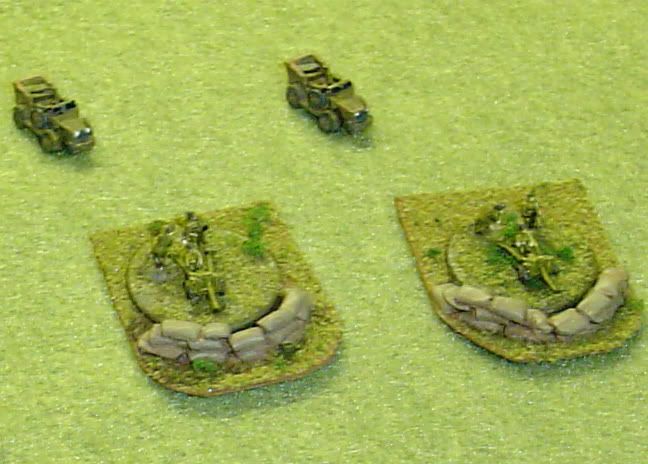
Here are some gun positions I made, with H&R French 25mm AT guns currently in position. The slightly smaller 1/300 H&R models make it a little clearer that my sandbags could have been a bit smaller. Oh well, I'll get 'em right next time!
But as it is, from about 20 minutes of hobby work I have been able to make several dug-in emplacements, and I still have about 100 sandbags in a bin waiting for whatever I choose to do with them.
Turned out to be a simple and effective technique!
-Mark
(aka: Mk 1)