The battle so far:
Continuing from another thread:
TMP link
Here`s a stage by stage report which I will accompany with photos.
Previously the battle arrays have been determined with the solo rules:
No artillery bombardment has been ordered by the French commanders and Oudinot`s Grenadiers of the Reserve will "Assault in column with artillery in reserve and attached cavalry in reserve to flank with second infantry lines and reserves to be ployed in columns."
The Russians, on hold orders have formed with: "Infantry first line deployed, second lines and reserves ployed to column. Corps artillery in reserve (12pdrs in the second line). Divisional artillery (6pdrs) by battery in the centre. Any attached cavalry in reserve limited to counter-attack enemy only if one of own infantry lines is broken." (The cavalry is to be held behind the second line.)
The Austrian Grenzers are deployed as they were in the actual battle; along the front covering the Russian first line of battle.
The Russian 6th Jager Regiment is on the right of the Russian position with Cossacks on the extreme right flank and a detachment of Nostitz`s command (one battalion of Grenzers and 2 squadrons of the Hessen Homburg Hussars)guard the road into Amstetten.
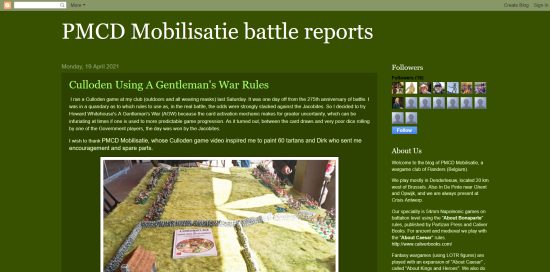
The photo below shows the view from the French side, with the reserve line and artillery halted and deployed in the rear of the rest of the division.
After some ineffective Russian artillery fire, the next photo shows the stage of contact between the two forces` skirmish lines on the Austro-Russian left, the outnumbered Grenzers have been forced to retire upon their supporting parent unit.
In the next turn, a brief skirmish combat will be followed by the actual assault by the French infantry elites on the formed Grenzers.
The game rules used are Grand Manoeuvre and the Solo Module for Grand Manoeuvre these can be found at:
grandmanoeuvre.co.uk
and a free scenario for the battle is at:
link
_________________________________________________
Turn four was quite eventful, and continued to produce disappointing results for the Russian artillery.
The formed units had just come to within combat range and the Grenzers had successfully rolled to deploy to line in an attempt to slow the French advance.
As the skirmishers closed, the French skirmishers` right wing was the most successful; after having driven the Grenzers back to their own unit they managed to disorder the deployed Grenzers on the Austro-Russian left.
The formed unit combats all along the Austrian line resulted in morale effects. Consequently, this will lead to an automatic command morale reaction in the next turn and the command will retire (that is rout) one move.
As there has been a decisive result to the combats, the advance of the grenadiers has not been held up for the turn and they will be able to continue their march against the first Russian line in the next turn.
The photo shows the result of the first turn of combat proper: the Grenzers are forced to retire behind the Russians.
The white markers indicate that the units are "shaken" and the blue marker represents disorder from the previous skirmisher combat.
_______________________________________________
Resuming the game, turn number five starts with the Grenzers and their supporting light cavalry retiring behind the Russian second line (they are shown with the white markers on the left-hand side of the photo).
Undaunted, the French advance continues against the Grenadiers in the Russian first line.
The first battalion of the second Grenadier Regiment is disordered and is halted some distance short of the guns of the Russian 6pdr half-battery.
The brief skirmish combat on the French right with the Russian left gives way to formed unit combats (the combat phase includes firing and any charges that may be made within the "combat range").
The results of these combats are that the Grenadiers and 1st Fusiliers of the Kiev Guard regiment become disordered (disordered units have blue markers).
In turn six, all the Russian and French units were rallied from their disorders and the Austrian Grenzers continue to rally behind the Russians.
Once again the 1st/2nd French Grenadiers advance to be beaten back by artillery fire and are disordered.
In the unit combats the advantage swings to the Russians being deployed to line, they have a bonus against columns in the second and all following turns. And now as a result, most of the French first brigade is disordered.
At the start of the next turn; turn seven it will be time to determine the arrival of the Russian reinforcements under Miloradovitch.
After some initial self-confidence in the plan, he must soon realise that he has run into some serious opposition.
Oudinot must break Bagration`s force before Miloradovich arrives and is formed for battle.
__________________________________________________
Turn seven of the game:
As per the scenario, at the start of the turn, two dice were rolled to determine the arrival of the Russian reinforcements; and a reasonably good result for Bagration is that on turn eleven Miloradovich`s troops will emerge from the road from Amstetten marked with the small Russian flag on the photograph:
_________________________________________________
Turn 7:
Nostitz`s Grenzers continued to rally behind Bagration`s lines, but the French Grenadiers were still in some disorder when it came to combat the 1st/2nd Regiment were hit badly by the Russian artillery and in the following infantry combats two more of the brigade`s battalions suffered damage to their morale.
Turn 8:
At 50% a command would be automatically halted but the 1st brigade with 75% of its force in poor morale would now be required to check its morale.
Firstly however, solo rules for the engagement itself "kick in" with General Oudinot`s possible reactions to the morale damage to his command.
Oudinot is rated with a +2 as "excellent" in the rules, so his modified die roll determines that he will order a immediate passage of lines and an assault of the enemy in column formation.
The morale of the first line is then tested; it passes and so it does not rout.
Then the passage of lines is diced for and although the troops are within close-range artillery fire, the passing (second line) is successful in it`s command manoeuvre die roll and moves past the fist line making contact with the Russians the shaken grenadiers are then moved back but are still under command-control.
Russian artillery fire fails to deter the advance of the fresh French units and the artillery battery is dispersed at last, a French success! However, the French assaults in column are halted the infantry combat results are all ties.
The photograph above shows the second wave assault by the French elites. The "lines" of French columns have exchanged places after the passage of lines.
After the dispersal of the Russian battery, there is a possible exploitation that could favour the French infantry, or they may, in turn, be countered by troops in the Russian second line?
With three more turns before Miloradovich appears, the French may still have time to break through the Russian rear-guard.