Help support TMP


"A Cockpit Canopy Tutorial by Spaceman Spiff" Topic


13 Posts

All members in good standing are free to post here. Opinions expressed here are solely those of the posters, and have not been cleared with nor are they endorsed by The Miniatures Page.

Remember that you can Stifle members so that you don't have to read their posts.

For more information, see the TMP FAQ.


Back to the SF Gallery Message Board


Areas of Interest

Science Fiction

Featured Hobby News Article


Featured Link


Featured Showcase Article

Chaos Space Marine Lord: Ode to a Foreign Painter

Personal logo Editor in Chief Bill The Editor of TMP Fezian takes a gamble on a blurry image in an auction.


Featured Profile Article

First Look: Final Faction Figures

Want to game with 4" action figures, at an affordable price point?


Featured Movie Review


1,417 hits since 1 Sep 2014
©1994-2024 Bill Armintrout
Comments or corrections?

Spaceman Spiff01 Sep 2014 6:28 a.m. PST

I certainly get a lot of compliments on my work and I have definitely taken notice that a lot of you ask me how I do my cockpits. Well, your requests have finally been granted! I wanted to make a video, but it was literally as boring as watching the paint dry, so I went with the step-by-step picture version.


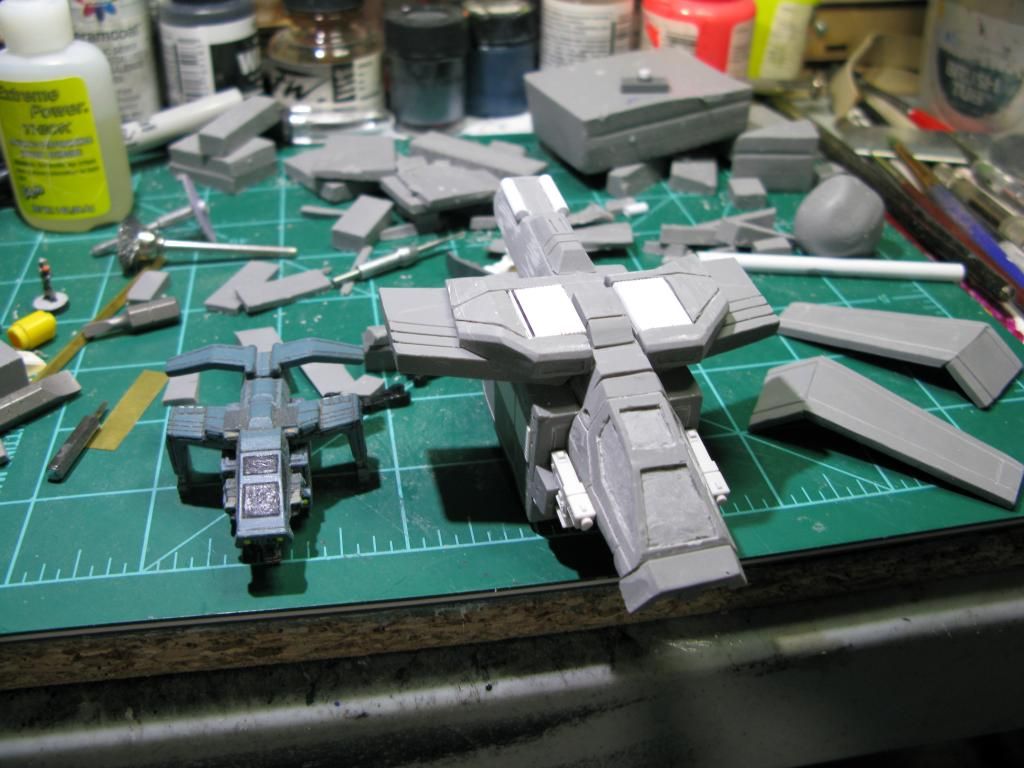
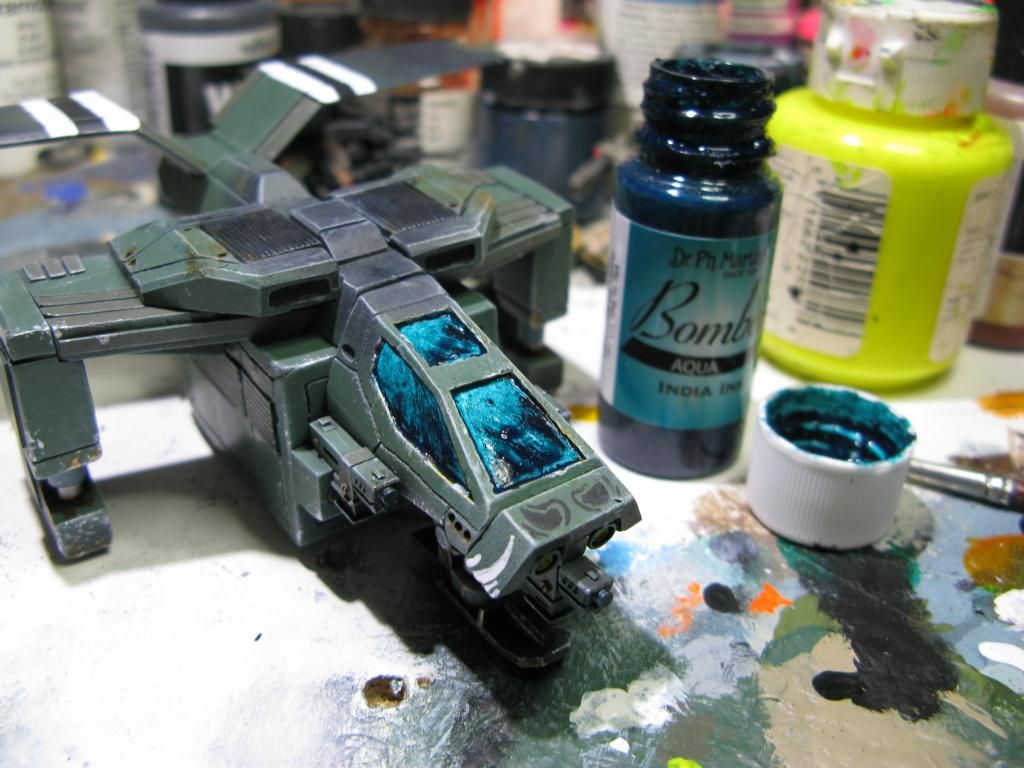
Let me first introduce you to my newest project: a 10mm version of the dropship from Starship Troopers.


url=http://s44.photobucket.com/user/4370spaceman-spiff/media/001-5.jpg.html]

STEP 1: Paint the cockpit glass with a very dark base color or just simple black. I have chosen black in this example.

url=http://s44.photobucket.com/user/4370spaceman-spiff/media/001-4.jpg.html]


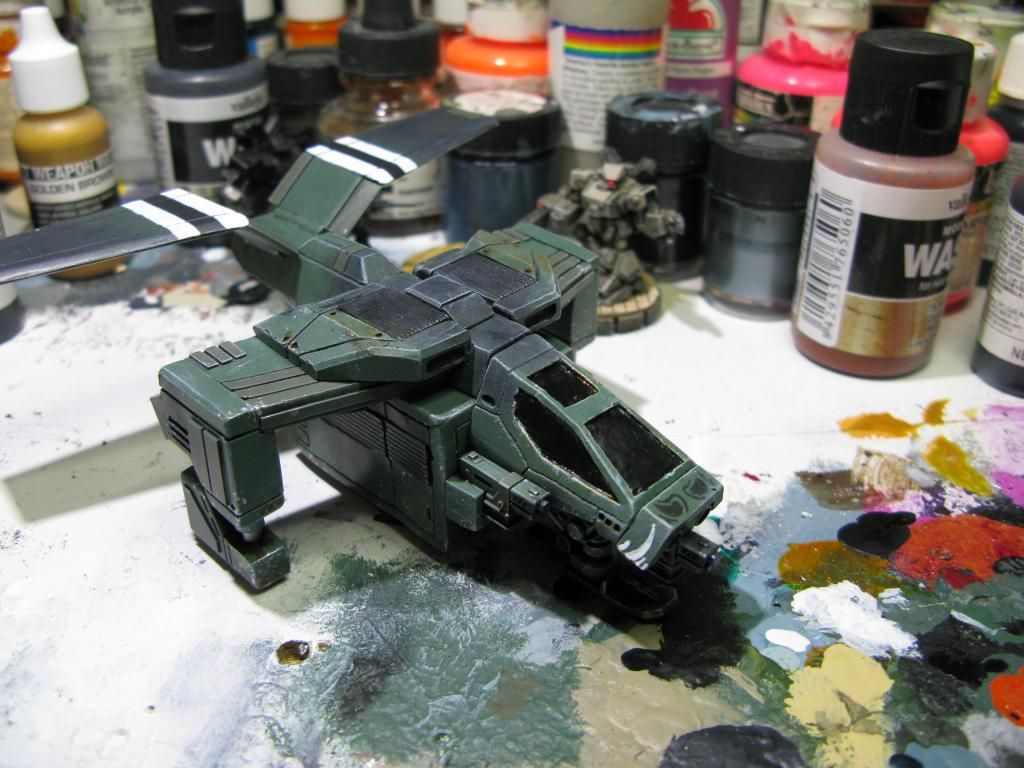
STEP 2: I apply plain white highlights to the area. I start by lightly brushing some white on and then build up the white in the corner. I use the cheap craft paint because it is thin and easy to get light brush strokes with.

url=http://s44.photobucket.com/user/4370spaceman-spiff/media/002.jpg.html]

STEP 3: After the white has completely dried, I apply an ink wash over the canopy. I do NOT dilute my ink.

url=http://s44.photobucket.com/user/4370spaceman-spiff/media/003.jpg.html]

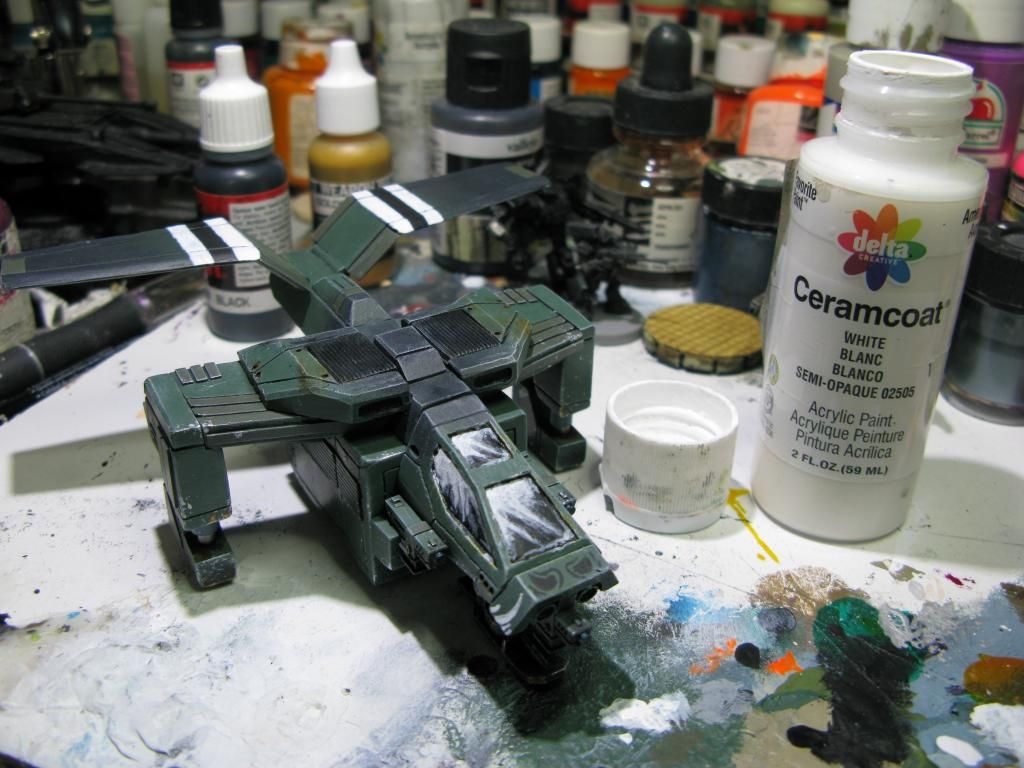
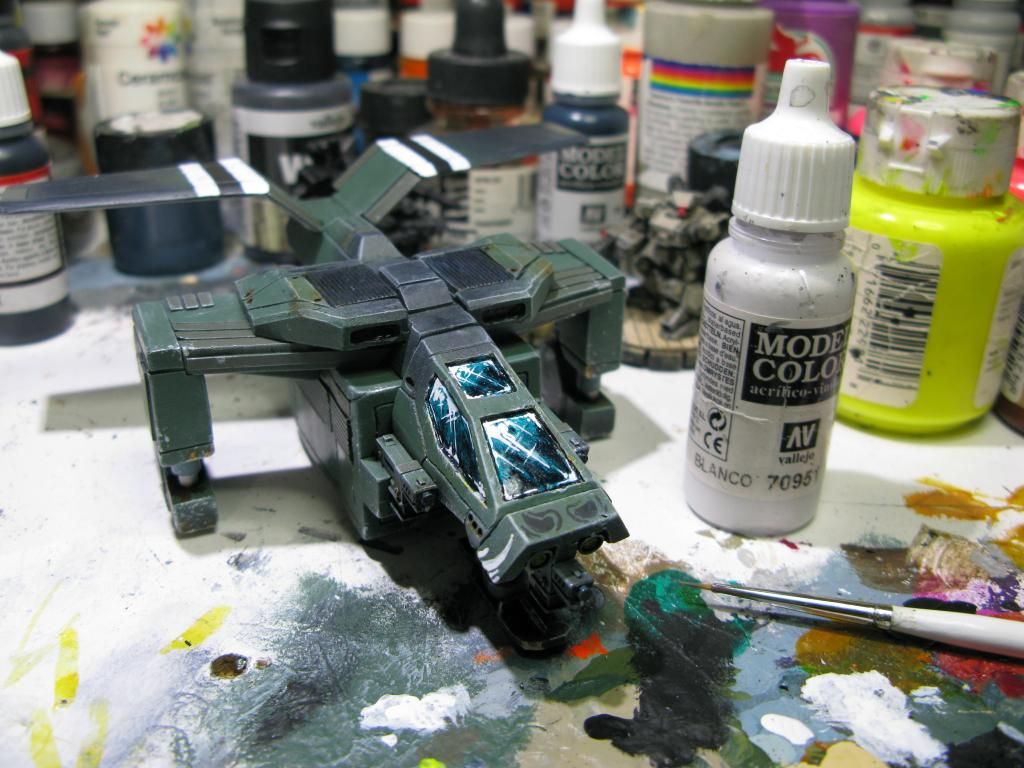
STEP 4: Now for the tricky part, the harsh reflections. I use my Vallejo white because it is thicker and more pure white than the craft paint. You can just do some simple corner dots and edge lining, but I am going for a much more dramatic effect that brings out the "ohhhs and ahhhs". I get my inspiration from watching my share of Anime movies. They always have very dramatic glass reflections.

url=http://s44.photobucket.com/user/4370spaceman-spiff/media/004-1.jpg.html]

Onomarchos01 Sep 2014 6:34 a.m. PST

That was very helpful, thanks

Zeelow01 Sep 2014 6:39 a.m. PST

Very helpful.

Beowulf Fezian01 Sep 2014 6:53 a.m. PST

Thanks for the tutorial. I'll try that later this week!

Personal logo McKinstry Supporting Member of TMP Fezian01 Sep 2014 7:13 a.m. PST

Thank you. I have to try that.

ming3101 Sep 2014 7:31 a.m. PST

awesome

haywire01 Sep 2014 7:38 a.m. PST

Nice!

Redroom01 Sep 2014 8:35 a.m. PST

good stuff, thanks for posting (will try this in the future)

Personal logo Murphy Sponsoring Member of TMP01 Sep 2014 10:58 a.m. PST

very cool…

Lardie the Great01 Sep 2014 1:39 p.m. PST

Cheers for that, hopefully I can copy the effect for my 28mm stuff, really clever idea, will you do a tutorial for your engine afterburner effect?

Twilight Samurai01 Sep 2014 10:25 p.m. PST

I always enjoy your posts!

Gunner Dunbar02 Sep 2014 4:05 a.m. PST

Love your work, thanks for the tutorial, very helpful.

stroezie07 Sep 2014 7:38 a.m. PST

Thank you very much.
I will be trying this out on my next vehicles.
Oh and +1 for a tutorial on the engine afterburner effect.

Sorry - only verified members can post on the forums.